This post has been republished via RSS; it originally appeared at: Project Support Blog articles.
First published on TECHNET on Dec 29, 2017*** 7/2/2018 - Update - just to address some confusion - the guest access to Project Online does not allow the guest to also have access to and download the Project Online Desktop Client application - that requires a full paid license. If you try to navigate to the application download you will get a message that no license is assigned ***
It looks like there is a current issue assigning licenses to guest users via the usual Admin Center route – and the Product Licenses section normally seen when editing users in Office 365 is not showing for guest users. And for PWA the guest user needs a license before they can see or do anything in Project Online. Hopefully this is temporary – but always good to know how to use PowerShell to do the license assignment too! And thanks Rolly Perreaux for bringing this to my attention.
A few useful resources first – then I’ll give a few short cuts for those already set up to use the PowerShell commands.
The support article for Project Online and guest users can be found here - https://support.office.com/en-us/article/Using-Project-Online-with-external-users-f305a365-3d81-48bc-a3d0-4260e7326899 and that also has the link to the more general SharePoint article - manage external sharing for your SharePoint Online environment . The article for assigning licenses is https://docs.microsoft.com/en-us/office365/enterprise/powershell/assign-licenses-to-user-accounts-with-office-365-powershell .
I’d already configured my tenant and site collection to allow Sharing (SharePoint Admin Center options) so I just needed to send the invite by using the ‘Share’ option top right in your PWA (or use the B2B options explained in the articles for adding in bulk)

The account needs to be a Microsoft (Hotmail, Live, MSN etc…) or Office 365 Work or Organizational account. The person then needs to respond to the request that arrives by e-mail – but at this point they will get a bad experience as they have no license.

But they will appear in your directory – and previously this was where licenses were assigned. The icon next to my name shows this is an external account.

As I couldn’t add licenses there I then reminded myself of the steps to do this with PowerShell from the articles above then opened my SharePoint Online Management shell (I already had all the right modules loaded) and executed the following:
PS C:\WINDOWS\system32> Connect-MsolService
PS C:\WINDOWS\system32> Get-MsolAccountSku
This first prompts you to log in – then the 2nd command lists your sku’s – useful for copy/pasting into the following commands.
PS C:\WINDOWS\system32> Get-MsolUser -all -UnlicensedUsersOnly
This will list the guest just added (and maybe others) - and they will need a usage location set before adding licenses. Mine is US - yours of course may be different. It is the ISO 3166-1 alpha-2 country code.
Then use the following, substituting your country code, upn and tenant as appropriate – and you can copy/paste the UPN form the output of the last command.
PS C:\WINDOWS\system32> Set-MsolUser -UserPrincipalName "<user principal name>" -UsageLocation US
PS C:\WINDOWS\system32> Set-MsolUserLicense -UserPrincipalName "<user principal name>" -AddLicenses “<yourtenant>:PROJECTONLINE_PLAN_2"
PS C:\WINDOWS\system32> Set-MsolUserLicense -UserPrincipalName "<user principal name>" -AddLicenses "<yourtenant>:ENTERPRISEPACK"
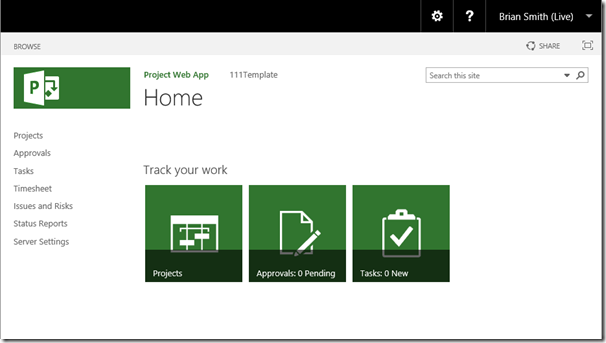
It can take a short while before the license is seen - logging out and back might help if you got the "do not have a license" message. My working external user! I’d edited the User Profile to make my display name unique.

