
This post has been republished via RSS; it originally appeared at: Running SAP Applications on the Microsoft Platform articles.
First published on MSDN on Jun 18, 2018In recent months we saw several customers with large investments into Hana technologies approach Microsoft for information about deploying large mission critical SAP applications on Azure with the Sybase ASE database.
SAP Hana customers are typically able to deploy Sybase ASE at little or no additional cost if they have licensed Hana Database.
Many of the customers that have contacted Microsoft are shutting datacenters or terminating UNIX platforms and moving ECC or BW systems in the size range of 25-45TB DB volume to Azure. An earlier blog describes some of the requirements and best practices for VLDB migrations to Azure. https://blogs. msdn. microsoft. com/saponsqlserver/2018/04/10/very-large-database-migration-to-azure-recommendations-guidance-to-partners/
Until recently there was no simple documented straight forward installation procedure for a typical two node High-Availability pair with Synchronous replication and a third node with Asynchronous replication. This is quite a common requirement for SAP customers.
This blog is designed to supplement the existing SAP provided documentation and to provide some hints and additional information. The SAP Sybase team are continuously updating and improving the Sybase documentation, so it is always recommended to start with the official documentation and then cross reference this documentation. This document is based on real deployments from Cognizant and DXC. The latest version of Sybase & Suse were then installed in a lab test environment to provide screenshots
High Level Overview of Installation Steps
The high-level installation process for a 3 tier SAP Distributed Installation is:
-
Read required OSS Notes, Installation Guides, Download Installation Media and the SAP on Sybase Business Suite documentation
-
For SUSE Linux Release 12 with SP3 release note : https://www. suse. com/releasenotes/x86_64/SUSE-SLES/12-SP3/ -
SAP Software Downloads https://support. sap. com/en/my-support/software-downloads. html -
SWPM Download https://support. sap. com/sltoolset -
-
Sybase Official Documentation https://help. sap. com/viewer/product/SAP_ASE/16. 0. 3. 3/en-US
-
- Provision Azure VMs with Suse for SAP Applications 12. 3 with Accelerated Networking Enabled
- Perform OS patching and preparation steps detailed below
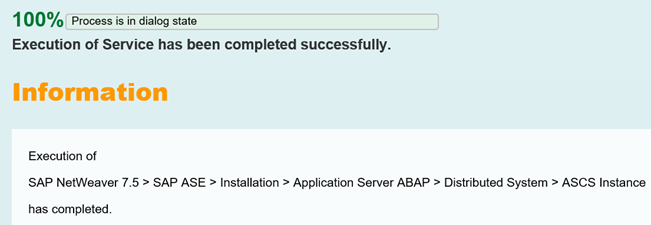
- Run SWPM Distributed Install and install the ASCS Instance
- Export the /sapmnt NFS share
- Mount the /sapmnt NFS share on the Primary, Secondary and DR DB server
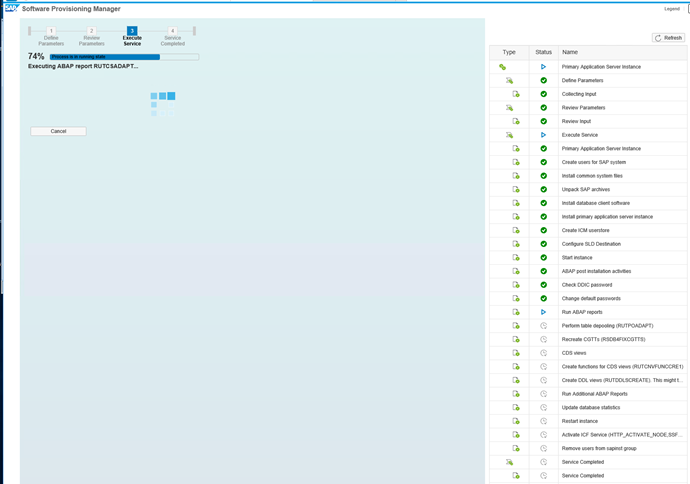
- Run SWPM Distributed Install and install the Primary DB Instance
- Run SWPM Distributed Install and install the Primary Application Server (Optional: add additional App servers)
- Perform Sybase Always-on preparation steps on Primary DB Instance
- Run setuphadr on Primary DB Instance
- Run SWPM Distributed Install and install the Secondary DB Instance
- Perform Sybase Always-on preparation steps on Secondary DB Instance
- Run setuphadr on Secondary DB Instance
- Run SWPM Distributed Install and install the DR DB Instance
- Perform Sybase Always-on preparation steps on DR DB Instance
- Run setuphadr on DR DB Instance
- Run post steps such as installing Fault Manager
Deployment Config
- Suse 12. 3 with latest updates
- Sybase 16. 03. 03
- SWPM version 22 or 23. SAP Kernel 7. 49 patch 500. NetWeaver ABAP 7. 50
- Azure Ev3 VMs with Accelerated Networking and 4 vcpu
- Premium Storage – each DB server has 2 x P20 disks (or more as required). App server has only a boot disk
- Official Sybase Documentation (some steps do not work, supplement with this blog) https://help. sap. com/viewer/product/SAP_ASE/16. 0. 3. 3/en-US
- Sample Response Files are attached here: Sybase-Sample-Response-Files . It is recommended to download and review these files
- Sybase Always-on does not leverage OS level clustering technologies such as Pacemaker or Windows cluster. The Azure ILB is not used. Instead the SAP workprocess is aware of the Primary and Secondary Sybase server. The DR node does not support automatic failover and this is a manual process to setup and configure SAP app servers to connect to the DR node
- This installation shows a "Distributed" installation. If the SAP Central Services should be highly available, follow the SAP on Azure documentation for Pacemaker
- Sybase Fault Manager is automatically installed on the SAP PAS during installation
-
Be careful of Linux vs. Windows End of Life characters. Use Linux command cat -v response_file. rsIf ^M are seen then there are Windows EOL characters.
Example:cat -v test. sh
Output:
Line 1 ^M
Line 2 ^M
Line 3 ^M
(Note: CTRL+M is a single character in Linux, which is carriagereturn in Windows. This needs to be fixed before utilizing the file in Linux )
To fix the issue
$> dos2unix test. sh
Output
Line 1
Line 2
Line 3
-
Hosts file configuration used for this deployment
Example: <IP Address><FQDN> <SHORTNAME> <#Optional Comments>
10. 1. 0. 9 sybdb1. hana. com sybdb1 #primary DB
10. 1. 0. 10 sybapp1. hana. com sybapp1 #SAP NW 7. 5 PAS
10. 1. 0. 11 sybdb2. hana. com sybdb2 #secondary DB
10. 1. 0. 12 sybdb3. hana. com sybdb3 #tertiary DB for DR
Common Prepare Steps on all Suse Servers
sudo zypper install -y glibc-32bit
sudo zypper install -y libgcc_s1-32bit
#these two glib 32bit are mandatory otherwise Always-on will not work
sudo zypper up -y
Note : It is mandatory to reboot the server if kernel patches are applied.
#resize the boot disk. The default linux root disk of 30GB is too small. Shutdown the VM and edit the disks in Azure Portal or Powershell. Increase the size of the disk to 60-100GB. Restart the VM and run the commands below. There is no benefit or advantage to provisioning an additional separate disk for a SAP application server
sudo fdisk /dev/sda
##delete the existing partition (this will not delete the data) and create [n] new primary [p] partition with defaults and write [w] config
sudo resize2fs /dev/sda2
sudo reboot
#Check Accelerated Networking is working
/sbin/ethtool -S eth0 | grep vf_
#Add these entries to the hosts file
sudo vi /etc/hosts
10. 1. 0. 9 sybdb1. hana. com sybdb1 #primary DB
10. 1. 0. 10 sybapp1. hana. com sybapp1 #SAP NW 7. 5 PAS
10. 1. 0. 11 sybdb2. hana. com sybdb2 #secondary DB
10. 1. 0. 12 sybdb3. hana. com sybdb3 #tertiary DB for DR
#edit the waagent to create a swapfile
sudo vi /etc/waagent. conf
line to look for>>
ResourceDisk. EnableSwap=n
ResourceDisk. SwapSizeMB=
<<
Modify the above values Note : Swap size must be given in MB size only.
#enable the swapfile and set a size of 2GB or more. Example:
ResourceDisk. EnableSwap=y
ResourceDisk. SwapSizeMB=2000
Once done restart of the agent is necessary to get the swap file up and active.
sudo systemctl restart waagent
Other Services to be enabled and restarted are:
sudo systemctl restart nfs-server
sudo systemctl enable nfs-server
sudo systemctl status uuidd
sudo systemctl enable uuidd
sudo systemctl start uuidd
sudo systemctl status uuidd
##run sapcar and unpack SWPM 22 or 23
sapcar -xvf SWPM10SP22_7-20009701. SAR
SAP APP Server ASCS Install
sudo /source/swpm/sapinst SAPINST_REMOTE_ACCESS_USER=<os-user>
Open a web browser from a Management Server and enter the Suse os-user name and password https://10. 1. 0. 10:4237/sapinst/docs/index. html


##after install exportthe NFS Share for /sapmnt
sudo vi /etc/exports
#add this line /sapmnt*(rw,no_root_squash)
## open port 2049 for nfs on NSG if required [by default VMs on same vnet can talk to each other]
sudo systemctl restart nfs-server
SAP DB Instance Install
##do common preparation steps such as zypper and hosts file etc
#create disks for sybase
sudo fdisk -l | grep /dev/sd
sudo fdisk /dev/sdc -> n, p, w
sudo fdisk /dev/sdd -> n, p, w
#It is generally recommended to use LVM and create pv, lv etc here so we can test performance later with striping additional disks.
Note: if multiple disk used in creating data / Backup / Log storage, make a necessary striping enabled to get optimal performance.
Example:
vgcreate VG_DATA /dev/sdc /dev/sdd
lvcreate -l 100%F VG_DATA -n lv_data -i 2 -I 256
sudo pvcreate /dev/sdc1 /dev/sdc1
sudo pvcreate /dev/sdc1 /dev/sdd1
sudo pvscan
sudo vgcreate syb_data_vg /dev/sdc1
sudo vgcreate syb_log_vg /dev/sdd1
sudo lvcreate -i1 -l 100%FREE -n syb_data_lvsyb_data_vg
sudo lvcreate -i1 -l 100%FREE -n syb_log_lvsyb_log_vg
sudo mkfs. xfs -f /dev/syb_data_vg/syb_data_lv
sudo mkfs. xfs -f/dev/syb_log_vg/syb_log_lv
sudo mkdir -p /sybase/source
sudo mkdir -p /log
sudo mkdir -p /sapmnt
sudo blkid | grep log
sudo blkid | grep data
Edit /etc/fstab and add the entries for the created disks.
Option 1:
Identify based on created volume group and lv details.
Ex: ls /dev/mapper/
And fetch the right devices
Ex: syb_data_vg-syb_data_lv
Add the the entries into /etc/fstab
sudo vi /etc/fstab
Add the lines.
/dev/mapper/syb_data_vg-syb_data_lv /hana/data xfs defaults,nofail 1 2
Option 2:
#now sudo su - to root user and run this (replace GUID) - cannot run this with sudo command, must be root
sudo su -
echo "/dev/disk/by-uuid/799603d6-20c0-47af-80c9-75c72a573829 /sybase xfsdefaults,nofail02">> /etc/fstab
echo "/dev/disk/by-uuid/2bb3f00c-c295-4417-b258-8de43a844e23 /log xfsdefaults,nofail02">> /etc/fstab
exit
sudo mount -a
sudo df -h
##create a directory for the source files.
sudo mkdir /sybase/source
## copy source files
sudo chmod 777 /sybase/source -R
## setup automount for /sapmnt
### - use auto mount not the "old" way sudo mount -t nfs4 -o rw sybapp1:/sapmnt /sapmnt
sudo mkdir /sapmnt
sudo vi /etc/auto.master
# Add the following line to the file, save and exit
+auto.master
/- /etc/auto.direct
sudo vi /etc/auto.direct
# Add the following lines to the file, save and exit
/sapmnt -nfsvers=4,nosymlink,sync sybapp1:/sapmnt
sudo systemctl enable autofs
sudo service autofs restart
sudo /sybase/source/swpm/sapinst SAPINST_REMOTE_ACCESS_USER=<os-user>
Open web browser and start installation


SAP PAS Install
##do same preparations as ASCS for zypper and hosts file etc
sudo /source/swpm/sapinst SAPINST_REMOTE_ACCESS_USER=<os-user>
https://10. 1. 0. 10:4237/sapinst/docs/index. html


AlwaysOn Install Primary
##do same preparations as ASCS for zypper and hosts file etc
Check that these libraries are installed otherwise Fault Manager will silently fail
sudo zypper install glibc-32bit
sudo zypper install libgcc_s1-32bit
##Login as syb<sid> - in this case the <sid> = ase
sybdb1 /sybase% whoami
sybase
sybdb1 /sybase% pwd
/sybase
sybdb1 /sybase% ls
ASEsourcesybdb1_dma.rssybdb1_setup_hadr. rs
sybdb1 /sybase% cat sybdb1_dma.rs | grep USER_INSTALL_DIR
USER_INSTALL_DIR=/sybase/ASE
sybdb1 /sybase%
sybdb1 /sybase% source/ASE1633/BD_SYBASE_ASE_16. 0. 03. 03_RDBMS_for_BS_/SYBASE_LINUX_X86_64/setup.bin -f /sybase/sybdb1_dma. rs -i silent
Note: if the command does not run put several <space> characters before the -i silent
Full path to setup.bin from ASE. ZIP file. Full path to response file otherwise it will fail with non-specific error message

##run this command to unlock the sa account. Command will fail if "-X" is not specified
isql-Usapsso -PSAPHana12345 -SASE -X
sp_locklogin sa, unlock
go

##If any errors occur review this note
2450148 - 'Warning: stopService() only supported on windows' message happened during HADR configuration -SAP ASE
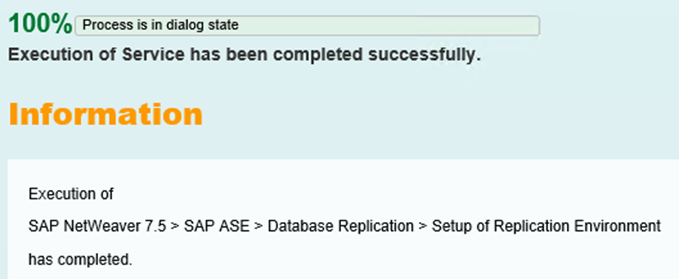
##Run setuphadr after editing the response file based on Sybase documentation (sample response file is attached to this blog)
setuphadr /sybase/sybdb1_setup_hadr.rs

AlwaysOn Install Secondary
##do same preparations as ASCS for zypper and hosts file etc
Check that these libraries are installed otherwise Fault Manager will silently fail
sudo zypper install glibc-32bit
sudo zypper install libgcc_s1-32bit
##do same preparations as ASCS for zypper and hosts file etc
#create disks for sybase
sudo fdisk -l | grep /dev/sd
sudo fdisk /dev/sdc -> n, p, w
sudo fdisk /dev/sdd -> n, p, w
#only 1 disk, but created pv, lv etc here so we can test performance later with striping additional disks
sudo pvcreate /dev/sdc1 /dev/sdc1
sudo pvcreate /dev/sdc1 /dev/sdd1
sudo pvscan
sudo vgcreate syb_data_vg /dev/sdc1
sudo vgcreate syb_log_vg /dev/sdd1
sudo lvcreate -i1 -l 100%FREE -n syb_data_lvsyb_data_vg
sudo lvcreate -i1 -l 100%FREE -n syb_log_lvsyb_log_vg
sudo mkfs. xfs -f /dev/syb_data_vg/syb_data_lv
sudo mkfs. xfs -f/dev/syb_log_vg/syb_log_lv
sudo mkdir -p /sybase/source
sudo mkdir -p /log
sudo mkdir -p /sapmnt
sudo blkid | grep log
sudo blkid | grep data
#now sudo su - to root user and run this (replace GUID) - cannot run this with sudo command, must be root
sudo su -
echo "/dev/disk/by-uuid/799603d6-20c0-47af-80c9-75c72a573829 /sybase xfsdefaults,nofail02">> /etc/fstab
echo "/dev/disk/by-uuid/2bb3f00c-c295-4417-b258-8de43a844e23 /log xfsdefaults,nofail02">> /etc/fstab
exit
sudo mount -a
sudo df -h
sudo mount -a
sudo df -h
##create a directory for the source files.
sudo mkdir /sybase/source
## copy source files
sudo chmod 777 /sybase/source -R
## setup automount for /sapmnt
### - use auto mount not the "old" way sudo mount -t nfs4 -o rw sybapp1:/sapmnt /sapmnt
sudo mkdir /sapmnt
sudo vi /etc/auto.master
# Add the following line to the file, save and exit
+auto.master
/- /etc/auto.direct
sudo vi /etc/auto.direct
# Add the following lines to the file, save and exit
/sapmnt -nfsvers=4,nosymlink,sync sybapp1:/sapmnt
sudo systemctl enable autofs
sudo service autofs restart
sudo /sybase/source/swpm/sapinst SAPINST_REMOTE_ACCESS_USER=<os-user>


Stop the autofs and unmount the /sapmnt - sapinst will continue
The /sapmnt must be mounted again shortly after


##Login as syb<sid> - in this case the <sid> = ase
/sybase/source/ASE1633/BD_SYBASE_ASE_16. 0. 03. 03_RDBMS_for_BS_/SYBASE_LINUX_X86_64/setup. bin -f /sybase/sybdb2_dma. rs -i silent
isql-Usapsso -PSAPHana12345 -SASE -X
sp_locklogin sa, unlock
go
2450148 - 'Warning: stopService() only supported on windows' message happened during HADR configuration -SAP ASE
##Run setuphadr after editing the response file based on Sybase documentation (sample response file is attached to this blog)
setuphadr /sybase/sybdb2_setup_hadr.rs

Do not restart the RMA - this is not required
AlwaysOn FM Install & Post Steps
The Sybase documentation for these steps is here.
https://help. sap. com/viewer/efe56ad3cad0467d837c8ff1ac6ba75c/16. 0. 3. 3/en-US/286f4fc8b3ab4439b3400e97288152dc. html
The documentation is not complete. After doing the steps on the documentation link review this Note
1959660 - SYB: Database Fault Management
su - aseadm
rsecssfx put DB_CONNECT/SYB/DR_USER DR_admin -plain
rsecssfx put DB_CONNECT/SYB/DR_PASSWORD SAPHana12345
sybdb1:~ #su - aseadm
sybdb1:aseadm 1> rsecssfx put DB_CONNECT/SYB/DR_USER DR_admin -plain
sybdb1:aseadm 2> rsecssfx put DB_CONNECT/SYB/DR_PASSWORD SAPHana12345
sybdb1:aseadm 3>
sybdb2:~ #su - aseadm
sybdb2:aseadm 1> rsecssfx put DB_CONNECT/SYB/DR_USER DR_admin -plain
sybdb2:aseadm 2> rsecssfx put DB_CONNECT/SYB/DR_PASSWORD SAPHana12345
sybdb2:aseadm 3>
## Run AlwaysOn Tuning & Configuration script on Primary and Companion
isql -UDR_admin -PSAPHana12345 -Ssybdb1:4909
sap_tune_rs Site1, 16, 4
isql -UDR_admin -PSAPHana12345 -Ssybdb2:4909
sap_tune_rs Site2, 16, 4
sybdb2:aseadm 3> isql -UDR_admin -PSAPHana12345 -Ssybdb2:4909
1> sap_tune_rs Site2, 16, 4
2> go
TASKNAMETYPE
VALUE
----------------------- -----------------
------------------------------------------------------------
Tune Replication Server Start Time
Sun Apr 29 06:20:37 UTC 2018
Tune Replication Server Elapsed Time
00:07:11
TuneRSTask Name
Tune Replication Server
TuneRSTask State
Completed
TuneRSShort Description
Tune Replication Server configurations.
TuneRSLong Description
Waiting 180 seconds: Waiting Replication Server to fully up.
TuneRSTask Start
Sun Apr 29 06:20:37 UTC 2018
TuneRSTask End
Sun Apr 29 06:27:48 UTC 2018
TuneRSHostname
sybdb2
(9 rows affected)
## On the APP server only
sudo vi . dbenv. csh
setenv dbs_syb_ha 1
setenv dbs_syb_server sybdb1:sybdb2
## Restart the SAP App server
sapcontrol -nr 00 -function StopSystem ALL
sapcontrol -nr 00 -function StartSystem ALL
https://help. sap. com/viewer/efe56ad3cad0467d837c8ff1ac6ba75c/16. 0. 3. 3/en-US/41b39cb667664dc09d2d9f4c87b299a7. html
sybapp1:aseadm 6> rsecssfx list
|---------------------------------------------------------------------------------|
| Record Key | Status | Time Stamp of Last Update |
|---------------------------------------------------------------------------------|
| DB_CONNECT/DEFAULT_DB_PASSWORD | Encrypted| 2018-04-2903:07:11UTC |
|---------------------------------------------------------------------------------|
| DB_CONNECT/DEFAULT_DB_USER | Plaintext| 2018-04-2903:07:07UTC |
|---------------------------------------------------------------------------------|
| DB_CONNECT/SYB/DR_PASSWORD | Encrypted| 2018-04-2906:18:26UTC |
|---------------------------------------------------------------------------------|
| DB_CONNECT/SYB/DR_USER | Plaintext| 2018-04-2906:18:22UTC |
|---------------------------------------------------------------------------------|
| DB_CONNECT/SYB/SADB_PASSWORD | Encrypted| 2018-04-2903:07:19UTC |
|---------------------------------------------------------------------------------|
| DB_CONNECT/SYB/SADB_USER | Plaintext| 2018-04-2903:07:14UTC |
|---------------------------------------------------------------------------------|
| DB_CONNECT/SYB/SAPSID_PASSWORD | Encrypted| 2018-04-2903:07:42UTC |
|---------------------------------------------------------------------------------|
| DB_CONNECT/SYB/SAPSID_USER | Plaintext| 2018-04-2903:07:37UTC |
|---------------------------------------------------------------------------------|
| DB_CONNECT/SYB/SSODB_PASSWORD| Encrypted| 2018-04-2903:07:27UTC |
|---------------------------------------------------------------------------------|
| DB_CONNECT/SYB/SSODB_USER| Plaintext| 2018-04-2903:07:22UTC |
|---------------------------------------------------------------------------------|
| DB_CONNECT/SYB/SYBSID_PASSWORD | Encrypted| 2018-04-2903:07:34UTC |
|---------------------------------------------------------------------------------|
| DB_CONNECT/SYB/SYBSID_USER | Plaintext| 2018-04-2903:07:30UTC |
|---------------------------------------------------------------------------------|
| SYSTEM_PKI/PIN | Encrypted| 2018-04-2722:36:39UTC |
|---------------------------------------------------------------------------------|
| SYSTEM_PKI/PSE | Encrypted (binary) | 2018-04-2722:36:45UTC |
|---------------------------------------------------------------------------------|
Summary
-------
ActiveRecords : 14 (Encrypted: 8, Plain: 6, Wrong Key: 0, Error: 0)
Defunct Records : 12 (180+ days: 0; Show: "list -withHistory", Remove: "compact")
## Run the Fault Manager Installation steps on the SAP PAS application server
sybapp1:aseadm 24> pwd
/sapmnt/ASE/exe/uc/linuxx86_64
sybapp1:aseadm 25> whoami
aseadm
sybapp1:aseadm 26> . /sybdbfm install
replication manager agent user DR_admin and password set in Secure Store.
Keep existing values (yes/no)? (yes)
SAPHostAgent connect user: (sapadm)
Enter password for user sapadm.
Password:
Enter value for primary database host: (sybdb1)
Enter value for primary database name: (ASE)
Enter value for primary database port: (4901)
Enter value for primary site name: (Site1)
Enter value for primary database heart beat port: (13777)
Enter value for standby database host: (sybdb2)
Enter value for standby database name: (ASE)
Enter value for standby database port: (4901)
Enter value for standby site name : (Site2)
Enter value for standby database heart beat port: (13787)
Enter value for fault manager host: (sybapp1)
Enter value for heart beat to heart beat port: (13797)
Enter value for support for floating database ip: (no)
Enter value for use SAP ASE Cockpit if it is installed and running: (no)
installation finished successfully.
Restart the SAP Instance - FM is added to the ASCS start profile

sybapp1:aseadm 32> sybdbfm status
fault manager running, pid = 4338, fault manager overall status = OK, currently executing in mode PAUSING
*** sanity check report (5)***.
node 1: server sybdb1, site Site1.
db host status: OK.
db status OK hadr status PRIMARY.
node 2: server sybdb2, site Site2.
db host status: OK.
db status OK hadr status STANDBY.
replication status: SYNC_OK.
AlwaysOn Install 3rd Node (DR) Async
Official SAP Sybase documentation and Links:
https://blogs. sap. com/2018/04/19/high-availability-disaster-recovery-3-node-hadr-with-sap-ase-16. 0-sp03/
Documentation https://help. sap. com/viewer/38af74a09e48457ab699e83f6dfb051a/16. 0. 3. 3/en-US
https://help. sap. com/viewer/38af74a09e48457ab699e83f6dfb051a/16. 0. 3. 3/en-US/6ca81e90696e4946a68e9257fa2d3c31. html
1. Install the DB host using SWPM in the same way as the companion host
2. Copy the companion host response file
3. Duplicate the section with all the COMP entries and add it at the bottom and rename at section of the newly copied COMPs to DR (for example). Leave the old COMP and PRIM entries as is.
4. Change the setup site to DR
5. All other entries from PRIM and COMP must remain the same since the setuphadr run for 3rd node needs to know about previous 2 hosts.
6. Execute setuphadr
Review the Sample Response File attached to this blog

##do same preparations as ASCS for zypper and hosts file etc
Check that these libraries are installed otherwise Fault Manager will silently fail
sudo zypper install glibc-32bit
sudo zypper install libgcc_s1-32bit
##do same preparations as ASCS for zypper and hosts file etc
#create disks for sybase
Note : when multiple disks are added for data/log/backup to create a single volume, use right striping method to get better performance
Example:
vgcreate VG_DATA /dev/sdc /dev/sdd
lvcreate -l 100%F VG_DATA -n lv_data -i 2 -I 256
(for log use –l 32 )
sudo fdisk -l | grep /dev/sd
sudo fdisk /dev/sdc -> n, p, w
sudo fdisk /dev/sdd -> n, p, w
#only 1 disk, but created pv, lv etc here so we can test performance later with striping additional disks
sudo pvcreate /dev/sdc1 /dev/sdc1
sudo pvcreate /dev/sdc1 /dev/sdd1
sudo pvscan
sudo vgcreate syb_data_vg /dev/sdc1
sudo vgcreate syb_log_vg /dev/sdd1
sudo lvcreate -i1 -l 100%FREE -n syb_data_lvsyb_data_vg
sudo lvcreate -i1 -l 100%FREE -n syb_log_lvsyb_log_vg
sudo mkfs. xfs -f /dev/syb_data_vg/syb_data_lv
sudo mkfs. xfs -f/dev/syb_log_vg/syb_log_lv
sudo mkdir -p /sybase/source
sudo mkdir -p /log
sudo mkdir -p /sapmnt
sudo blkid | grep log
sudo blkid | grep data
edit /etc/fstab and add the entries for the created disks.
Option 1 :
Identify based on created volume group and lv details.
Ex: ls /dev/mapper/
And fetch the right devices
Ex: syb_data_vg-syb_data_lv
Add the the entries into /etc/fstab
sudo vi /etc/fstab
Add the lines.
/dev/mapper/syb_data_vg-syb_data_lv /hana/data xfs defaults,nofail 1 2
Option 2 :
#now sudo su - to root user and run this (replace GUID) - cannot run this with sudo command, must be root
sudo su -
echo "/dev/disk/by-uuid/799603d6-20c0-47af-80c9-75c72a573829 /sybase xfsdefaults,nofail02">> /etc/fstab
echo "/dev/disk/by-uuid/2bb3f00c-c295-4417-b258-8de43a844e23 /log xfsdefaults,nofail02">> /etc/fstab
exit
sudo mount -a
sudo df -h
sudo mount -a
sudo df -h
Note: mount points are visible only when the folders are accessed in df –h command when auto mount is enabled.
##create a directory for the source files.
sudo mkdir -p /sybase/source
## copy source files
sudo chmod 777 /sybase/source -R
## setup automount for /sapmnt
### - use auto mount not the "old" way sudo mount -t nfs4 -o rw sybapp1:/sapmnt /sapmnt
sudo mkdir /sapmnt
sudo vi /etc/auto.master
# Add the following line to the file, save and exit
+auto.master
/- /etc/auto.direct
sudo vi /etc/auto.direct
# Add the following lines to the file, save and exit
/sapmnt -nfsvers=4,nosymlink,sync sybapp1:/sapmnt
sudo systemctl enable autofs
sudo service autofs restart
sudo /sybase/source/swpm/sapinst SAPINST_REMOTE_ACCESS_USER=<os-user>


Stop the autofs and unmount the /sapmnt - sapinst will continue
The /sapmnt must be mounted again shortly after


## Install the DMA on the DR Node
##Login as syb<sid> - in this case the <sid> = ase
source/ASE1633/BD_SYBASE_ASE_16. 0. 03. 03_RDBMS_for_BS_/SYBASE_LINUX_X86_64/setup. bin -f /sybase/sybdb3_dma. rs -i silent
isql-Usapsso -PSAPHana12345 -SASE -X
sp_locklogin sa, unlock
go
sybdb3 /sybase% uname -a
Linux sybdb3 4. 4. 120-92. 70-default #1 SMP Wed Mar 14 15:59:43 UTC 2018 (52a83de) x86_64 x86_64 x86_64 GNU/Linux
sybdb3 /sybase% whoami
sybase
##Run setuphadr after editing the response file based on Sybase documentation (sample response file is attached to this blog)
sybdb3 /sybase% setuphadr /sybase/sybdb3_setup_hadr.rs
AlwaysOn Testing & Useful Command Syntax
In the section below planned and unplanned failovers as well as monitoring commands are used.
It is recommended to review the Sybase documentation and also to review these SAP Notes:
1982469 - SYB: Updating SAP ASE with saphostctrl
1959660 - SYB: Database Fault Management
2179305 - SYB: Usage of saphostctrl for SAP ASE and SAP Replication Server
## Check if Fault Manager is running on the SAP PAS with this command
ps -ef | grep sybdbfm
executable in /usr/sap/<SID>/ASCS00/work
sybdbfm is copied to sybdbfm. sap<SID>_ASCS00
cd /usr/sap/<SID>/ASCS00/work
. /sybdbfm. sapASE_ASCS00 status
. /sybdbfm. sapASE_ASCS00 hibernate
. /sybdbfm. sapASE_ASCS00 resume
login as syb<sid> in this case sybase
## Login to the RMA
isql -UDR_admin -P<<password>> -SASE_RMA_Site1 -I DM/interfaces -X -w999
## to see all the components that are running
sap_version all
go
## to see the status of a replication path
sap_status path
go
## to see the status of resources
sap_status resource
go
## Login to ASE
The syntax "-I DM/interfaces" does a lookup in the Sybase AlwaysOn configuration database to find the host and TCP port
isql -UDR_admin -P<<password>> -SASE_Site1 -I DM/interfaces -X-w999
## to clear down the transaction log run this command
dump tran ASE with truncate_only
go
## to show freespace in DB
sp_helpdb ASE
go
## Transaction log backups are needed on all replicas otherwise the Trans Log will become full
## to start/stop/get info on Sybase DB (and all required components for Always on like RMA) - run this on the DB host
sudo /usr/sap/hostctrl/exe/saphostctrl -user sapadm -function StartDatabase -dbname ASE -dbtype syb
sudo /usr/sap/hostctrl/exe/saphostctrl -user sapadm -function StartDatabase -dbname ASE_REP -dbtype syb

## to get Sybase DB status
sudo /usr/sap/hostctrl/exe/saphostctrl -user sapadm -function GetDatabaseStatus -dbname ASE -dbtype syb
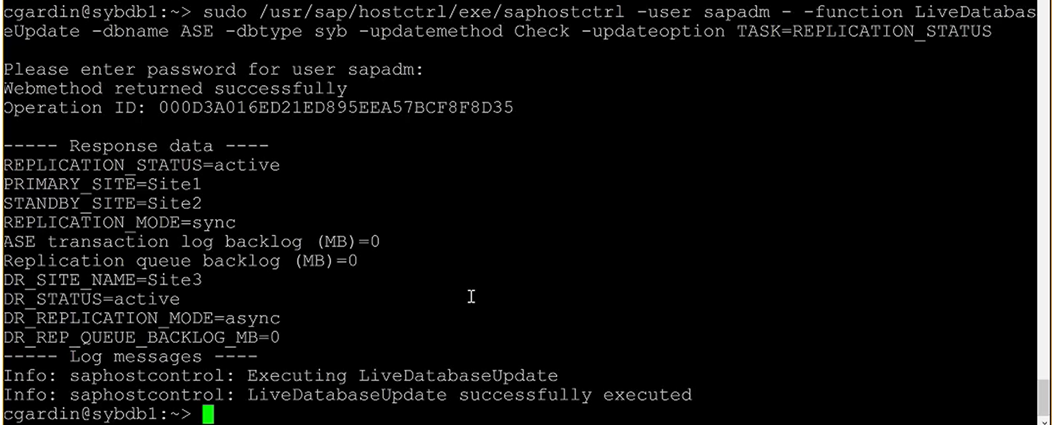
## to get Sybase DB replication status
sudo /usr/sap/hostctrl/exe/saphostctrl -user sapadm -function LiveDatabaseUpdate -dbname ASE -dbtype syb -updatemethod Check -updateoption TASK=REPLICATION_STATUS
## to send a trace ticket logon to RMA and execute these commands
sap_send_trace Site1
go
sap_status active
go
## during HADR testing leave tail running on the file /usr/sap/<SID>/ASCS00/work
tail -100f dev_sybdbfm
## to force a shutdown of the DB engine run the command below. Always-on will try to stop a normal shutdown of the DB
shutdown with wait nowait_hadr
go
## to do a planned failover from Primary to Companion DB the normal sequence is:
1. Failover from Primary to Companion
2. Drain logs from Primary to the DR site
3. Reverse Replication Route to start synchronization from the new Primary to the Companion and DR
-- There is a new command that does all these steps automatically:
/usr/sap/hostctrl/exe/saphostctrl -user sapadm - -function LiveDatabaseUpdate -dbname ASE -dbtype syb -updatemethod Execute -updateoption TASK=FAILOVER -updateoption FAILOVER_FORCE=1 -updateoption FAILOVER_TIME=300
## it is recommended to use this command. If there are errors check in the path /usr/sap/hostctrl/work for log files
##other useful commands:
## to disable/enable replication from a Site to all routes
sap_disable_replication Site1, <DB>
sap_enable_replication Site1,Site2,<DB>
## command to manually failover
sap_failover <primary>,<standby>,<timeout>, [force], [unplanned]
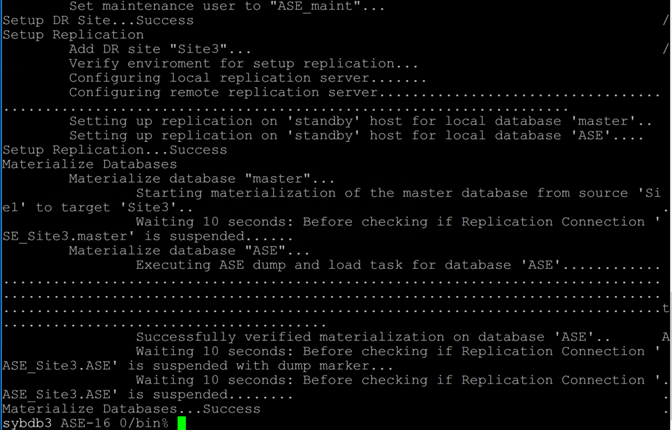
## Materialize is a "dump and load" to reinitialize Sybase Alwayson replica.
sap_materialize auto,Site1,Site2,master
sap_materialize auto,Site1,Site2,<SID>
Sybase How To & Links
Customers familiar with SQL Server AlwaysOn should note that although it is possible to take a DB or Log backup from a replica, these backups are not compatible between Primary <-> Replica databases. It is also a requirement to run transaction log backups on the replica nodes unlike SQL Server.
SAP Notes:
2134316 - Can SAP ASE run in a cloud environment? - SAP ASE
1554717 - SYB: Planning information for SAP on ASE
1706801 - SYB: SAP ASE released for virtual systems
1590719 - SYB: Updates for SAP Adaptive Server Enterprise (SAP ASE)
1959660 - SYB: Database Fault Management
2450148 - 'Warning: stopService() only supported on windows' message happened during HADR configuration -SAP ASE
2489781 - SAP ASE 16. 0 SP03 Supported Operating Systems and Versions
DBA Cockpit doesn't work by default after installation.
Setup DBA Cockpit as per:
2293673 - SYB: DBA Cockpit Correction Collection SAP Basis 7. 50
1605680 - SYB: Troubleshoot the setup of the DBA Cockpit on Sybase ASE
1245200 - DBA: ICF Service Activation for WebDynpro DBA Cockpit
For SUSE Linux Release 12 with SP3 release note : https://www. suse. com/releasenotes/x86_64/SUSE-SLES/12-SP3/
SAP Software Downloads https://support. sap. com/en/my-support/software-downloads. html
SWPM Download https://support. sap. com/sltoolset
Sybase Release Matrix https://wiki. scn. sap. com/wiki/display/SYBASE/Targeted+ASE+16. 0+Release+Schedule+and+CR+list+Information
Sybase Official Documentation https://help. sap. com/viewer/product/SAP_ASE/16. 0. 3. 3/en-US
Special thanks to Wajeeh Samdani from SAP Sybase Development in Walldorf
Special thanks to Cognizant SAP Cloud Team for their input and review of this blog
Content from third party websites, SAP and other sources reproduced in accordance with Fair Use criticism, comment, news reporting, teaching, scholarship, and research