
This post has been republished via RSS; it originally appeared at: Microsoft Data Migration articles.
First published on MSDN on Mar 23, 2018
Authored by gennadyk@microsoft.com
The Azure Database Migration Service is a fully managed service designed to enable seamless migrations from multiple database sources to Azure Data platforms with minimal downtime. For Azure Database Migration Service to be able to connect to on-premises source it requires either one of the following Azure hybrid networking prerequisites:
- Express Route
- Site-to-Site VPN
What is Site-to-Site VPN?
Site-to-Site VPN is designed for establishing secured connections between site offices and the cloud or bridging on-premises networks with virtual networks on Azure. To establish a Site-to-Site VPN connection, you need a public-facing IPv4 address and a compatible VPN device, or Routing and Remote Access Service (RRAS) running on Windows Server 2012. (For a list of known compatible devices, go to https://msdn.microsoft.com/en-us/library/azure/jj156075.aspx#bkmk_KnownCompatibleVPN .) You can use either static or dynamic gateways for Site-to-Site VPN. 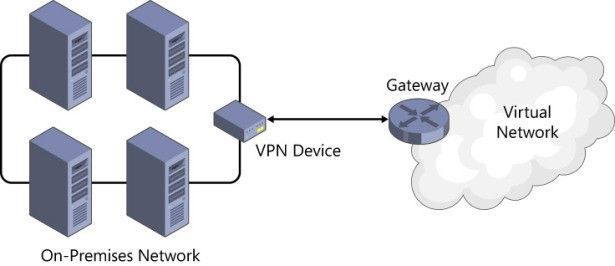
Site-to-Site VPN extends your on-premises network to the cloud. This allows your on-premises servers reach your VMs on the cloud and vice versa your cloud VMs to communicate with your on-premises infrastructure. Although Site-to-Site connections provide reasonable reliability and throughput, some larger enterprises require much more bandwidth between their datacenters and the cloud. Moreover, because VPNs go through the public Internet, there’s no SLA to guarantee the connectivity. For these enterprises, ExpressRoute is the way to go.
In this blog entry I will go concentrate on some common network connectivity troubleshooting techniques when using Site-to-Site VPN option with Azure Database Migration Service to migrate on-premises source to Azure based target. VPN connectivity issues will cause various error messages when trying to connect to source on-premises databases from the Azure Database Migration Service.
Basic situation analysis
When attempting to connect to on-premises while creating Database Migration Service project or migration activity customers may get number of exceptions that prevent them from connecting. These exceptions can be divided into several common categories:
- Login user security issues. These cover issues where login provided has lack of permissions to the database, account is locked, invalid or expired password, etc. These issues are covered by SQL Server error codes 300, 15113,18452,18456,18487,18488 returned to user with Azure DMS error message
- Server certificate cannot be trusted, missing or invalid. User typically will get following message back with SQL error code -2146893019 A connection was successfully established, but a trusted certificate is not installed on the computer running SQL Server. Please set up a trusted certificate on the server. Refer to this link for further help: https://support.microsoft.com/en-us/help/2007728/error-message-when-you-use-ssl-for-connections-to-sql-server-the-certi
- Firewall device placed between Azure cloud and customer on-premises source is preventing Azure DMS from connecting to the source. In this most commonly SQL Server error code 40615 is returned by Azure DMS with the error message “Cannot connect to <servername>” after attempting to connect to source database.
- Finally, the error may be due to lack of connectivity over Site-to-Site VPN between on-premises source server and Azure VNET preventing Azure DMS from being able to connect to source database. These can be covered via SQL error codes -1,2, 5, 53, 233, 258, 1225, etc. with return error message “SQL connection failed ”. Rest of this write-up will provide troubleshooting and diagnostics steps for this error category.
Basic troubleshooting for Azure Site-to-Site VPN connection issues
When seeing connectivity errors in Azure Database Migration Service due to Site-To-Site VPN connectivity issues between on-premises source infrastructure and Azure based target, such as SQL Azure DB or SQL Azure DB Managed Instance. it is important to start by scoping the problem correctly and making sure that all the basic tests were done before moving forward to a deeper troubleshooting. One of the first items we ask customer to do is to create a test Windows based Virtual Machine in the affected Azure VNET and attempt to test connectivity from that VM to other VMs in the same subnet, as well as on-premises server that has SQL Server source instance installed. To create Azure Virtual Machine you can follow this tutorial .
Here are two key questions that you should ask even before you start collecting and analyzing data:
- Is this VM able to ping other VMs that are located on the same subnet? When doing ping testing in Azure one has to be aware that because the ICMP protocol is not permitted through the Azure load balancer, you will notice that you are unable to ping an Azure VM from the internet, and from within the Azure VM, you are unable to ping internet locations. In case you want to perform such testing we recommend you use SysInternals PSPing utility as described here .
- Do I have another VM on the same virtual network able to communicate with on-premise resources?
If this VM cannot communicate with other VMs on the same subnet the issue most likely with the VM resources, you created. Probably these VMs are not on the same virtual network or the new VM was created using the Quick Create option. When you use this option, you may not be able to choose the virtual network on which the VM belongs, therefore it won’t be able to communicate with other VMs that belong to a custom virtual network. However, if VM can communicate with other VMs and resources within subnet but cannot communicate with on-premises resources you may have an issue with Site-to-Site VPN connectivity, in which case troubleshooting steps in this document may be useful to you.
Advanced VNET gateway log capture using Azure PowerShell
In addition to the document mentioned above, in case of Azure Site-to-Site VPN connectivity issues, with ARM based Azure VNET gateway resources you can use Azure PowerShell to capture diagnostic logs that can be extremely useful to troubleshoot connectivity issues. Following Azure PowerShell cmdlets will help you on this task:
- Start-AzureVNetGatewayDiagnostics
- Stop-AzureVnetGatewayDiagnostics
- Get-AzureVNetGatewayDiagnostics
Before you can use these Azure PowerShell cmdlets for log capture on your Azure VNET gateway you will need following:
- Microsoft Azure PowerShell Module. Be sure to download and install the latest version of the Azure PowerShell Module .
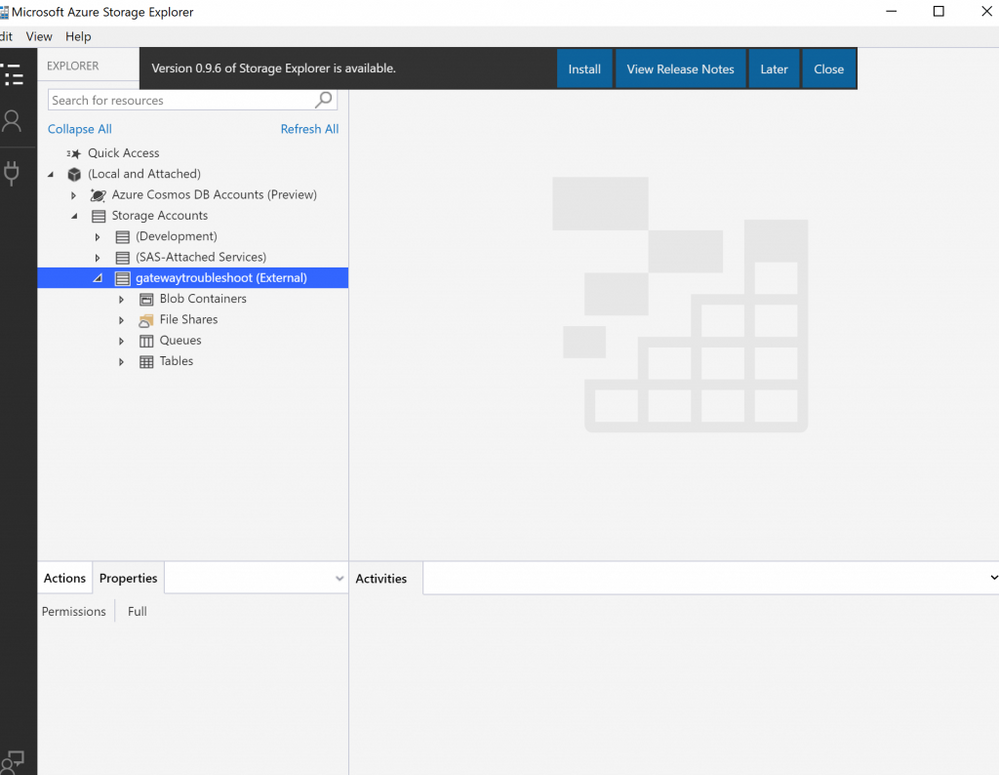
- Azure Storage Account. Azure Virtual Network Gateway diagnostics logs are stored in an Azure Storage Account. You can create a new Storage Account by following this article . After you created this storage account you should be able to browse to it using Azure Storage Explorer like in below image:
You can follow steps below to setup diagnostics capture:
- First, sign in with your Azure subscription via PowerShell. Below example directs PowerShell to log you into Azure and to switch context to subscription named “My Production” as default
#login to azure
Login-AzureRmAccount
Select-AzureSubscription -Default -SubscriptionName "My Production”
- Next, select the Azure Storage Account that you've created for storing the diagnostic logs that your Virtual Network Gateway will be generating.
$storageAccountName = (Get-AzureStorageAccount).StorageAccountName | Out-GridView -Title "Select Azure Storage Account" -PassThru
$storageAccountKey = (Get-AzureStorageKey -StorageAccountName $storageAccountName).Primary
$storageContext = New-AzureStorageContext -StorageAccountName $storageAccountName -StorageAccountKey $storageAccountKey
- Next, you need to select the Azure VNET on which the Gateway that you'll be diagnosing is provisioned.
$azureVNet = (Get-AzureVNetSite).Name | Out-GridView -Title "Select Azure VNet" -PassThru
- Now, you are ready to start capturing diagnostic logs. You will use the Start-AzureVNetGatewayDiagnostics cmdlet to begin your log capture. When using this cmdlet, you must specify a capture duration in seconds, which can be up to 300 seconds (5 minutes). Below example will capture logs for 90 seconds.
$captureDuration = 90
Start-AzureVNetGatewayDiagnostics -VNetName $azureVNet -StorageContext $storageContext -CaptureDurationInSeconds $captureDuration
- Now lets wait for duration of capture
Sleep -Seconds $captureDuration
- After the capture duration has concluded, diagnostics logged will automatically stop and the log stored within Azure storage will be closed. Now you can save capture locally.
$logUrl = (Get-AzureVNetGatewayDiagnostics -VNetName $azureVNet).DiagnosticsUrl
$logContent = (Invoke-WebRequest -Uri $logUrl).RawContent
$logContent | Out-File -FilePath vpnlog.txt
- Finally, you can use your favorite text editor to explore log contents and get more information on your issue
Microsoft Support has contributed a script that automates above log gathering to PowerShell gallery and you can download it from here
Additional resources:
- TechNet blog on capturing Azure VPN Gateway logs - https://blogs.technet.microsoft.com/canitpro/2016/01/11/step-by-step-connect-your-aws-and-azure-environments-with-a-vpn-tunnel/
- Test-NetConnection cmdlet to test connectivity - https://docs.microsoft.com/en-us/powershell/module/nettcpip/test-netconnection?view=win10-ps
- Azure Database Migration Service Prerequisites - https://docs.microsoft.com/en-us/azure/dms/pre-reqs
- Azure Database Migration Service FAQ - https://docs.microsoft.com/en-us/azure/dms/faq