
First published on MSDN on Mar 09, 2017
Overview
You can use app roles easily with the baked in Azure AD based Azure App Service Authentication functionality to control access to parts of your application. You can then leverage ASP.Net functions such as
User.IsInRole(“Admin”)
and
[Authorize(Roles = “Admin”)]
in your Controllers, APIs and Pages to restrict or allow access. Azure Active Directory makes it easy to define App roles however the default classes to leverage roles is looking for a different claim. Below is how to accommodate this and some simple examples or utilizing roles.
What are app roles?
App roles are an easy way to assign permissions to users that allows you to control who can do what in your Azure App Service (Azure Web App, Azure API App, Azure Mobile App etc…). You simply define roles that you can name for yourself for your particular application. For example:
Jeff
may have the role of
Admin
and
Julie
may have the role of
Observer
Advantages of this approach:
Simple programming model.
Roles are specific to the application. The role claims for one application are not sent to another application.
If the customer removes the application from their AD tenant, the roles go away.
The application doesn’t need any extra Active Directory permissions, other than reading the user’s profile.
ref:
https://docs.microsoft.com/en-us/azure/architecture/multitenant-identity/app-roles
Walkthrough Adding and Using App Roles with your ASP.Net application in Azure
Configure Azure Active Directory using express settings
In the
Azure portal
, navigate to your application. Click
Settings
, and then
Authentication/Authorization
.
If the Authentication / Authorization feature is not enabled, turn the switch to
On
.
Click
Azure Active Directory
, and then click
Express
under
Management Mode
.
Click
OK
to register the application in Azure Active Directory. This will create a new registration. If you want to choose an existing registration instead, click
Select an existing app
and then search for the name of a previously created registration within your tenant. Click the registration to select it and click
OK
. Then click
OK
on the Azure Active Directory settings blade.
By default, App Service provides authentication but does not restrict authorized access to your site content and APIs. You must authorize users in your app code.
(Optional) To restrict access to your site to only users authenticated by Azure Active Directory, set
Action to take when request is not authenticated
to
Log in with Azure Active Directory
. This requires that all requests be authenticated, and all unauthenticated requests are redirected to Azure Active Directory for authentication.
Click
Save
.
Do not do step 5!
Edit the Azure AD Manifest to add the roles you want to define
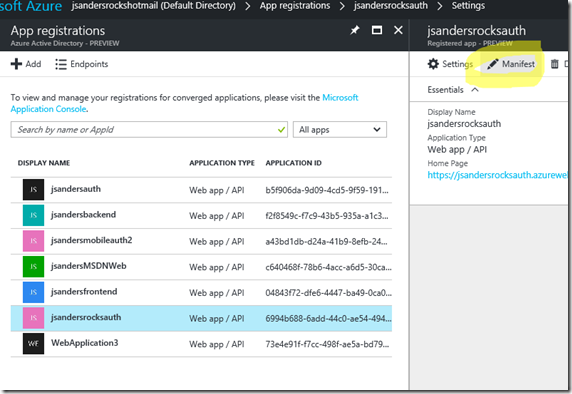
Find the Active Directory App registration that you just created and edit the Manifest:
Find the userRoles section which is empty:

Add some roles you have defined (generate unique guids for the id) and click
Save
– ref:
https://azure.microsoft.com/en-us/resources/samples/active-directory-dotnet-webapp-roleclaims/
– Step 2 ONLY

Assign User Roles
Create several user accounts in the Azure Management Portal, and assign them different roles by navigating to the “Users” tab of your AD application in the Classic Azure Portal
https://manage.windowsazure.com.
The ASSIGN button is how you assign the roles you defined in the previous step. If you want to change roles for a user, first hit the REMOVE icon for the user and reASSIGN with the correct Role.
Find your AD Application in the old portal:

Go to the USERS tab in your AD application page:

Assign a role for the Users (the ones you defined will appear here):

Add code to your app to use the user roles
To user the built in Authorization attributes and the User.IsInRole() functionality you first must add a claim to the ClaimsPriciiple.Current definition when the user is Authenticated.
Using OWIN you can create a hook into the PostAuthenticate pipeline to fix up the roles to worth with the ASP.Net classes and functionality you may already be aware of from on premise AD roles:
Create or use a file Startup.cs that will call a new function ConfigureAuth, or modify the existing startup to include the functionality we will add in ConfigureAuth:
using Microsoft.Owin;
using Owin;
// requires Install-Package Microsoft.Owin.Host.SystemWeb
[assembly: OwinStartup(typeof(jsandersadauthnetbasic.Startup))]
namespace jsandersadauthnetbasic
{
public partial class Startup
{
public void Configuration(IAppBuilder app)
{
// For more information on how to configure your application, visit http://go.microsoft.com/fwlink/?LinkID=316888
ConfigureAuth(app);
}
}
}
See Comments to see how I fix up claims:
public partial class Startup
{
public static void ConfigureAuth(IAppBuilder app)
{
// add this function into the app pipeline to Call my function OnAuth and call the next in the pipeline
app.Use((context, next) =>
{
// The function to call…
OnAuth(context);
return next.Invoke();
});
// limit the calls to the above function to be in the PostAuthenticate part of the stage
app.UseStageMarker(PipelineStage.PostAuthenticate);
}
/// <summary>
/// Called in the PostAuthenticate stage
/// this hack is because appRoles comes back as a claim type ‘role’ and not a user role.
/// {
/// “typ”: “roles”,
/// “val”: “Admin”
/// },
/// we copy the role claim to the claimsIdentity.RoleClaimType: http://schemas.microsoft.com/ws/2008/06/identity/claims/groupsid
/// so that IsInRole will work correctly and [Authorize (“Role= will work too
/// </summary>
/// <param name=”context”> Passed in </param>
private static void OnAuth(IOwinContext context)
{
// if authenticated…
if (ClaimsPrincipal.Current.Identity.IsAuthenticated)
{
// claimsIdentity we want to add our roles to…
ClaimsIdentity claimsIdentity = ClaimsPrincipal.Current.Identity as ClaimsIdentity;
// List of claims
var appRoles = new System.Collections.Generic.List<Claim>();
foreach (Claim claim in ClaimsPrincipal.Current.FindAll(“roles”))
{
// build the list
appRoles.Add(new Claim(claimsIdentity.RoleClaimType, claim.Value));
}
if (appRoles.Count > 0)
{
// if anything in the list, add these claims to the current identity
claimsIdentity.AddClaims(appRoles);
}
}
}
}
Next you can easily configure Authorization in your app!
In aspx pages you can use the IsInRole function:
protected void Page_Load(object sender, EventArgs e)
{
if (this.User.Identity.IsAuthenticated)
{
if (User.IsInRole(“Admin”))
{
Response.Clear();
Response.Write(“is an admin”);
Response.Flush();
}
else
{
Response.Clear();
Response.Write(“is NOT an admin”);
Response.Flush();
}
}
else
{
Response.Clear();
Response.Write(“is NOT Authenticated”);
Response.Flush();
}
}
You can use the Authorize attribute for Controller and or Controller Methods:
// Sample cannot access any of the controller methods unless you are Admin
// ref: https://msdn.microsoft.com/en-us/library/system.web.mvc.authorizeattribute(v=vs.118).aspx
[Authorize(Roles = “Admin”)]
public class TestAdminAccessController : ApiController
{
// or optionally comment out Auth on the controller so that
// you cannot access only this GET method unless you are Admin
// [Authorize(Roles = “Admin”)]
// GET: api/TestAdminAccess
public IEnumerable<string> Get()
{
return new string[] { “value1”, “value2” };
}
You can control access to Pages based using your Web.Config (in this example only the Admin role can access the adminonly.aspx page):
<?xml version=”1.0″ encoding=”utf-8″?>
<!–
For more information on how to configure your ASP.NET application, please visit
http://go.microsoft.com/fwlink/?LinkId=169433
–>
<configuration>
<location path=”adminonly.aspx”>
<system.web>
<authorization>
<allow roles=”Admin”/>
<deny users=”*” />
</authorization>
</system.web>
</location>
<system.web>
<compilation debug=”true” targetFramework=”4.5.2″ />
<httpRuntime targetFramework=”4.5.2″ />
You can control access to static content based on Web.Config settings (in this example only the Admin role can access the StaticHtml.html page)
Similar to the example above however by default static files do not go through the ASP.Net pipeline. The fix is to add a handler for the *.html files (handler must be last in the list of handlers) and then you can restrict access to the html file based on roles. In the below sample the Static.Html.html file is restricted to the “Admin” role:
<?xml version=”1.0″ encoding=”utf-8″?>
<!–
For more information on how to configure your ASP.NET application, please visit
http://go.microsoft.com/fwlink/?LinkId=169433
–>
<configuration>
<location path=”adminonly.aspx”>
<system.web>
<authorization>
<allow roles=”Admin”/>
<deny users=”*” />
</authorization>
</system.web>
</location>
<location path=”StaticHtml.html”>
<system.web>
<authorization>
<allow roles=”Admin”/>
<deny users=”*” />
</authorization>
</system.web>
</location>
<system.web>
<compilation debug=”true” targetFramework=”4.5.2″ />
<httpRuntime targetFramework=”4.5.2″ />
</system.web>
<system.codedom>
<compilers>
<compiler language=”c#;cs;csharp” extension=”.cs” type=”Microsoft.CodeDom.Providers.DotNetCompilerPlatform.CSharpCodeProvider, Microsoft.CodeDom.Providers.DotNetCompilerPlatform, Version=1.0.0.0, Culture=neutral, PublicKeyToken=31bf3856ad364e35″ warningLevel=”4″ compilerOptions=”/langversion:6 /nowarn:1659;1699;1701″ />
<compiler language=”vb;vbs;visualbasic;vbscript” extension=”.vb” type=”Microsoft.CodeDom.Providers.DotNetCompilerPlatform.VBCodeProvider, Microsoft.CodeDom.Providers.DotNetCompilerPlatform, Version=1.0.0.0, Culture=neutral, PublicKeyToken=31bf3856ad364e35″ warningLevel=”4″ compilerOptions=”/langversion:14 /nowarn:41008 /define:_MYTYPE=\"Web\" /optionInfer+” />
</compilers>
</system.codedom>
<system.webServer>
<handlers>
<remove name=”ExtensionlessUrlHandler-Integrated-4.0″ />
<remove name=”OPTIONSVerbHandler” />
<remove name=”TRACEVerbHandler” />
<add name=”ExtensionlessUrlHandler-Integrated-4.0″ path=”*.” verb=”*” type=”System.Web.Handlers.TransferRequestHandler” preCondition=”integratedMode,runtimeVersionv4.0″ />
<add name=”AspNetStaticFileHandler-HMTL” path=”*.html” verb=”*” type=”System.Web.StaticFileHandler”/>
</handlers>
</system.webServer></configuration>
Final notes
This just scratches the surface of what you can do with app roles, but should give you a good start. You could manually inspect the ‘roles’ claim in code by iterating over the claims collection if of the User and finding the value if you don’t want to copy the ‘roles’ claim to the one the default classes inspect but using the Authorize attribute and IsInRole function is much more elegant and familiar to ASP.Net programmers.
If you find this blog useful, please drop me a note!