
This post has been republished via RSS; it originally appeared at: Storage at Microsoft articles.
First published on TECHNET on Jul 05, 2012
In my last blog, I discussed the industry standard Storage Management Initiative (SMI-S) in general terms. Microsoft started supporting SMI-S for storage provisioning in System Center 2012 Virtual Machine Manager, released earlier this year. With the upcoming Windows Server 2012, SMI-S support will be available to all of our server customers. Coupled with the new Storage Management API (SMAPI), which consists of new WMI interfaces and cmdlets, it is possible to manage SAN or direct attached storage in a vendor-independent fashion, and also in a system-independent fashion if you have more than Windows in your datacenter. The new File and Storage Services canvas in Server Manager can take advantage of SMI-S providers, giving you a GUI for managing basic array functionality right out of the box.
SMI-S is based on the DMTF CIM Model and Schema, and as such it can support very complex environments. The SMAPI simplifies that by hiding a lot of the details and relationships that go into the model. Many vendors took part in the formation of SMI-S. Each vendor has to create one or more SMI-S providers for their products and customers need to obtain the providers from their storage vendors. But first, let’s talk about getting SMI-S going on Windows Server 2012.
Adding SMI-S support to Windows Server 2012
The Windows Standards-Based Storage Management Service is the optional feature for Windows Server only, which communicates with SMI-S providers (in SMI-S speak, it is a “client”). I will refer to it below as the “Storage Service”. It is not installed by default, so you will need to add the feature by using either Server Manager or a PowerShell cmdlet.
The diagram below shows the full architecture of the new Storage Management infrastructure in Windows. This blog focuses mostly on the lower left area highlighted by the red box.

Figure 1 Architecture of Storage Management on Windows Server 2012
The Storage Service also providers other functionality such as extensive (and secure) caching of management objects surfaced by one or more SMI-S providers, handling of dynamic events through SMI-S indications, managing asynchronous tasks and secure credential management. [Windows also supports a different hardware provider model, known as Storage Management Provider (or SMP). This blog only addresses the SMI-S support, and the Storage Service translates between SMI-S and SMP for you.]
You should think carefully about where you want to install this service – in a datacenter you would centralize the management of your resources as much as practicable, and you don’t want to have too many points of device management all competing to control the storage devices. This can result in conflicting changes and possibly even data loss or corruption if too many users can manage the same arrays. Multiple levels of permissions can help mitigate this possibility. SMI-S providers also typically manage more than one hardware device so you don’t need to install one provider per array.
Using Server Manager
Server Manager has been redesigned from the ground up for Windows Server 2012. It is now a tool that can manage across many server instances. It is one way that you can install the Windows Standards-Based Storage Management Service.
Server Manager typically opens when you log in to the Windows Server as an administrator. All actions described below must be performed with administrator privilege (Windows may prompt to elevate privilege if necessary).

Figure 2 Server Manager Dashboard
Pick the server you wish to install on to begin the feature installation (here I chose the Local Server but you could install on any other server being managed). Click on Manage and select Add Roles and Features:

Figure 3 Add Roles and Features to the Local Server
Continue with the Wizard, selecting Next for the next three screens
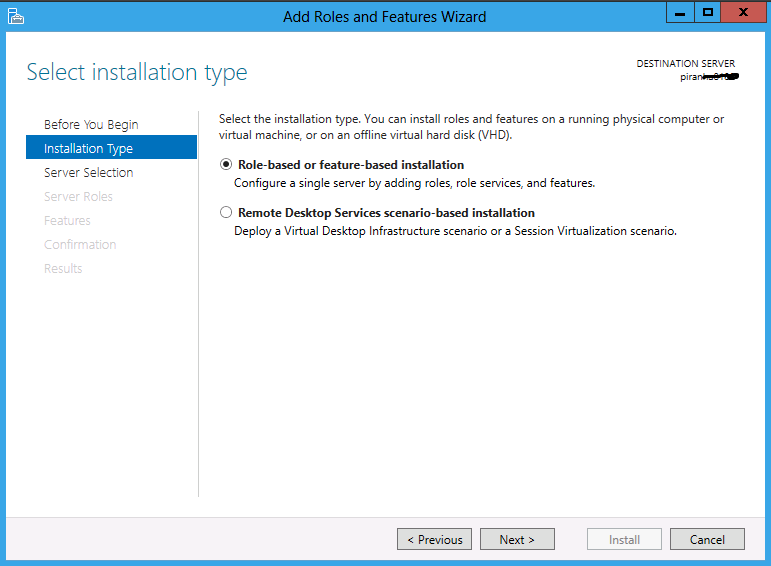
Figure 4 Select Role-based or feature-based installation

Figure 5 Server Selection

Figure 6 Server Roles
Select Windows Standards-Based Storage Management and confirm the installation:
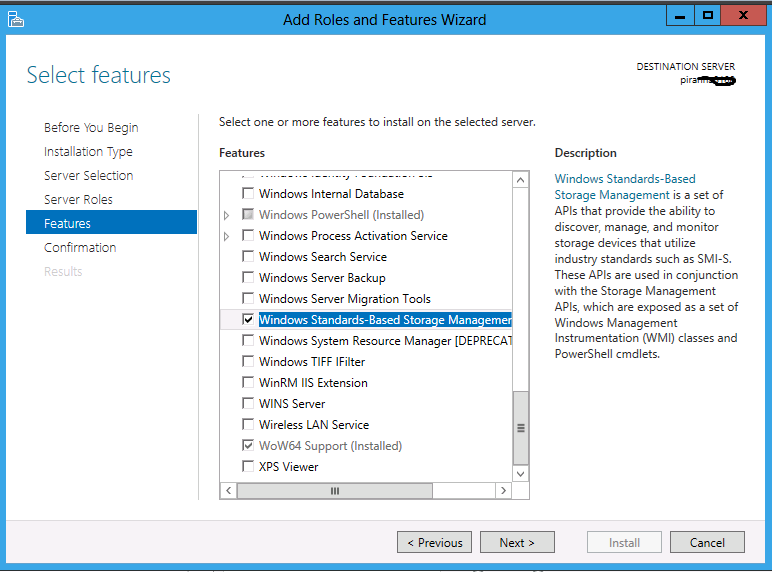
Figure 7 Server Features

Figure 8 Confirm
Click Install and wait for the Wizard to complete. You could close this window but it shouldn’t take long.

Figure 9 Feature installed
Using PowerShell to enable the storage service
Another (easier) way to install the service is using the Windows PowerShell Add-WindowsFeature cmdlet. Open an Administrative PowerShell prompt and enter
Add-WindowsFeature WindowsStorageManagementService
This will install and enable the service and add three new cmdlets to the system, but the service doesn’t know about any SMI-S providers yet. That will happen when you register providers.
Note: at the time this blog was first posted, cmdlet help was not yet online for the three SMI-S specific cmdlets (Register-SmisProvider, Unregister-SmisProvider and Search-SmisProvider) so you may see an error message when you attempt to Update-Help. The Search-SmisProvider cmdlet will be covered in a later topic; for now I will assume you know the name or IP address of the SMI-S providers you will be using.
SMI-S providers
In general, you will download these from your storage vendor. Each vendor has their own mechanism for distributing, licensing, installing and configuring providers, so it’s difficult to give you generic rules.
The steps are as follows:
- Download the SMI-S provider from your storage array vendor.
- Install the provider on a Windows or Linux server. It should not be installed on a server running any other SMI-S provider. It can be installed on the same system as the Storage Service but you should install SMI-S servers in as few places as necessary.
- Add firewall rules if you installed the provider on a Windows Server.
- Change or add account credentials for the provider, as appropriate.
- Make any changes to the provider’s properties (if necessary) and restart it.
- Add arrays to manage.
Registering Providers
In order to use an SMI-S provider, it must be registered. The register process will do the following:
1) Save the provider information for reuse whenever the service or system restarts
2) Save the credentials for the provider (securely!)
3) Allow adding certificates to the proper store if you are using the recommended SSL (https) communication protocol
4) Perform a basic discovery (level 0)
5) Subscribe for indications – this will be the subject of a later post
To register a provider, use the Register-SmisProvider cmdlet:
Register-SmisProvider –ConnectionUri https://<name or IP address of provider>:<port>
A prompt for provider credentials will appear (you can also script this using a PSCredential). Although the storage service supports HTTP, you are encouraged to use HTTPS with the register cmdlet. This will ensure that the provider’s SSL certificate is properly configured on the machine running the storage service and will give the highest level of security for communications. It is also important for SMI-S indications, which are only delivered using HTTPS.
It’s worth noting that permissions for the provider are restricted to the user account you are currently logged in with on the machine running the Storage Service. You can give other users permission by specifying –AdditionalUsers with the Register-SmisProvider cmdlet.
At this point, if the register succeeds, only basic discovery information has been collected (provider and array details, also known as Level 0).
Get-StorageProvider
(Observe the Names returned; Storage Spaces will always be shown but that does not use SMI-S so I won’t discuss it here.)
Get-StorageSubSystem
Storage pools and volumes will not be discovered yet. To do a deeper discovery, execute this cmdlet:
Update-StorageProviderCache –Name <name from above> -DiscoveryLevel Level2
I want to reiterate that the Storage Service has an extensive, multi-level cache. Once objects are discovered, they can be operated upon efficiently. But beware: deep discoveries can take a lot of time, especially with high-end hardware which supports tens of thousands of objects! Each level is cumulative so a Level3 discovery also does levels 0-2. I plan to talk more about limiting the scope of the discovery in a more tree-structured approach in a later post.
To remove the provider and credentials from your system, use the Unregister-SmisProvider cmdlet.
Some other cmdlets
For any cmdlet, you can type -? to get the complete syntax and information about parameter sets or use any of the other PowerShell help features. You can also pipe the output to control formatting or for use as input to another cmdlet.
Some advanced functionality may be limited by the array hardware, the SMI-S provider, and of course, the features you licensed from the storage vendor. The cmdlets below are just a sample of the complete set available through the Storage Management API on Windows Server 2012.
Pools and Virtual Disks
|
Get-StoragePool |
Shows the storage pools on discovered subsystems. You will have to increase the level of discovery using Update-StorageProviderCache before these appear since pools are Level1 objects. |
|
New-StoragePool |
Creates a new storage pool from available free physical disks (do a Level3 discovery first). |
|
New-VirtualDisk |
Creates a new virtual disk (aka storage volume in SMI-S). |
|
Remove-VirtualDisk |
Deletes a virtual disk (and the data on it). |
|
New-VirtualDiskSnapshot |
Creates a new writable snapshot of an existing virtual disk. |
|
New-VirtualDiskClone |
Creates a new writable clone (appears as a complete copy) of an existing virtual disk. |
Masking Operations
Unmasking allows virtual disks to be seen by specific systems and their HBAs or iSCSI initiators. This is the key to sharing arrays with different hosts and allows large-scale storage to be used in a multi-computer environment. Masking is the reverse, hiding a virtual disk. Different arrays have different rules such as allowing virtual disks to participate in a limited number of masking sets, or allowing you control over which target ports can be specified in a set.
|
New-MaskingSet |
Exposes virtual disks to specific initiators (port on a host). |
|
Get-MaskingSet |
Displays the discovered masking sets. |
|
Add-InitiatorIdToMaskingSet |
Adds additional initiators, where allowed by the hardware. |
|
Add-TargetPortToMaskingSet |
Adds additional target ports (some high end arrays support this). |
|
Add-VirtualDiskToMaskingSet |
Adds another virtual disk to an existing masking set. |
|
Remove-InitiatorIdFromMaskingSet |
Reverse of Add-InitiatorIdToMaskingSet. |
|
Remove-MaskingSet |
Removes the masking set, hiding the all the virtual disks from all hosts [it does not delete any virtual disks]. |
References
To see more about our commitment to standards and storage management, refer to http://blogs.technet.com/b/server-cloud/archive/2011/10/14/windows-server-8-standards-based-storage-management.aspx .
The Windows Server 2012 PowerShell Storage cmdlets are used with SMI-S providers as well as native SMP providers.
The previous blog in this series gives an overview of SMI-S . This blog gives you some information about using the EMC SMI-S provider with the storage service.
Learn more about the SNIA’s Storage Management Initiative at http://snia.org/forums/smi .