
This post has been republished via RSS; it originally appeared at: Skype for Business Blog articles.
First published on TECHNET on May 11, 2016Author; Korneel Bullens , Senior Customer Engineering Architect, Skype for Business
References;
Planning for Cloud Connector Edition - https://technet.microsoft.com/en-us/library/mt605227.aspx
Configuring Cloud Connector Edition - https://technet.microsoft.com/en-us/library/mt605228.aspx
Hardware Used;
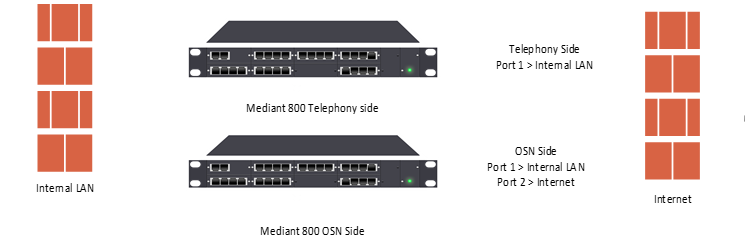
- Audiocodes Mediant 800 with integrated OSN
- OSN Hardware
- 32 GB of memory
- Core I7 5859EQ
- Dual network connections
- 512 GB SSD
Prerequisites;
- Windows Server 2012 R2 installed on the OSN with the latest updates (Standard or Datacenter)
- Note: If Standard Edition is used, 2 licenses are needed to license all 4 virtual machines
- Hyper-V enabled on the OS
- A copy of the Server 2012 R2 ISO is available on the machine
- Office 365 with Cloud PBX is available
- Active Directory with ADFS and AADSYNC enabled
-
7 IP addresses in the Internal LAN Range
- 2 of the internal Ip addresses must have internet access (Host IP & Sysprep IP)
- 1 external IP address
- 1 external certificate with *.sipdomain & sip.sipdomain
Environment
Internal IP Addresses
| IP Address | Host | Subnet Mask | Gateway | DNS Server |
| 172.16.50.150 | CCE OSN | 255.255.255.0 | 172.16.50.250 | 172.16.50.1 |
| 172.16.50.151 | CMS | 255.255.255.0 | 172.16.50.250 | 172.16.50.1 |
| 172.16.50.152 | Edge | 255.255.255.0 | 172.16.50.250 | 172.16.50.1 |
| 172.16.50.153 | Mediation | 255.255.255.0 | 172.16.50.250 | 172.16.50.1 |
| 172.16.50.154 | DC | 255.255.255.0 | 172.16.50.250 | 172.16.50.1 |
| 172.16.50.155 | BaseVMIP | 255.255.255.0 | 172.16.50.250 | 172.16.50.1 |
| 172.16.50.156 | Gateway | 255.255.255.0 | 172.16.50.250 | 172.16.50.1 |
External IP Addresses
| IP Address | Host | Subnet Mask | Gateway | DNS Server | External DNS Name |
| 185.92.71.252 | Edge | 255.255.255.248 | 185.92.71.249 | 172.16.50.1 | Ap.korneel.nl |
Users
| Name | Username | SIP Address | External Phone Number | IP Phone |
| Korneel Bullens | Kbullens | kbullens@korneel.nl | +31305001484 | 12345 |
Domains in use
Korneelb.onmicrosoft.com as the tenant
Korneel.nl as the SIP domain
Additional Servers
Domain Controller
ADFS Server that also runs AADSync
Preparing the environment
Before installing the OSN as a smaller Cloud Connector, perform the following tasks
-
On the OSN, create 2 network adapters in Hyper-V.
- Network adapter 1 must be named “Internal” and must be connected to the Internal LAN, and select “allow management operating system to share this network adapter”.
- Network adapter 2 must be named “External” and must be connected to the External LAN. Allow management operating system to share this network adapter must NOT be selected
- There is a third network adapter, which is an internal loopback adapter to the gateway. This adapter must be disabled
-
On the OSN, make sure the latest updates are installed and applied, and Hyper-V is enabled.
- Verify internet connectivity on the OSN and verify the gateway can be reached
- Verify the correct ports are opened as per the planning guide for Cloud Connector
- Verify the entire disk on the OSN is assigned to C
-
On your AD environment verify that
- Active Directory is installed
- ADFS and AADSYNC is installed and configured correctly
- A tenant is enabled for Cloud PBX and a vanity domain is enabled.
Installing Cloud Connector Edition
From the cloud connector download page, download the latest version of Cloud Connector at https://www.microsoft.com/en-us/download/details.aspx?id=51693
After installing Cloud Connector Edition, this will enable a set of PowerShell scripts.
Create a new directory called “CCE” on the Root folder of C, and a sub folder called Site inside CCE
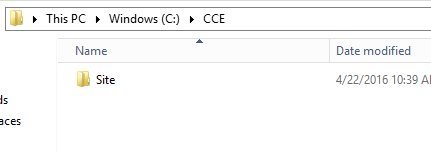
In this setup we will not create a HA environment so the Site directory does not have to be shared. In a HA environment, we will share the site directory between the different CCE hosts.
To make sure the installation ends up in the pre-configured directories, we have to set the site and appliance directory;
Open PowerShell as an administrator and run the following cmdlets;
- Set-CcSitedDirectory “c:\cce\site”
- Set-CcApplianceDirectory “c:\cce”
Place the Server 2012 R2 ISO and the Certificate for the Edge Server inside the Appliance Directory, in our case, that is c:\cce
After the ISO is copied, the certificate path must be set with
- Set-CcExternalCertificateFilePath –path c:\cce\wildcard.pfx
We are now ready to start the CC Download with
- Start-CcDownload
You can check the progress of the download with Get-CcDownloadProgress
After the download is complete, run the cmdlet
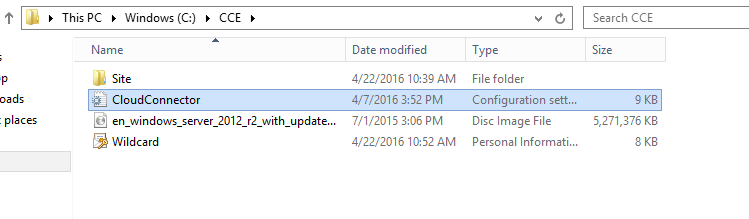
- Export-CcConfigurationSampleFile
This will export a sample of the configuration file. Go to the CCE Appliance directory and rename it to CloudConnector.INI - your appliance directory should now look like this:
Open and edit the CloudConnector.ini file with your settings. While the complete INI must match your environment, the following values are of special attention
-
IP Prefix Lengths (Corpnet and InternetIP);
- make sure to use the correct prefix lengths. Use a subnet calculator if necessary
-
CorpnetSwitchname
- This should contain the name of Hyper-V Virtual Switch name you use for internal traffic, in our example “Internal”
-
InternetSwitchName
- This should contain the Hyper-V Virtual Switch name you use for your Internet facing traffic. In our example “External”
-
BaseVMIP
- This is the IP address used to create the BaseVM. This IP must allow the virtual machine full internet access
-
CorpnetDefaultGateway
- This gateway is not necessary for the functionality of Cloud Connector, however, this gateway is used during the preparation of the BaseVM to provide it internet access so it must be provided for the BaseVM creation. Note that the BaseVM will be recreated if updates are to be applied to Cloud Connector, so we recommend to whitelist the BaseVM IP for Internet Access
-
CorpNetDNSIPAddress
- This DNS Server is used for the internal machines as well as the BaseVM to resolve DNS queries. While CCE does not have to be registered in the internal DNS, during the BaseVM creation the BaseVM needs DNS Server Access to query the Windows Update Servers
-
ManagementSwitch/IP/Subnet
- This management switch is used during installation. After installation, this switch si automatically deleted. You should pick IP information here that is different from the production IP information such as the Internal LAN
-
ExternalMRPublicIPs
- Only complete this if you are using NAT. if not using NAT, leave this empty
Now that the INI file is complete, it is time to start creating the BaseVHD.
Run the following cmdlet to start converting the ISO to a BaseVHD
- Convert-CcIsoToVhdx –IsoFilePath c:\cce\Windows_Server_2012R2.iso
After about 2.5 to 3 hours (depending on your internet connection) the total installation will be complete.
You can now run the installation PowerShell cmdlet;
- Install-CcInstance –HardwareType minimum
After the installation, it is recommended to validate that all Skype for Business related services are running on the virtual machines
Configuring Office 365
Connect to Skype for Business online using the following cmdlets in an administrative powershell;
- Import-Module skypeonlineconnector
- $cred = Get-Credential
- Enter your admin credentials of your Office 365 Tenant
- $Session = New-CsOnlineSession -Credential $cred –Verbose
- Import-PSSession $session –allowClobber
First, we set up the Tenant for Hybrid Voice via Cloud Connector by running the following cmdlets;
- Set-CsTenantHybridConfiguration -PeerDestination <External Access Edge FQDN> -UseOnPremDialPlan $false
- Set-CsTenantFederationConfiguration -SharedSipAddressSpace $True
Now enable the user for Enterprise Voice;
- Set-CsUser –identity kbullens@korneel.nl –EnterpriseVocieEnabled $true –HostedVoicemail $true –OnPremlineURI tel:+31305001484
You have now enabled the User to receive incoming calls and make outbound calls.
You'll need to decide whether your users should be able to make international calls. By default, international calling is enabled. You can disable or enable users for international dialing using the online Skype for Business admin center.
To disable international calling on a per user basis, run the following cmdlet in Skype for Business Online PowerShell:
- Grant-CsVoiceRoutingPolicy -PolicyName InternationalCallDisallowed -Identity $user
To re-enable international calling on a per user basis after it has been disabled, run the same cmdlet, but change the value for PolicyName to InternationalCallsAllowed .
To complete setup of voice mail for users, do the following:
- Check whether a dial plan named BusinessVoice_8D_DialPlan already exisits by running the following cmdlet: Get-CsOnlineUMDialplan | Select Identity
- If the dial plan doesn't exist, create it by running the following cmdlet:
New-CsOnlineUMDialplan -Identity BusinessVoice_8D_DialPlan -CountryOrRegionCode 1 -NumberOfDigitsInExtension 8
|
|
| After creating dial plan, wait five minutes to allow for changes to be replicated before enabling users. |
3. Enable users for UM Mailbox by running the following cmdlet:
Get-CsOnlineUser –identity kbullens@korneel.nl |Enable-CsOnlineUmMailbox
And you are all set! We hope you have enjoyed this post.