This post has been republished via RSS; it originally appeared at: Core Infrastructure and Security Blog articles.
First published on MSDN on Mar 24, 2017Installation of the MIM WAL can sometimes be problematic especially if you are just getting started or even just an armature developer. The objective of this post is to:
1. ) Help in the collection of all files needed to compile the Workflow Activity Library
2.) Prepare solution to be compiled
3.) Install the Workflow Activity Library
4.) Verify Workflow Activity Library was successfully installed.
Step 1. What is the WAL (Workflow Activity Library
Please review the following resources
The MIMWAL (Custom Workflow Activity Library)
MIMWAL
MIM WAL WIKI
Step 2. Download files needed to compile the Workflow Activity Library
Download latest version of MIM WAL
Download hotfix rollup package (build 4.1.3496.0) is available for Forefront Identity Manager 2010 R2 (Do not download the latest hotfix for this, I know that would make too much sense right but instead download this old one.)
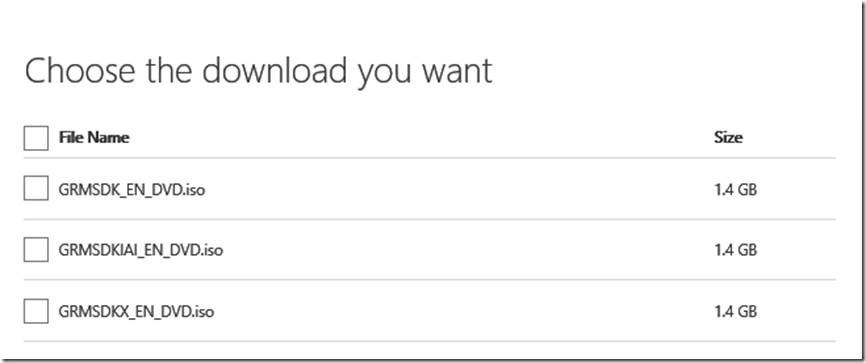
Download Windows SDK

Notice the 3 option
GRMSDK_EN_DVD.iso is x86 version
GRMSDKX_EN_DVD.iso is AMD64 version
GRMSDKIAI_EN_DVD.iso is itanium version
Note: Below section was updated to reflect the correct .msp files Thank you Dan Lowe (HBF) for the call out.
Step 2. Extract files from MIM hotfix
Navigate to the folder where the Extracted Hotfix files are located and find the file Fimservice_x64_kb2906832.msp
if 7-zip is installed on your machine Right click on the file Fimservice_x64_kb2906832.msp and click on 7-Zip and select Extract files
In the Extract to window enter the destination of the extracted files.
Now lets verify files have been extracted.
Navigate to the destination where you set the extraction location.
Locate the file MSDN.cab
Now click on this file
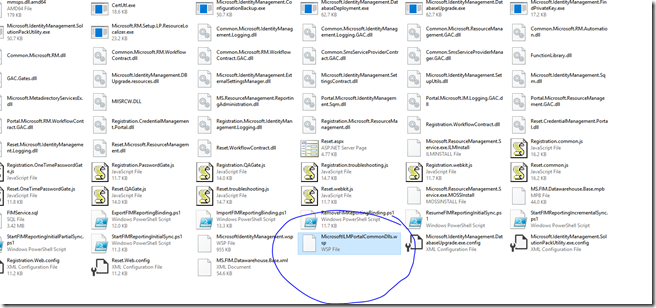
Locate the wsp file MicrosoftILMPortalCommonDlls.wsp

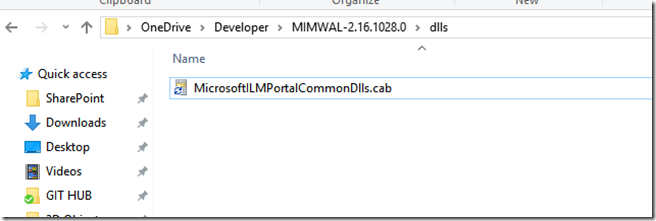
Right click the wsp file and click on Extract and extract it to a specified location
This now click on the extracted file which looks alot like the file you just clicked on to extract from

Rename this file to MicrosoftILMPortalCommonDlls.wsp

when you open up this file you will see

Locate the following files
- Microsoft.IdentityManagement.WebUI.Controls.dll
- Microsoft.IdentityManagement.WFExtensionInterfaces.dll
- Microsoft.ResourceManagement.dll
- Microsoft.ResourceManagement.WorkflowContract.dll

Copy those files to a location you will easily be able to find.
If your not already logged into the server that host the FIM / MIM Service log into the server open up Powershell
type in the following command
cd C:\Windows\assembly\GAC_MSIL\System.Management.Automation\1.0.0.0__31bf3856ad364e35
Then enter the following cmd
copy .\System.Management.Automation.dll <enter path to location where you have the other .dlls>
or you could just navigate to the source and copy it but this file may be hidden in your environment depending on your settings.
Before we continue we need to get the gacutil.exe and the sn.exe
Locate the file GRMSDK_EN_DVD.iso or which ever version you downloaded earlier
Extract the files
open the Extracted files navigate to the folder "Setup"
Open the Setup Folder
Locate the folder "WinSDKNetFxTools"
Open the "WinSDKNetFxTools" and locate the file cab1.cab
Open the cab1.cab file
There will be a bunch of files locate the following 2 files, be sure to get the correct files as a few files are named very similar
FL_gacutil_exe_30517_x86_enu
FL_sn_exe_24885_x86_enu
copy these files to the location where you copied the previously downloaded .DLLs
Rename these files
Rename FL_gacutil_exe_30517_x86_enu to gacutil.exe
Rename FL_sn_exe_24885_x86_enu to sn.exe
now that we have the files needed lets get ready to compile it.
Please continue to MIM WAL–Installation Guide Part 2
