This post has been republished via RSS; it originally appeared at: New blog articles in Microsoft Tech Community.
Integrate Azure Sphere with Azure IoT Central
Follow me on Twitter @dglover
| Author | Dave Glover, Microsoft Cloud Developer Advocate |
|---|---|
| Target Platform | Seeed Studio Azure Sphere MT3620 |
| Target Service | Azure IoT Central |
| Developer Platform | Windows 10 or Ubuntu 18.04 |
| Azure SDK | Azure Sphere SDK 19.11 or better |
| Developer Tools | Visual Studio (The free Community Edition or better) or Visual Studio Code (Free OSS) |
| Hardware | Seeed Studio Grove Shield, and the Grove Temperature and Humidity Sensor (SHT31) |
| Source Code | https://github.com/gloveboxes/Create-a-Secure-IoT-Solution-with-Azphere-Sphere-and-and-Azure-IoT-Central |
| Language | C |
| Date | As of January, 2020 |
Introduction to Azure Sphere Development
What you will learn
You will learn how to build an Azure Sphere application that integrates with Azure IoT Central. This includes support for displaying telemetry, controlling the device state using IoT Central Settings (Azure IoT Hub Device Twins) and Commands (Azure IoT Hub Direct Methods), defining rules to trigger workflows, and a custom dashboard.
If unfamiliar with Azure Sphere development then review the Create a Secure Azure Sphere App using the Grove Shield Sensor Kit tutorial before starting this tutorial.
What is Azure Sphere
Azure Sphere is a secured, high-level application platform with built-in communication and security features for internet-connected devices.
It comprises a secured, connected, crossover microcontroller unit (MCU), a custom high-level Linux-based operating system (OS), and a cloud-based security service that provides continuous, renewable security.
Why Azure Sphere
As billions of new devices are connected, organizations need to secure them to help protect data, privacy, physical safety, and infrastructure. Azure Sphere builds on decades of Microsoft experience in hardware, software, and cloud to provide a turnkey solution for IoT devices. Get defense in depth to embrace IoT innovation with confidence.
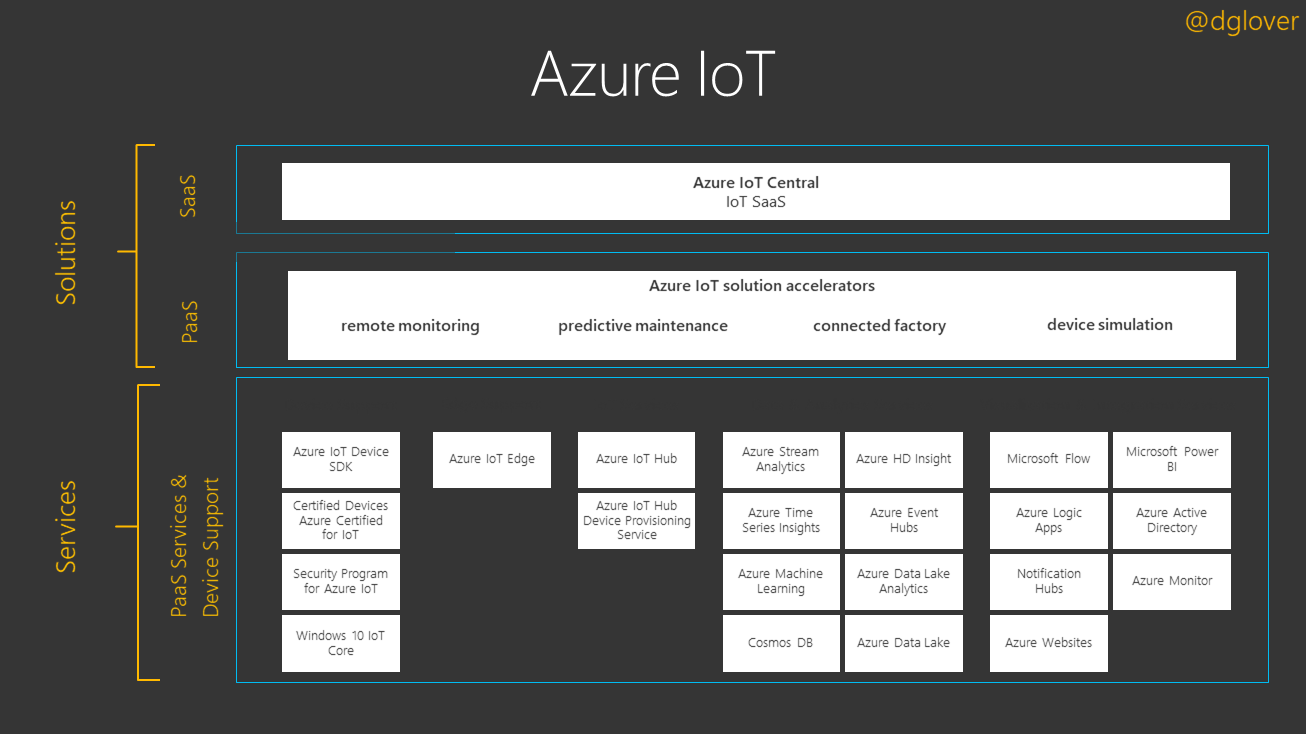
What is Azure IoT Central
Azure IoT Central provides an easy way to connect, monitor and manage your Internet of Things (IoT) assets at scale. Azure IoT Central is a hosted, extensible software as a service (SaaS) platform that simplifies the setup of your IoT solution and helps reduce the burden and costs of IoT management, operations, and development. Provide customers superior products and services while expanding your business possibilities.
Tutorial Overview
- Create an Azure IoT Central Application (Free trial)
- Set up Azure IoT Central to work with Azure Sphere
- Deploy an Azure IoT Central application to Azure Sphere
Clone the following GitHub Repositories
-
The Azure Sphere Samples
git clone https://github.com/Azure/azure-sphere-samples.git -
This tutorial
git clone https://github.com/gloveboxes/Create-a-Secure-IoT-Solution-with-Azphere-Sphere-and-and-Azure-IoT-Central.git
Create an Azure IoT Central Application

We are going to create an Azure IoT Central application, connect Azure IoT Central to an Azure Sphere Tenant, and finally create a device.
-
Open the Azure IoT Central in a new browser tab, then click Getting started.
-
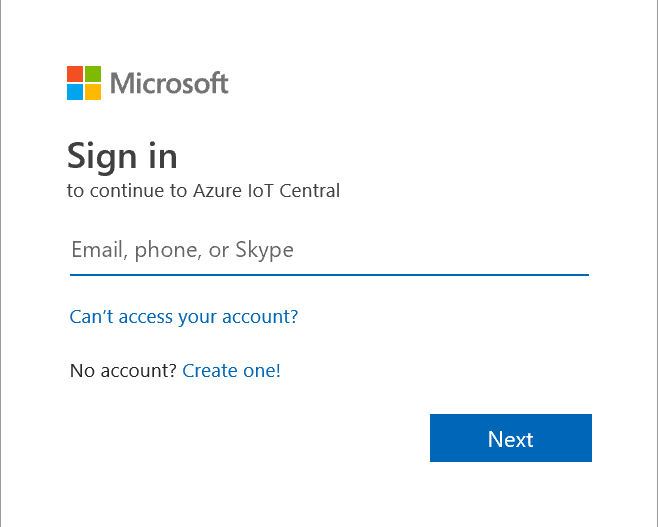
Next, you will need to sign with your Microsoft Personal, or Work, or School account. If you do not have a Microsoft account, then you can create one for free using the Create one! link.
-
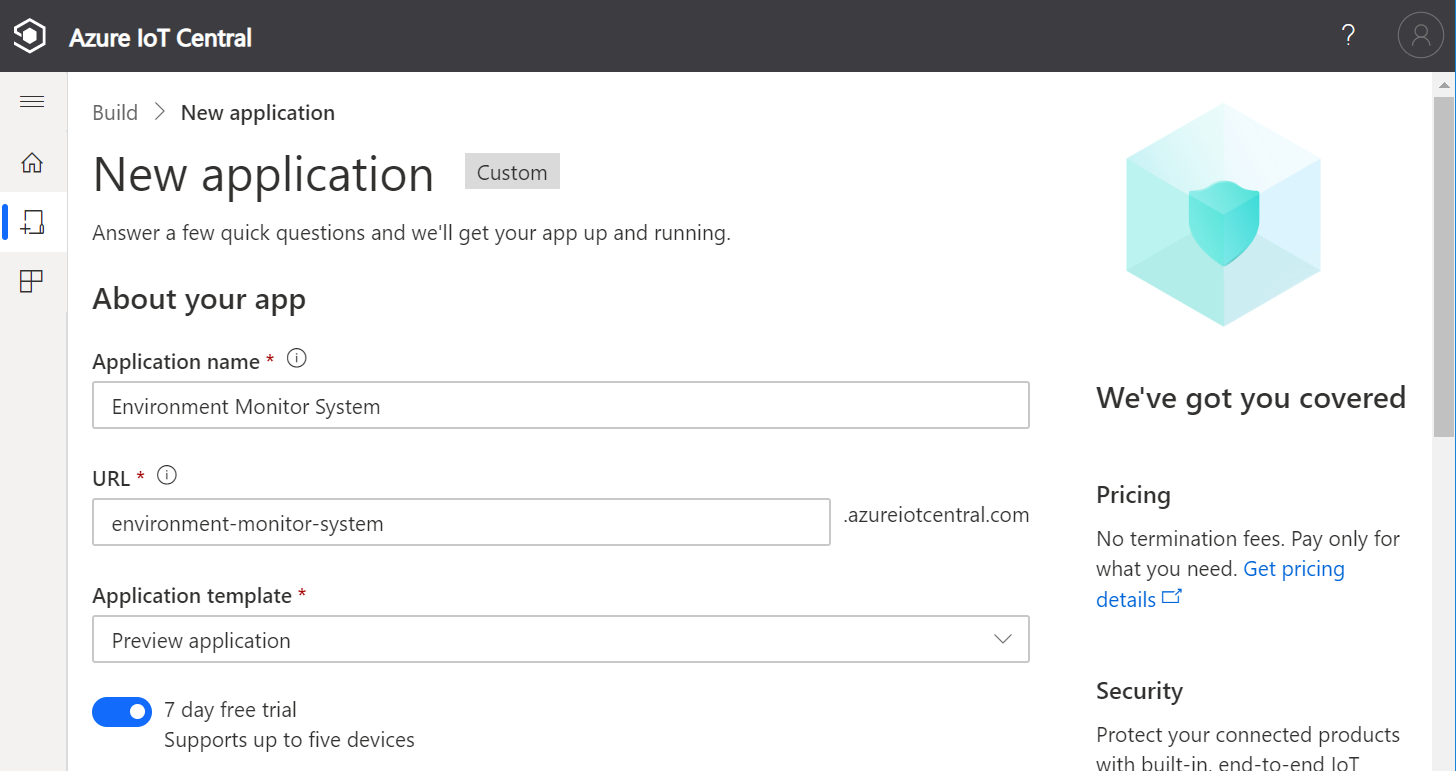
Create a new Azure IoT Central application. Scroll to the bottom of the screen, select Create a custom app. This takes you to the Create Application page.
Create a New application
Specify Application name, URL, enable 7-day free trial, and complete the registration form. Then click Create.
-
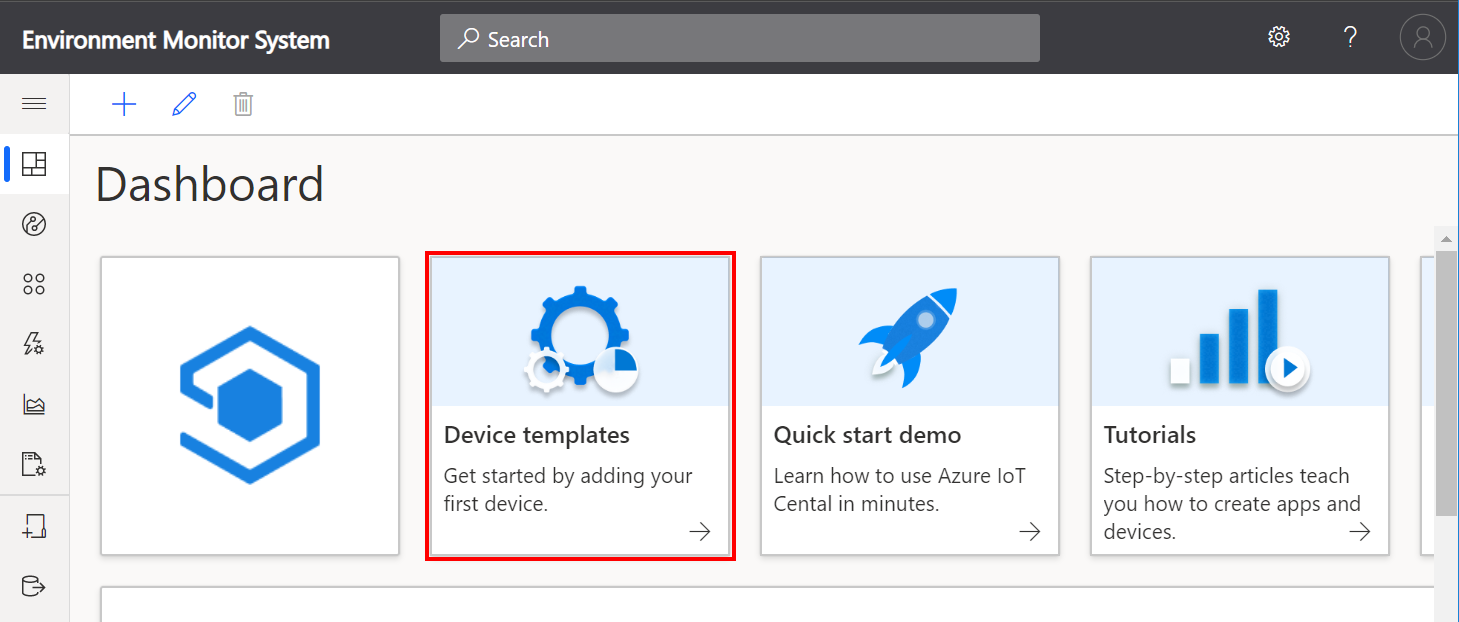
Add new Device Template
Click Device templates
-
Select IoT device template type
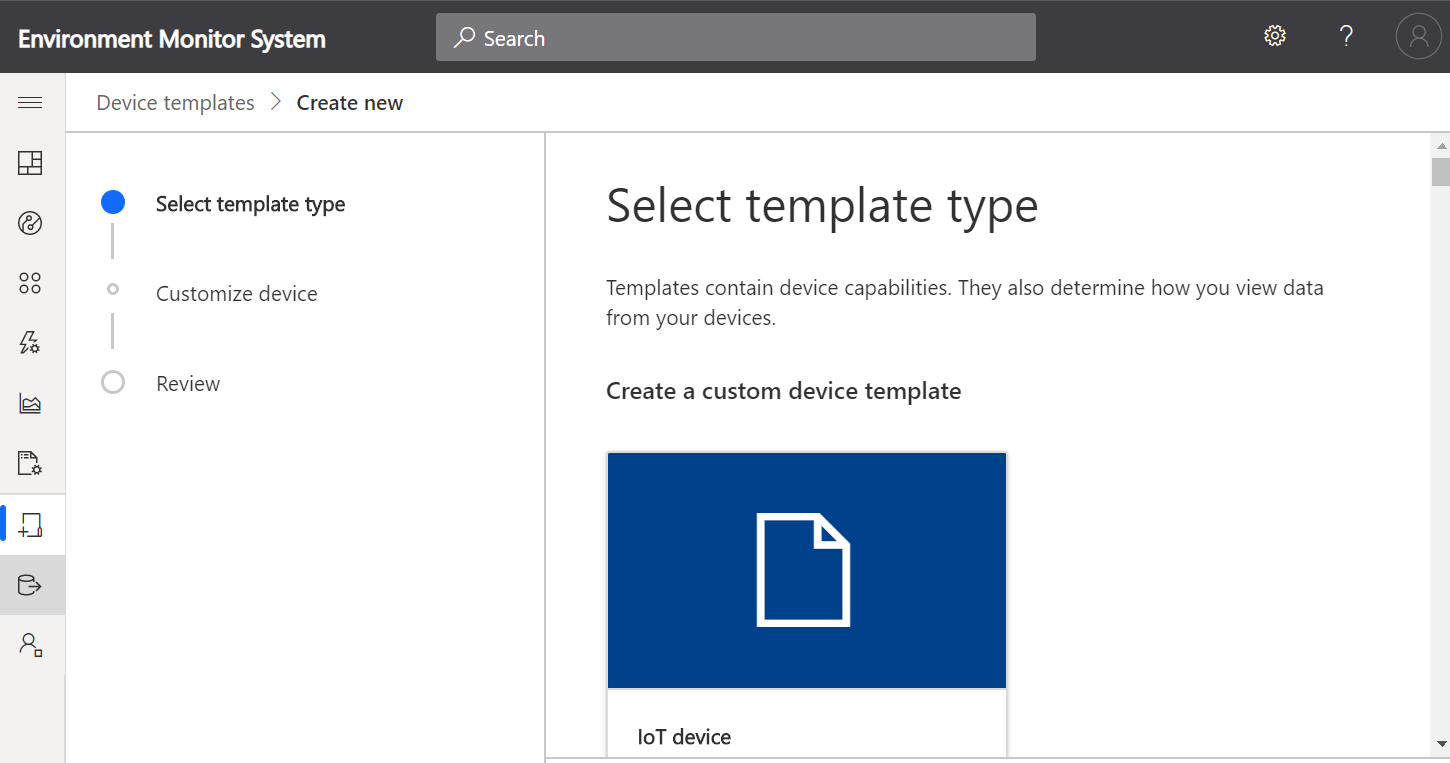
-
Create an IoT Device Template
- Select IoT device,
- Click Next:Customise,
- Click Next: Review,
- Click Create.
- Name your template and press Enter
Create a Capability Model
Add an Interface
- Click Custom,
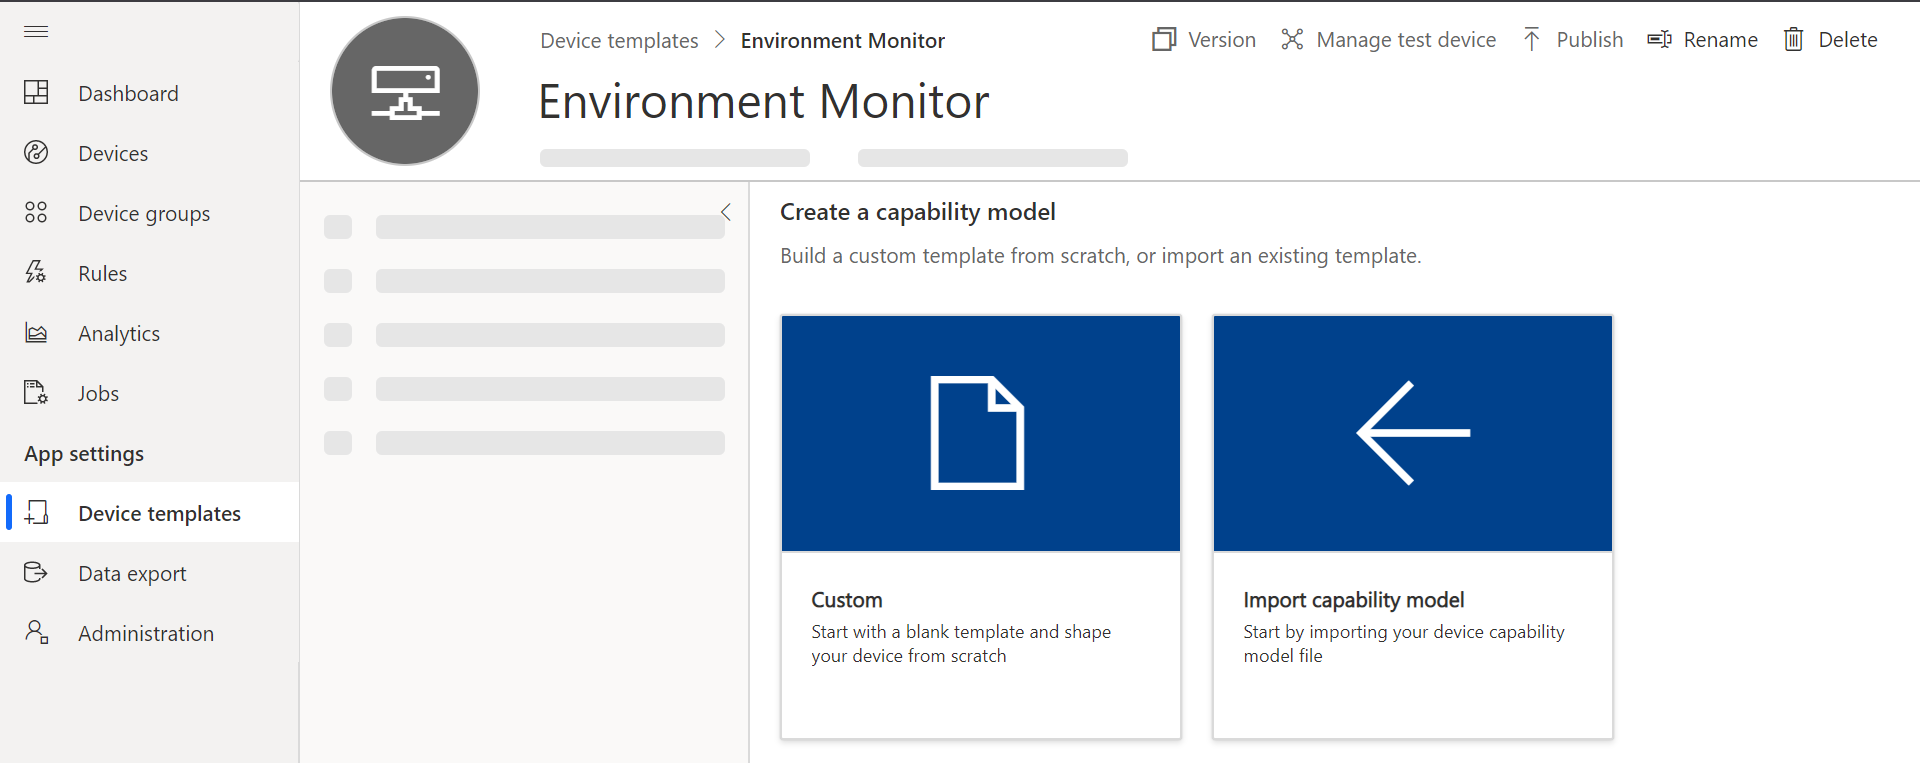
- Click the + Add interface to add an Interface.
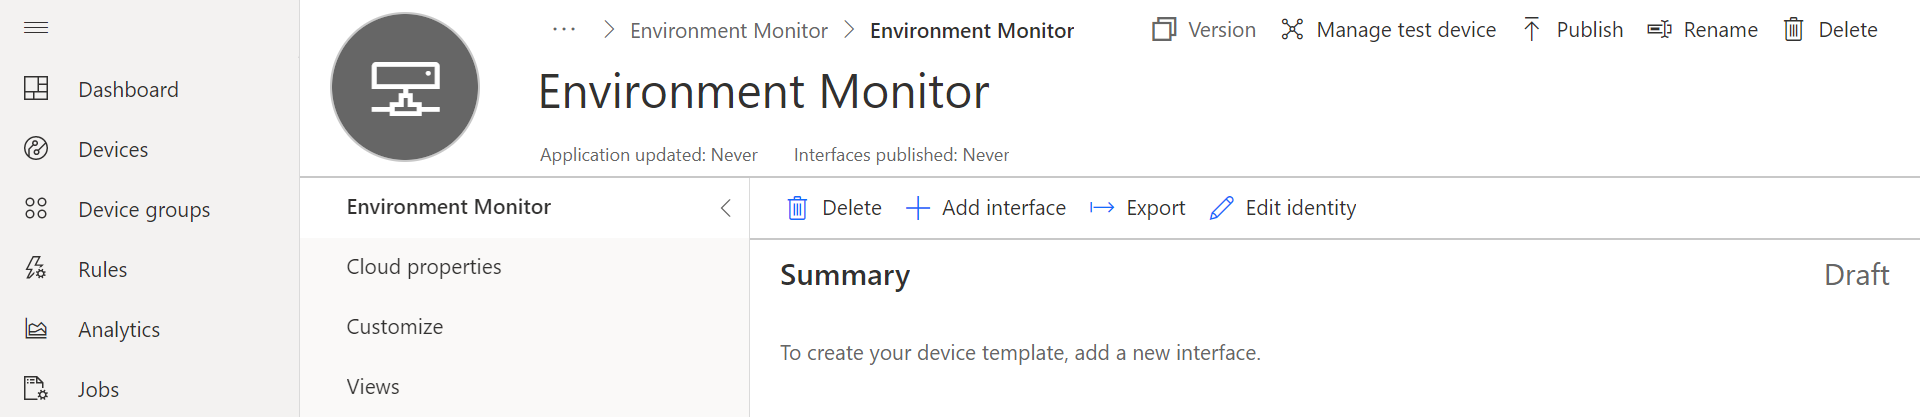
- Choose Custom interface.
Add Capabilities
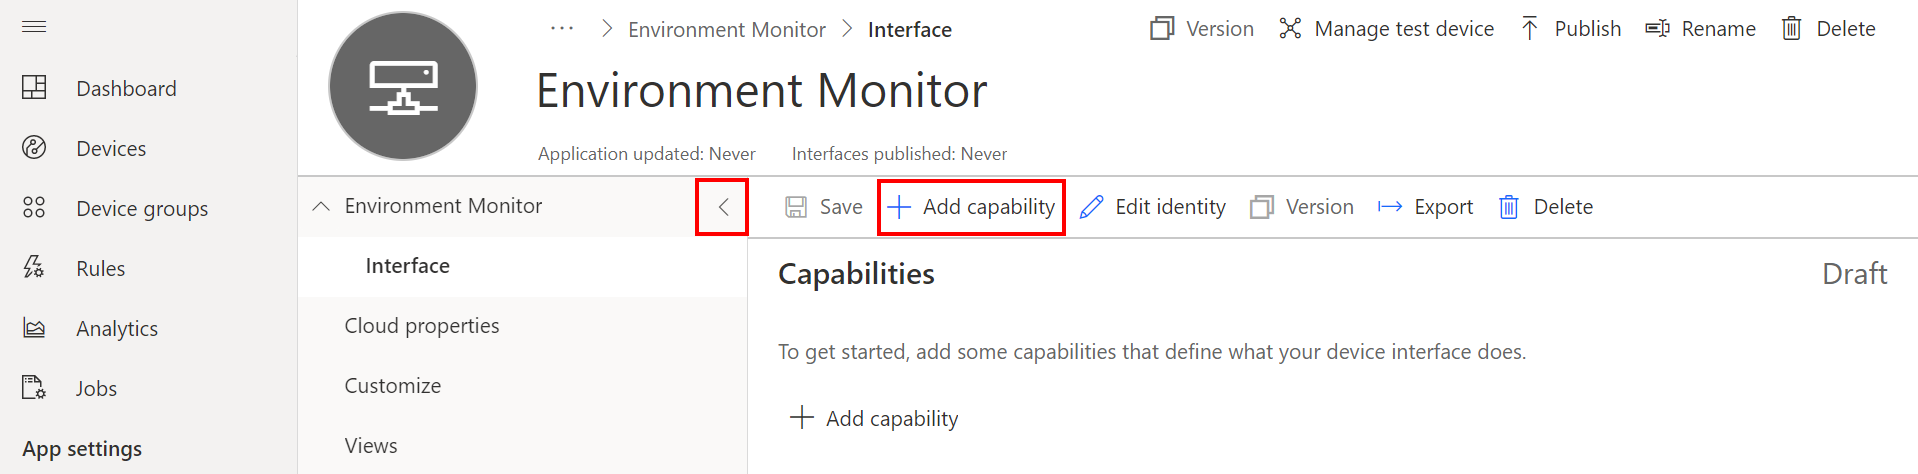
Click < (Collapse) to create more working space.
-
Add Humidity Capability
- Click + to Add capability.
- Add Humidity Telemetry Capability
- Set the Unit to %

-
Click Add Capability and add Temperature Capabilities
- Display name: Temperature
- Name: Temperature
- Semantic type: Temperature
- Units: C
- Display Unit: C
-
Click Save to save the capabilities model.

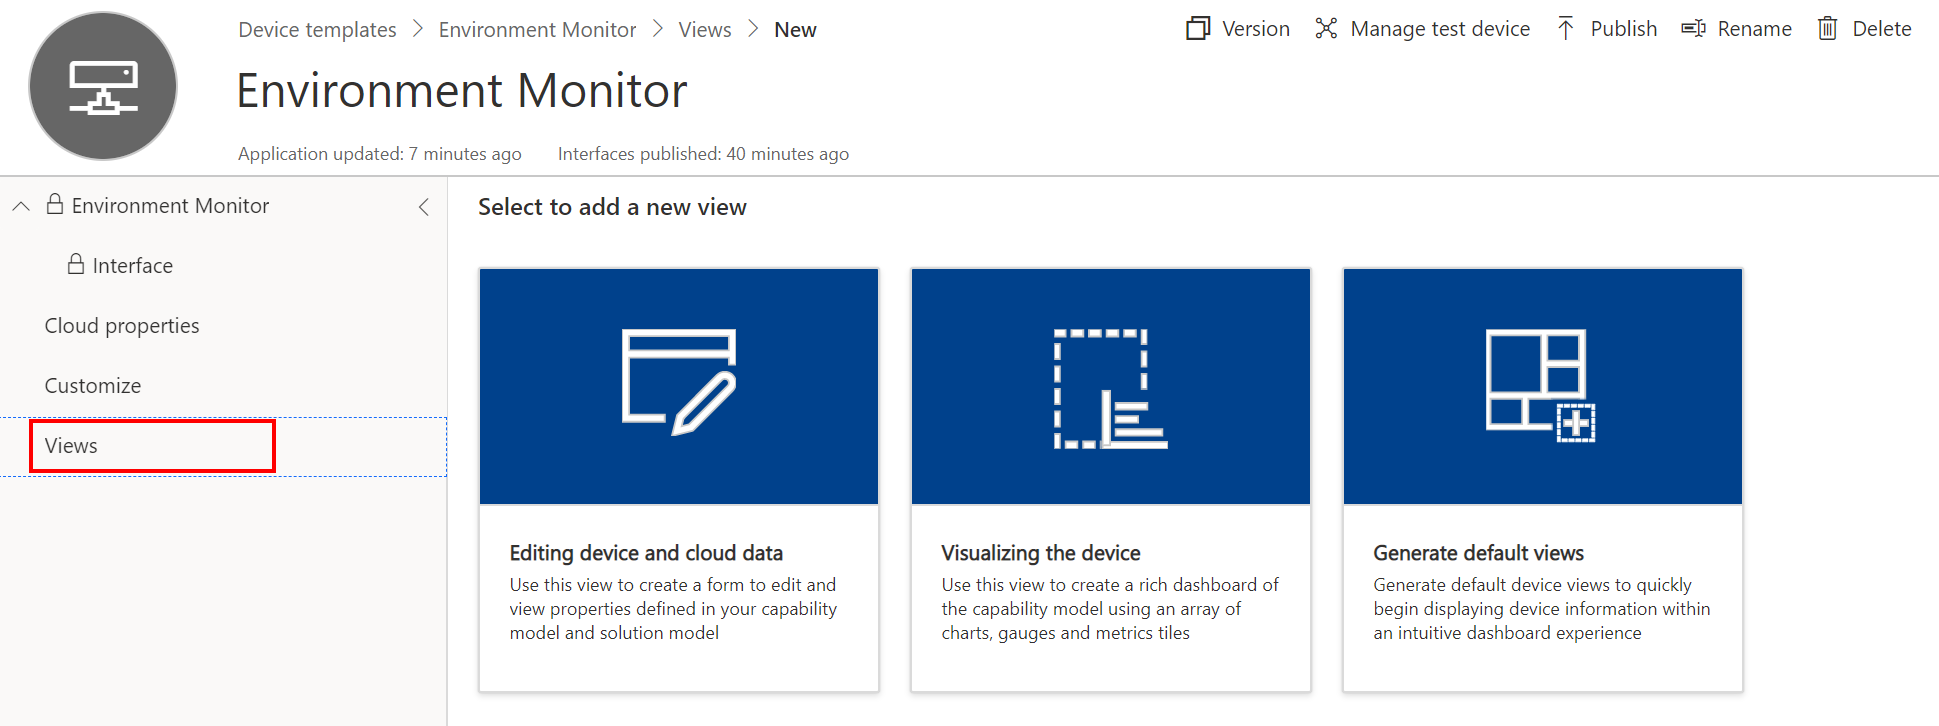
Create a Device Template View
- Click Views
- Click Generate default views
- Click Generate default dashboard view(s)
-
You can customize the default view later.
Publish the Template
Click Publish to activate the template, then click Publish. 
Connect Azure IoT Central to an Azure Azure Sphere Tenant
The Azure Sphere includes out of the box support for Azure IoT Hub and IoT Central.
Follow the complete Set up Azure IoT Central to work with Azure Sphere guide.
In summary, you need to:
- Open an Azure Sphere Developer Command Prompt
- Authenticate
azsphere login - Download the Certificate Authority (CA) certificate for your Azure Sphere tenant
azsphere tenant download-CA-certificate --output CAcertificate.cer - Upload the tenant CA certificate to Azure IoT Central and generate a verification code
- Verify the tenant CA certificate
- Use the validation certificate to verify the tenant identity
Create an Azure Device in Azure IoT Central
From the Azure Sphere Developer Command Prompt, type the following command.
azsphere device show-attached
Note: The Create New Device dialog box in Azure IoT Central requires that the device ID be in lowercase characters. From the Azure Sphere Developer Command Prompt, enter the following command, which gets the ID of the attached device and converts it to lowercase:
powershell -Command ((azsphere device show-attached)[0] -split ': ')[1].ToLower()
Switch back to Azure IoT Central Web Portal
-
Select Devices from the side menu, then the Device Template previously created.

-
Click + New to add a new device
Paste in the device ID you generated with the PowerShell command into the Device ID field and give your device a friendly name.
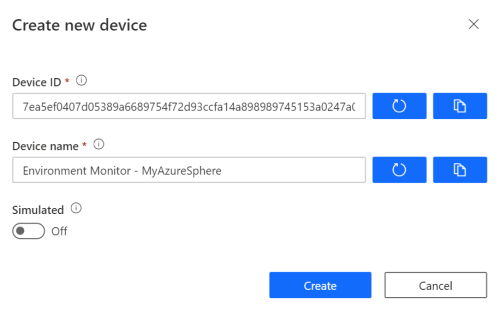
- Click Create to create the new device.
Configure the Azure Sphere Application for Azure IoT Central
Review the Azure IoT Central Sample guide.
Config the Azure Sphere Application
- Open the Create-a-Secure-IoT-Solution-with-Azphere-Sphere-and-and-Azure-IoT-Central solution you cloned with Visual Studio
- Open the app_manifest.json file
- Set the default Azure Sphere Tenant You may need to select the default Azure Sphere Tenant. Use the
azsphere tenant listcommand to list available tenants, use theazsphere tenant select -i <guid>to select the default tenant. -
From the Azure Sphere Developer Command Prompt, issue the following command to get the tenant ID. Copy the returned value and paste it into the DeviceAuthentication field of the app_manifest.json file:
azsphere tenant show-selected -
From the Azure Sphere Developer Command Prompt, change to the azure-sphere-samples\Samples\AzureIoT\Tools folder you previously cloned, and run ShowIoTCentralConfig.exe.
ShowIoTCentralConfigWhen prompted, log in with the credentials you use for Azure IoT Central.
The output of this command will be similar as follows:
Are you using a Work/School account to sign in to your IoT Central Application (Y/N) ? Getting your IoT Central applications You have one IoT Central application 'yourappname-iot-central'. Getting the Device Provisioning Service (DPS) information. Getting a list of IoT Central devices. Find and modify the following lines in your app_manifest.json: "CmdArgs": [ "0ne9992KK6D" ], "AllowedConnections": [ "global.azure-devices-provisioning.net", "saas-iothub-9999999-f33a-4002-4444-7ca8989898989.azure-devices.net" ], "DeviceAuthentication": "--- YOUR AZURE SPHERE TENANT ID--- ", -
Copy the information from the output into the appmanifest.json file in Visual Studio. You *appmanifest.json* file will look similar to the following:
{
"SchemaVersion": 1,
"Name": "AzureSphereBlink1",
"ComponentId": "a3ca0929-5f46-42b0-91ba-d5de1222da86",
"EntryPoint": "/bin/app",
"CmdArgs": [ "0ne9992KK6D" ],
"Capabilities": {
    "Gpio": [ 9 ],
    "Uart": [ "ISU0" ],
    "AllowedConnections": [ "global.azure-devices-provisioning.net", "saas-iothub-9999999-f33a-4002-4444-7ca8989898989.azure-devices.net" ],
    "DeviceAuthentication": "999x999xeb-e021-43ce-8gh8-8k9lp888494"
},
"ApplicationType": "Default"
}
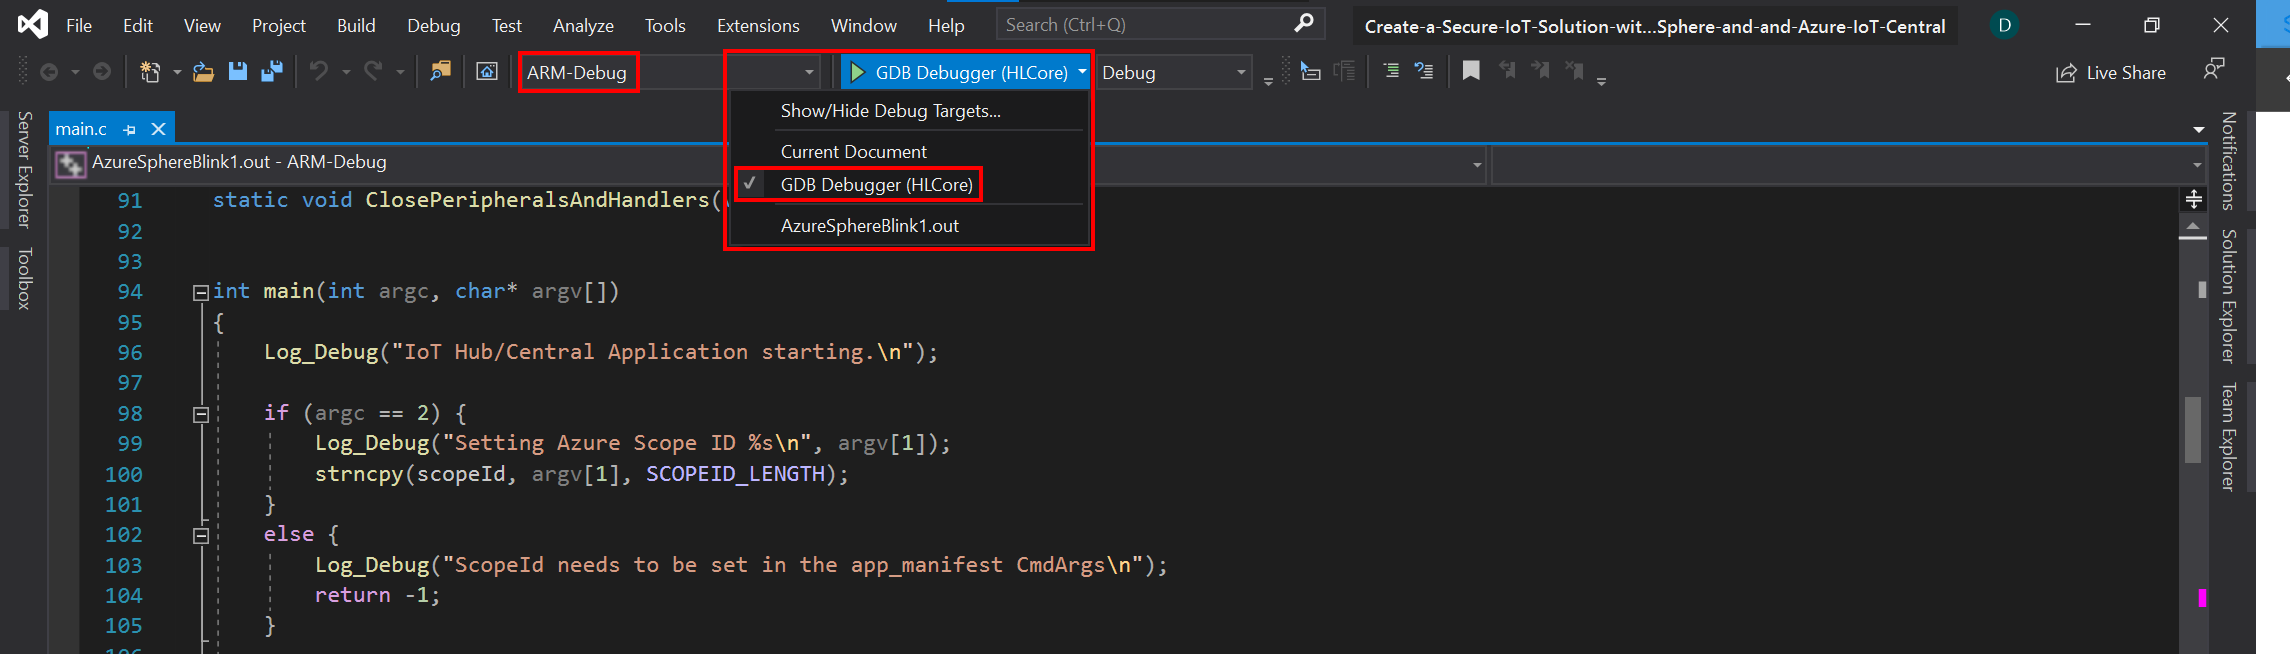
Configure Visual Studio App Deployment Settings
Before building the application with Visual Studio ensure ARM-Debug and GDB Debugger (HLCore) options are selected.
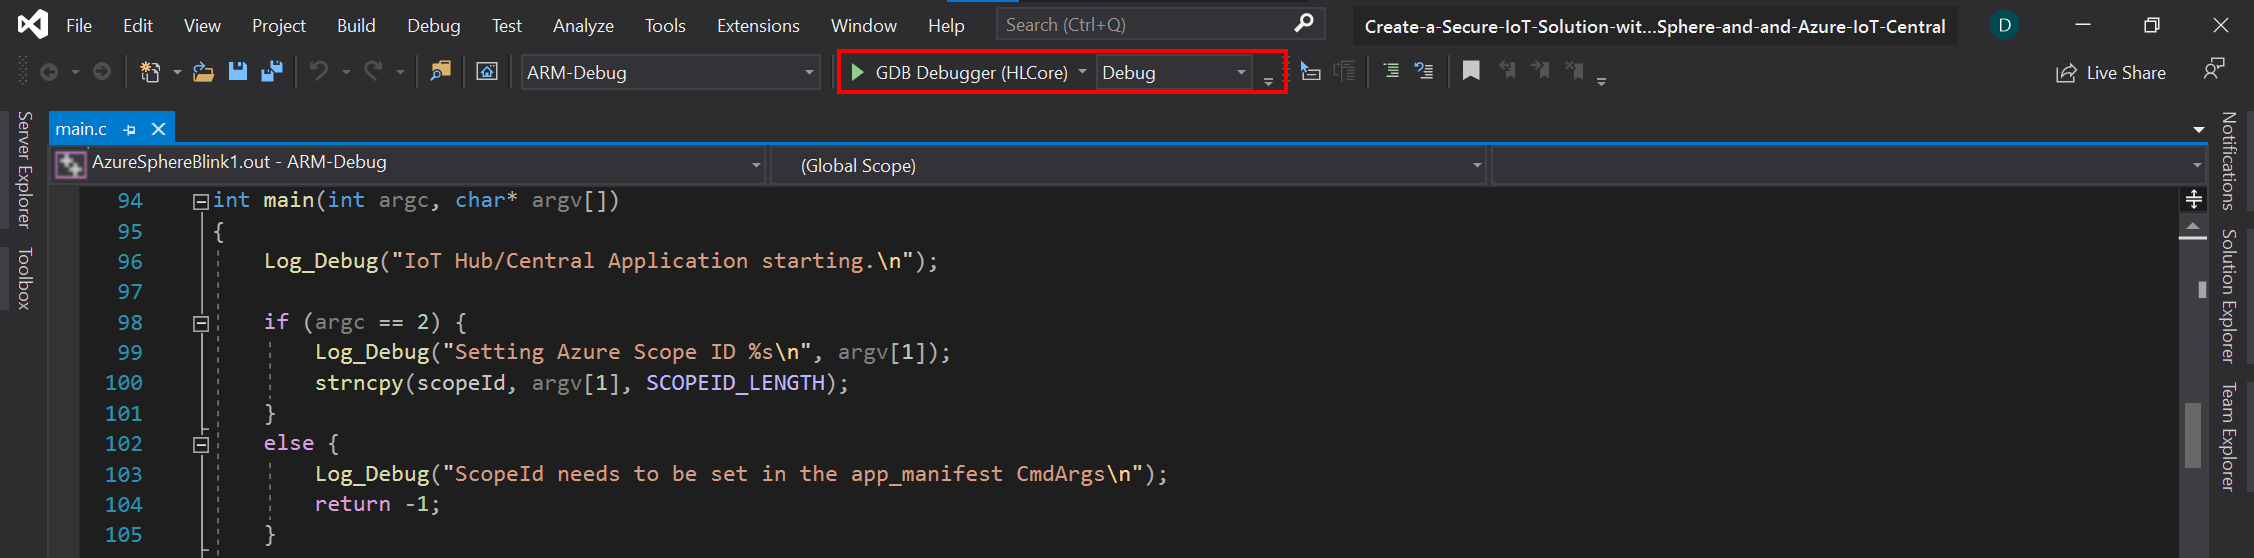
Build, Deploy, and start Debugging
To start the build, deploy, debug process either click the Visual Studio Start Selected Item icon or press F5. To Build and deploy without attaching the debugger, simply press Ctrl+F5.
Azure IoT Central Integration
Now the application is running on the Azure Sphere switch across to Azure IoT Central, select the Devices tab, the device template you created, then the actual device. You may have to wait a moment before the telemetry is displayed in the Measurements panel.

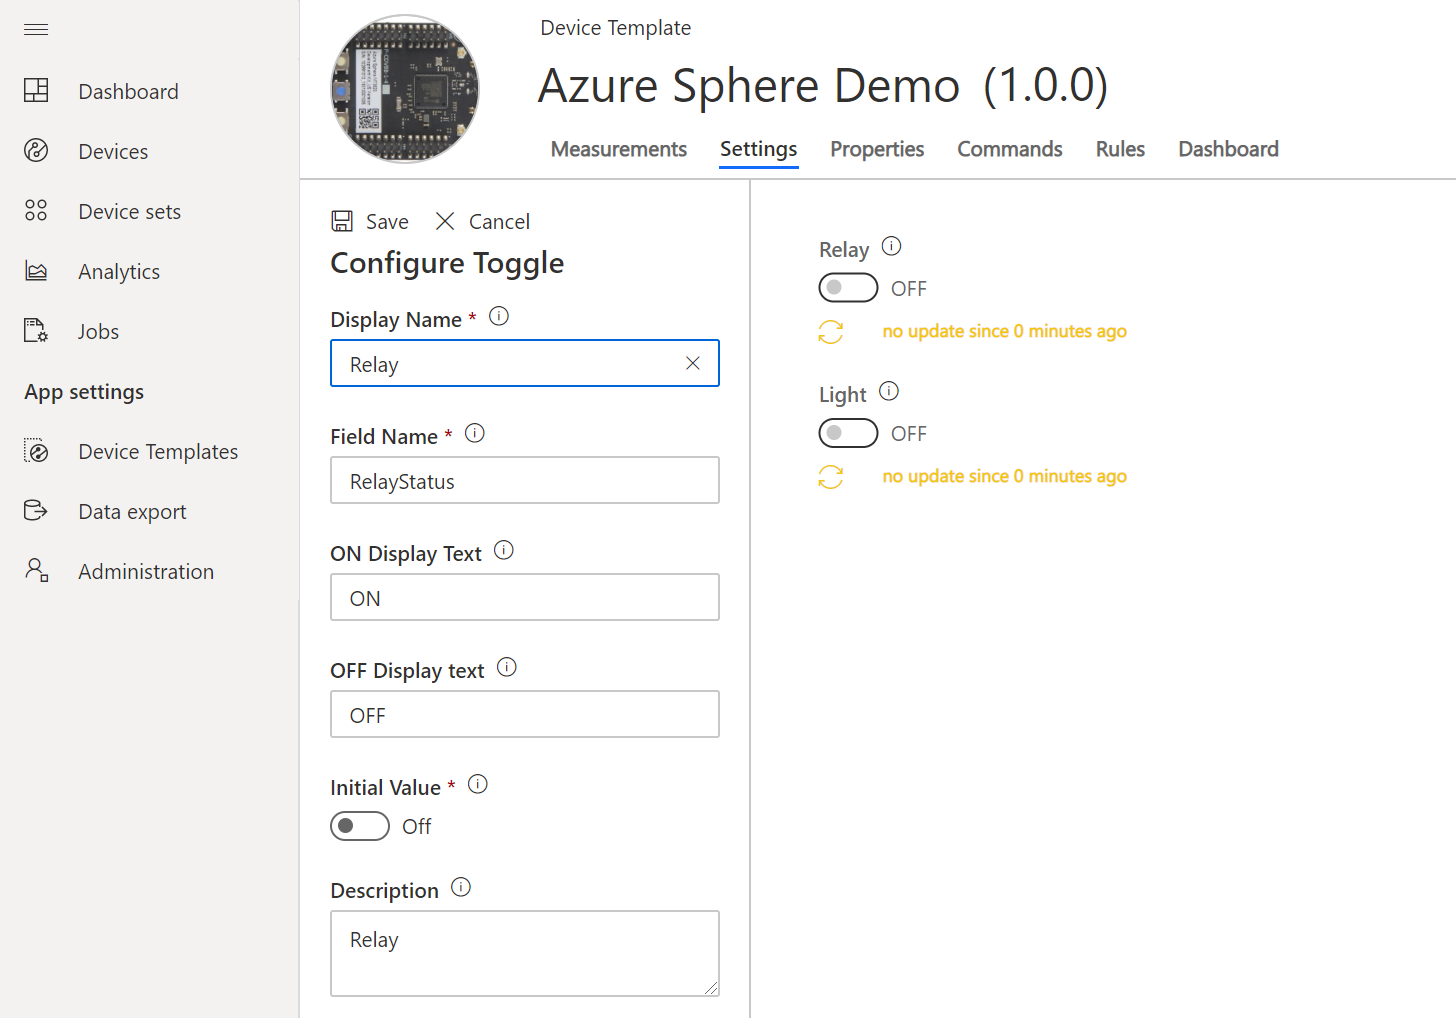
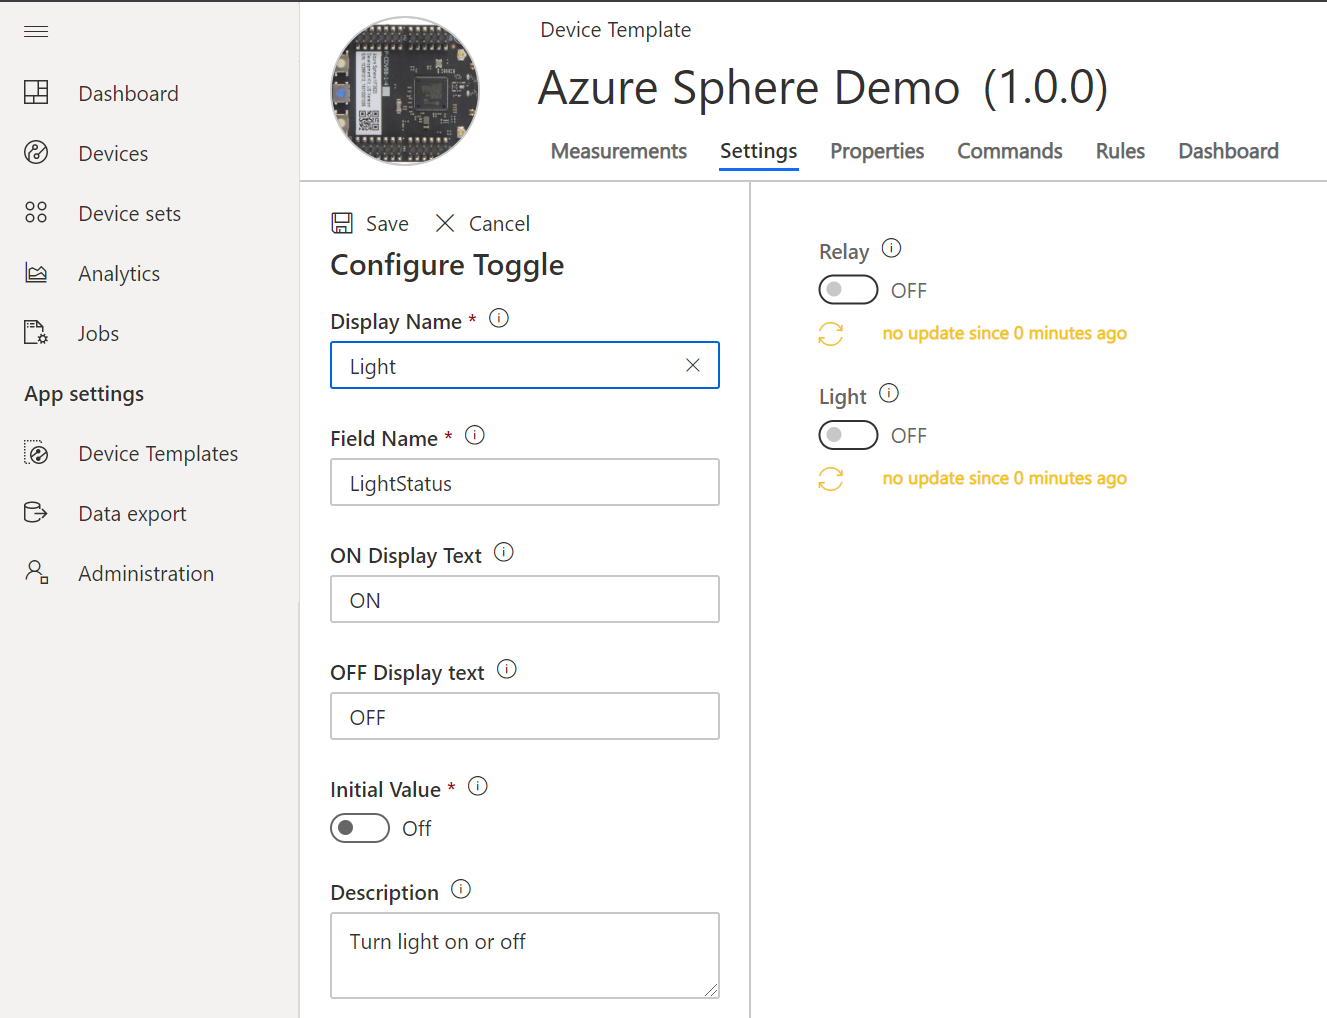
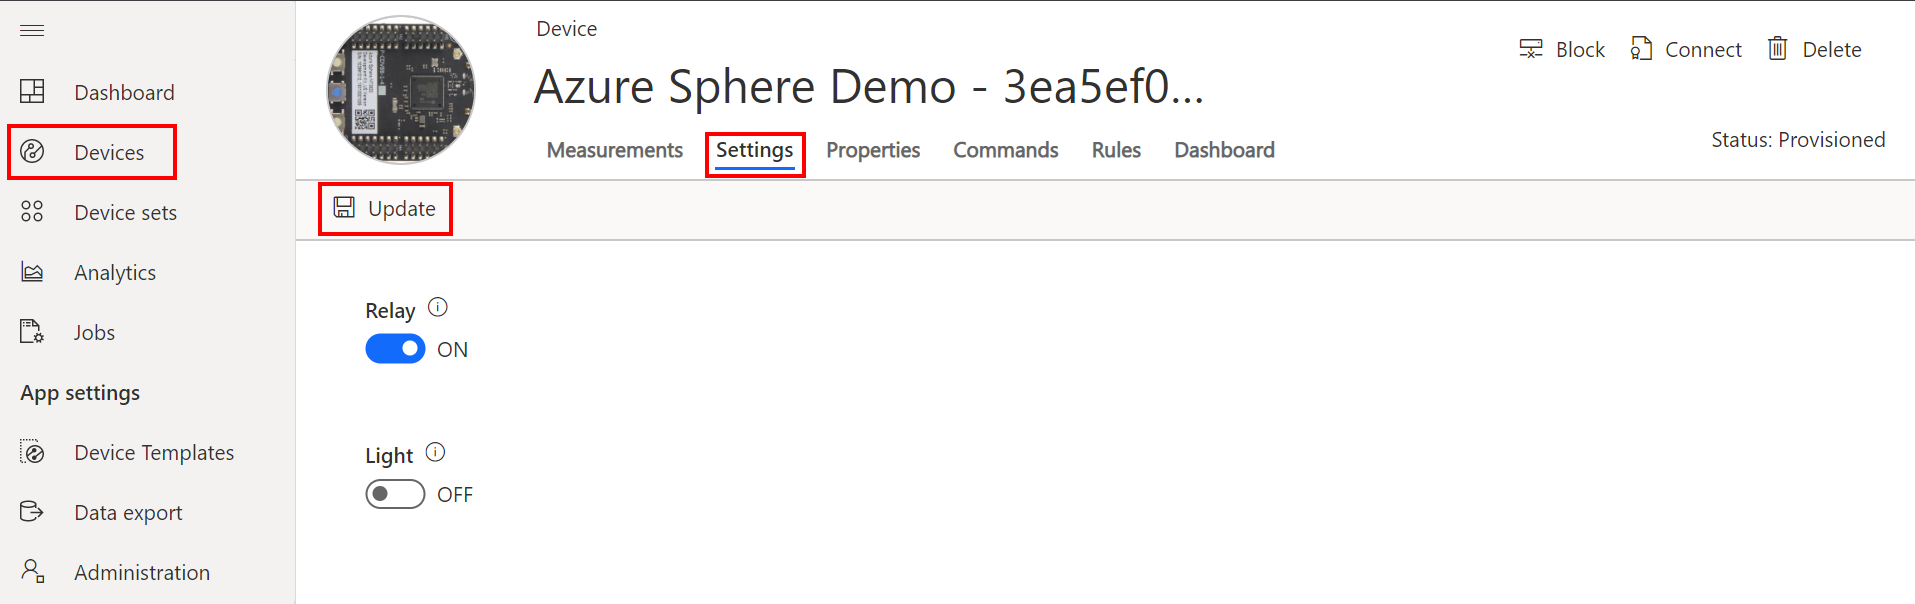
Azure IoT Central Settings
To work with settings you will need to update the Device Template and add settings for Light and Relay. See the Appendix.
Switch to the settings tab on Azure IoT Central and change the toggle state and click update and observe an LED on the Azure Sphere will toggle between on and off.
Finished 完了 fertig finito ख़त्म होना terminado
Congratulations you have finished the tutorial.

Appendix
Understanding Tutorial Solution
From Visual Studio, open the main.c.
Review the following functions.
- InitPeripheralsAndHandlers
- GetTelemetry
- TwinCallback
- AzureDirectMethodHandler
InitPeripheralsAndHandlers
Sets up SIGTERM termination handler, initialize peripherals, and set up event handlers.
static int InitPeripheralsAndHandlers(void)
{
    struct sigaction action;
    memset(&action, 0, sizeof(struct sigaction));
    action.sa_handler = TerminationHandler;
    sigaction(SIGTERM, &action, NULL);

    epollFd = CreateEpollFd();
    if (epollFd < 0) {
        return -1;
    }

    OpenPeripheral(&sending);
    OpenPeripheral(&relay);
    OpenPeripheral(&light);

    // Initialize Grove Shield and Grove Temperature and Humidity Sensor
    GroveShield_Initialize(&i2cFd, 115200);
    sht31 = GroveTempHumiSHT31_Open(i2cFd);

    StartTimer(&iotClientDoWork);
    StartTimer(&iotClientMeasureSensor);

    return 0;
}
GetTelemetry
Reads sensor telemetry and returns the data as a JSON object.
static int ReadTelemetry(char eventBuffer[], size_t len) {
    GroveTempHumiSHT31_Read(sht31);
    float temperature = GroveTempHumiSHT31_GetTemperature(sht31);
    float humidity = GroveTempHumiSHT31_GetHumidity(sht31);

    static const char* EventMsgTemplate = "{ \"Temperature\": \"%3.2f\", \"Humidity\": \"%3.1f\", \"MsgId\":%d }";
    return snprintf(eventBuffer, len, EventMsgTemplate, temperature, humidity, msgId++);
}
TwinCallback
Handles Azure IoT Hub Device Twins.
In Azure IoT Central, Azure IoT Hub Device Twins are exposed in the user interface as Settings.

static void TwinCallback(DEVICE_TWIN_UPDATE_STATE updateState, const unsigned char* payload,
    size_t payloadSize, void* userContextCallback)
{
    JSON_Value* root_value = NULL;
    JSON_Object* root_object = NULL;

    char* payLoadString = (char*)malloc(payloadSize + 1);
    if (payLoadString == NULL) {
        goto cleanup;
    }

    memcpy(payLoadString, payload, payloadSize);
    payLoadString[payloadSize] = 0; //null terminate string

    root_value = json_parse_string(payLoadString);
    if (root_value == NULL) {
        goto cleanup;
    }

    root_object = json_value_get_object(root_value);
    if (root_object == NULL) {
        goto cleanup;
    }


    JSON_Object* desiredProperties = json_object_dotget_object(root_object, "desired");
    if (desiredProperties == NULL) {
        desiredProperties = root_object;
    }

    SetDesiredState(desiredProperties, &relay);
    SetDesiredState(desiredProperties, &light);

cleanup:
    // Release the allocated memory.
    if (root_value != NULL) {
        json_value_free(root_value);
    }
    free(payLoadString);
}
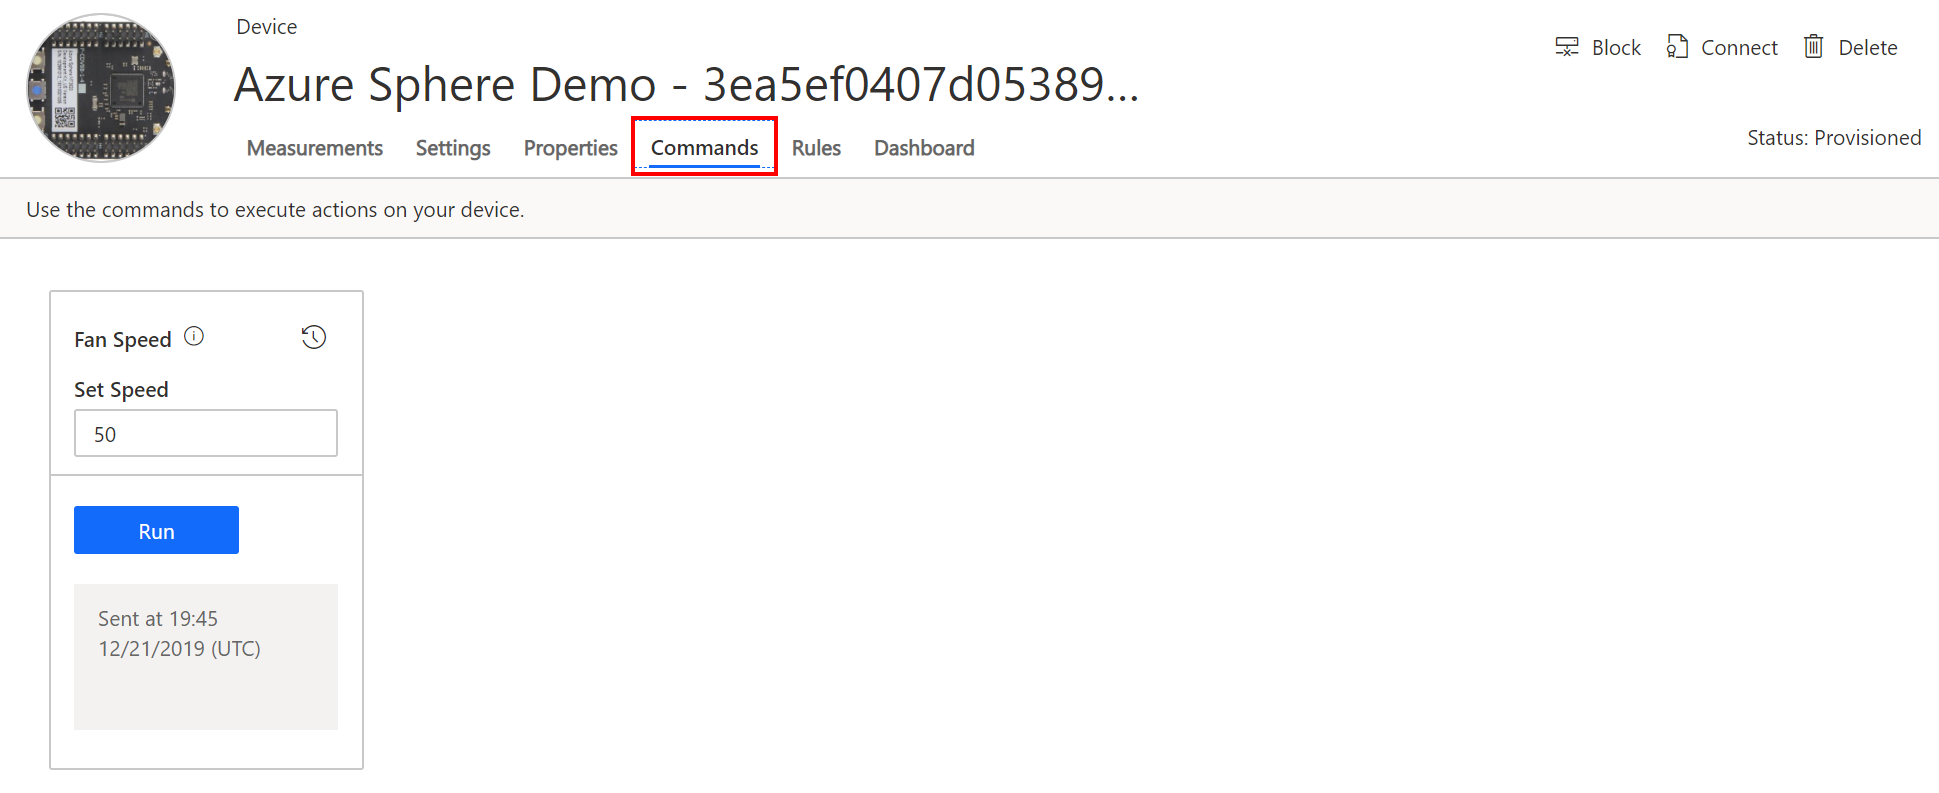
AzureDirectMethodHandler
Handles Azure IoT Hub Direct Methods
In Azure IoT Central, Azure IoT Hub Direct Methods are exposed in the user interface as Commands.
static int AzureDirectMethodHandler(const char* method_name, const unsigned char* payload, size_t payloadSize,
    unsigned char** responsePayload, size_t* responsePayloadSize, void* userContextCallback) {

    const char* onSuccess = "\"Successfully invoke device method\"";
    const char* notFound = "\"No method found\"";

    const char* responseMessage = onSuccess;
    int result = 200;
    JSON_Value* root_value = NULL;
    JSON_Object* root_object = NULL;

    // Prepare the payload for the response. This is a heap allocated null terminated string.
    // The Azure IoT Hub SDK is responsible of freeing it.
    *responsePayload = NULL;  // Response payload content.
    *responsePayloadSize = 0; // Response payload content size.

    char* payLoadString = (char*)malloc(payloadSize + 1);
    if (payLoadString == NULL) {
        responseMessage = "payload memory failed";
        result = 500;
        goto cleanup;
    }

    memcpy(payLoadString, payload, payloadSize);
    payLoadString[payloadSize] = 0; //null terminate string

    root_value = json_parse_string(payLoadString);
    if (root_value == NULL) {
        responseMessage = "Invalid JSON";
        result = 500;
        goto cleanup;
    }

    root_object = json_value_get_object(root_value);
    if (root_object == NULL) {
        responseMessage = "Invalid JSON";
        result = 500;
        goto cleanup;
    }

    if (strcmp(method_name, "fanspeed") == 0)
    {
        int speed = (int)json_object_get_number(root_object, "speed");
        Log_Debug("Set fan speed %d", speed);
    }
    else
    {
        responseMessage = notFound;
        result = 404;
    }

cleanup:

    // Prepare the payload for the response. This is a heap allocated null terminated string.
    // The Azure IoT Hub SDK is responsible of freeing it.
    *responsePayloadSize = strlen(responseMessage);
    *responsePayload = (unsigned char*)malloc(*responsePayloadSize);
    strncpy((char*)(*responsePayload), responseMessage, *responsePayloadSize);

    if (root_value != NULL) {
        json_value_free(root_value);
    }
    free(payLoadString);

    return result;
}
Azure IoT Central Template Settings for Device Twins