This post has been republished via RSS; it originally appeared at: Yammer Blog articles.
Earlier this year we announced the general availability of Live Events in Microsoft 365 and shared news at SharePoint Conference 2019 about our efforts to make these events easy to create and produce without leaving Yammer. We’re now excited to share that the new scheduling experience is rolled out worldwide!

Step 1: Create a Live Event
In order to create a Live Event, you’ll need:
- Admin permission in the desired Yammer Group
- The group you want to run the event in must be connected to Office 365
- A Stream license (you likely have this if you have Office 365).
Learn more about the technical aspect of what’s required here.
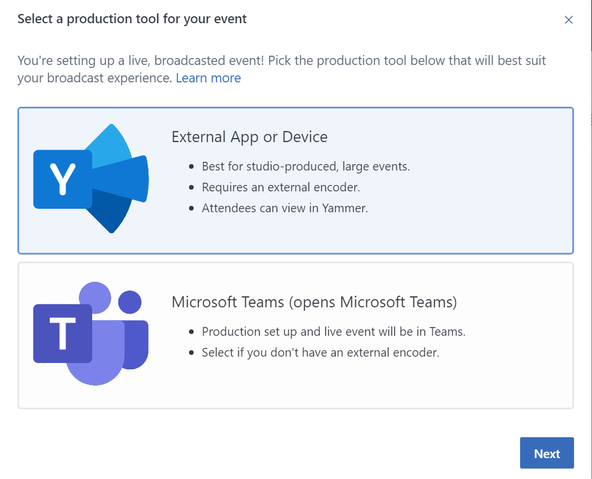
Step 2: Choose your type of event.
For a Teams event, choose the Microsoft Teams option. For higher production quality, multiple cameras, or to view and interact within Yammer, choose the External App option (see below).
Step 3: Fill out the event details.
Add the title, date & time, description, and organizers.
Step 4: Share the event page.
Now that the event is created, you can send the link to attendees.
For a quick start guide on how to produce and host these events, check out our recent blog post or go deep with our Live Events in Yammer Playbook.
Have questions about Live Events in Yammer? Join us for a
Yammer AMA on Wednesday, July 10th from 9:00 a.m. to 10:00 a.m. PT in the Yammer AMA space.
An AMA is a live online event similar to a "YamJam" on Yammer or an "Ask Me Anything" on Reddit. The Windows as a service AMA will give you the opportunity to connect with members of the Windows product and engineering teams, who will be on hand to answer your questions and listen to feedback.
Add the event to your calendar to ensure you don’t miss it. See you there!
Mike Holste is a Yammer + Employee Engagement Product Marketing Manager for Microsoft


