This post has been republished via RSS; it originally appeared at: New blog articles in Microsoft Tech Community.
I'm thrilled to announce limited preview of automatic sensitivity labeling in Office apps using built-in classifiers. As part of this preview, the Microsoft 365 Compliance Center will allow you to create sensitivity labels and corresponding automatic or recommended labeling policies in Office apps using built-in classifiers.
The six built-in classifiers that are available as part of this preview are :
- Resume: detects written accounts of an applicant's personal, educational, and professional qualifications and experience
- Source code: detects a set of instructions and statements written in the top 25 computer programming languages of GitHub
- Offensive language: detects text items that contain profanities, slurs, taunts, and disguised expressions (expressions that have the same meaning as more offensive terms)
- Threat: detects a specific category of offensive language related to threat to commit violence or do physical harm/damage to a person/property.
- Harassment: detects a specific category of offensive language related to offensive conduct targeting one or multiple individuals regarding race, color, religion, national origin, gender, sexual orientation, age, disability and genetic information.
- Profanity: detects a specific category of offensive language that contains swear words or vulgar language.
The Office apps which will support automatic sensitivity labeling using the above classifiers include the following:
- Win32 apps (You need to be a part of the Office Insider Program)
- Word
- Excel Win32
- PowerPoint Win32
- Office Online Apps (Opt-in to this preview required)
- Word Online
- Excel Online
- PowerPoint Online
- Outlook Web
The subscription and license requirements for this preview are similar to what is needed to enable automatic sensitivity labels in Office apps. For more details, see subscription and licensing requirements for sensitivity labels
Pre-requisites to start with built-in classifier-based auto-labeling
For the tenant in which you want to enable built-in classifiers backed sensitivity labeling in Office apps, you should have the following as pre-requisites :
- Office online apps : To enable this in Office online apps, you will need to opt-in to this preview.
- Win32 apps : To enable this in Office Win32 apps, you will need to opt-in to Office Insiders program. You have the option to opt-in as an individual, a set of individuals, or a group to the Insider channel for testing.
- Once you have at least one of the above pre-requisites completed, you’ll need to define at least one label for your tenant and a corresponding label policy to detect an out-of-box or custom sensitive information type.
- Follow the procedure described in the section "How to Opt-in to this Preview" below to express interest for this feature.
How to Opt-in to this Preview
To express interest in this preview, please fill out this form with your details and we’ll enable it for your tenant in 3 working days.
Testing asks
Testing of built-in classifiers
- Built-in classifiers that are already published may be tested through the flow of creating an auto-apply sensitivity label policy – please refer to the section "Creating auto-label policies" below on details of how to create a sensitivity label and a label policy.
- Feedback: We’d love to hear your feedback on how this feature is helping you with your use cases. We have put together a form that you can fill out for feedback.
Creating auto-label policies
Please follow the steps to create an auto-label policy which uses any of the built-in classifiers
- Make sure that at least one sensitivity label and a corresponding label policy already exists in your tenant to detect an out-of-box or custom sensitive information type.
- Go to Microsoft 365 compliance Center and click on Information Protection on the left navigation menu and then click “Create a Label”
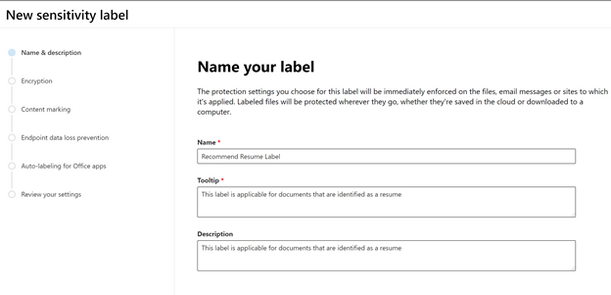
- Enter the name, tooltip, and description for the label and then click on Next.
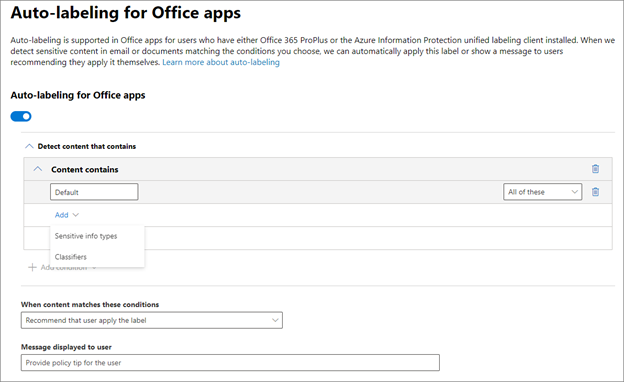
- You can then associate a built-in classifier with the label by adding a classifier as shown below.
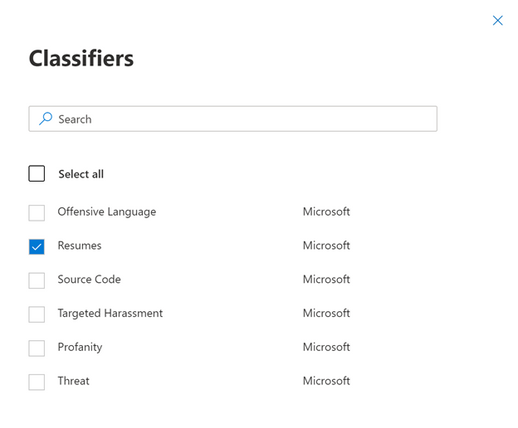
- You can then choose which classifier to associate with the label. In this example we will use “Resume”.
- Choose whether you want to auto-apply or just recommend this label and provide an optional policy tip.
TIP : For the purpose of testing please use recommended labeling. Once you are satisfied with how the policies are working you can choose the auto-labeling option
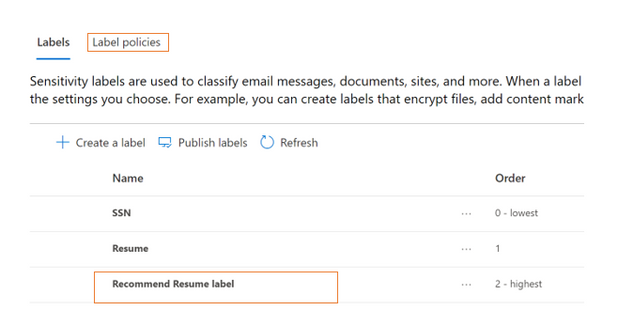
- You should then see your label in the list of labels. Click on Label Policies to create one as the next step.
- Go to label policies and click on Publish Labels
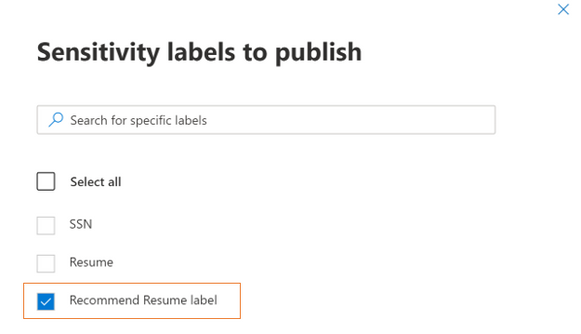
- Choose the sensitivity label to be associated to the policy
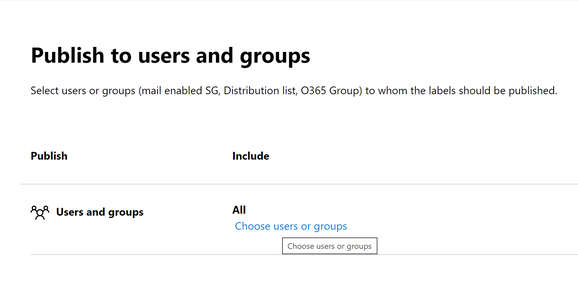
- While testing please scope it to certain users or user groups
TIP: For the purpose of testing please restrict the scope of users to a limited set of users which can be expanded later
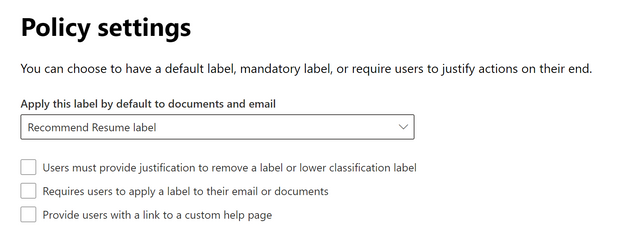
- Choose your policy settings and give a name and description to your label policy.
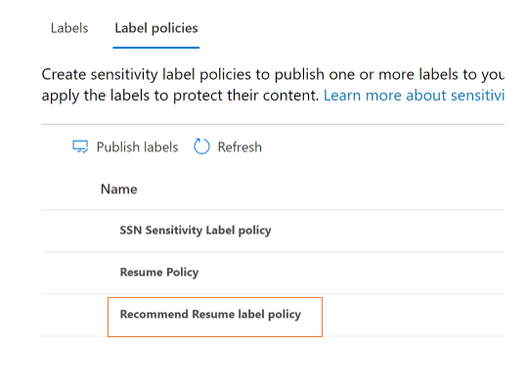
- You should be able to see your label policy in the list of label policies
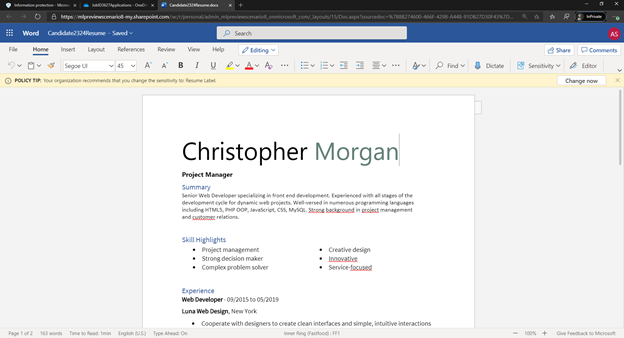
- Depending on the label settings, you can now see file detections like the following below as files are detected as matches for trainable classifiers, where a policy tip appears:
Helpful Feedback
Throughout the process of testing built-in classifiers and label application across Office apps, your feedback on the following would be helpful:
- Usability feedback
- Feedback on the experience all-up
- Feedback on using these classifiers in the auto-apply or recommended label policy
- Are labels being /recommended to documents that match the category of the classifier (resume, source code, etc)?
- Is label recommendation/auto-application accurate and quick?
We have published a form that you can fill to send us your valuable feedback.


