This post has been republished via RSS; it originally appeared at: Azure Database Support Blog articles.
We received some questions from our customers that they want to enable the firewall of their Azure Storage Account that they are using to import data using BCP.
In this article we are going to explain how it is possible to do it.
First of all, we need information about the advantages/disadvantages when we enable Azure Storage Account firewall:
- If you check the Allow trusted Microsoft services to access this storage account, just only a few services reported in this URL would be able to connect https://docs.microsoft.com/en-us/azure/storage/common/storage-network-security#exceptions. Unfortunately, Azure SQL Service is not among them, but SQL Azure DW (Synapse) yes. So, in this case using BULK INSERT would be not possible.
- If we used BCP command from a Virtual Machine we are going to have an Access Denied error message even if we check Allow trusted Microsoft services to access this storage account or adding the IP in the public firewall.
What is the solution:
- Added this storage account in the VNET of the Virtual Machine and BCP will work.
- If you run the BCP command from OnPremises, you need to the IP in the firewall exceptions and BCP will work.
How to configure:
- In order to have the best performance, my suggestion is to run BCP from the machine running in Azure.
- Create an Azure Storage Account with File Share Option enabled.
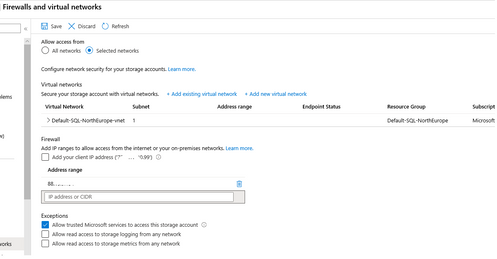
- Enable Azure Storage Account Firewall, adding the VNET/SUBNET of this Azure Virtual Machine.
- Mount the file share either OnPremises or in your Azure Virtual Machine, running the following commands:
- net use drivename: \\myfileshare.file.core.windows.net\mybcpfiles /u:Azure\myfileshare PrimaryKeyValue.
- And from this point we could run BCP command using this drivername having the Azure Storage firewall enabled.
Enjoy!


