This post has been republished via RSS; it originally appeared at: Microsoft Developer Blogs - Feed.
There are a number of posts about using custom fonts in Xamarin.Forms. However, embedded fonts definitely takes the cake. No more platform-specific handling of fonts and adding font files in three different projects. Just one file and an attribute in your shared code and your font is ready to go. In this post we will see how to use it in Xamarin.Forms 4.5.530 and up.Life Before Embedded Fonts
As mentioned, there are a couple of posts on using custom fonts already. The most recent one can be found here. In that post, you will see, that depending on the platform, you would need to go through some hoops. Such as adding an entry to the metadata or adding the font file to each target platform project. As well as setting the right build action, finding out the correct font name, and then cross your fingers everything was right the first time. Written down like this, it doesn't seem like a lot of work and granted. You only have to do it once (per font), but it can still be a hassle. Especially the part about finding the correct font-family name (or postscript name), involves some trail-and-error. If you have worked with custom fonts before, you already know these embedded fonts will be a big improvement.How To Use Embedded Fonts
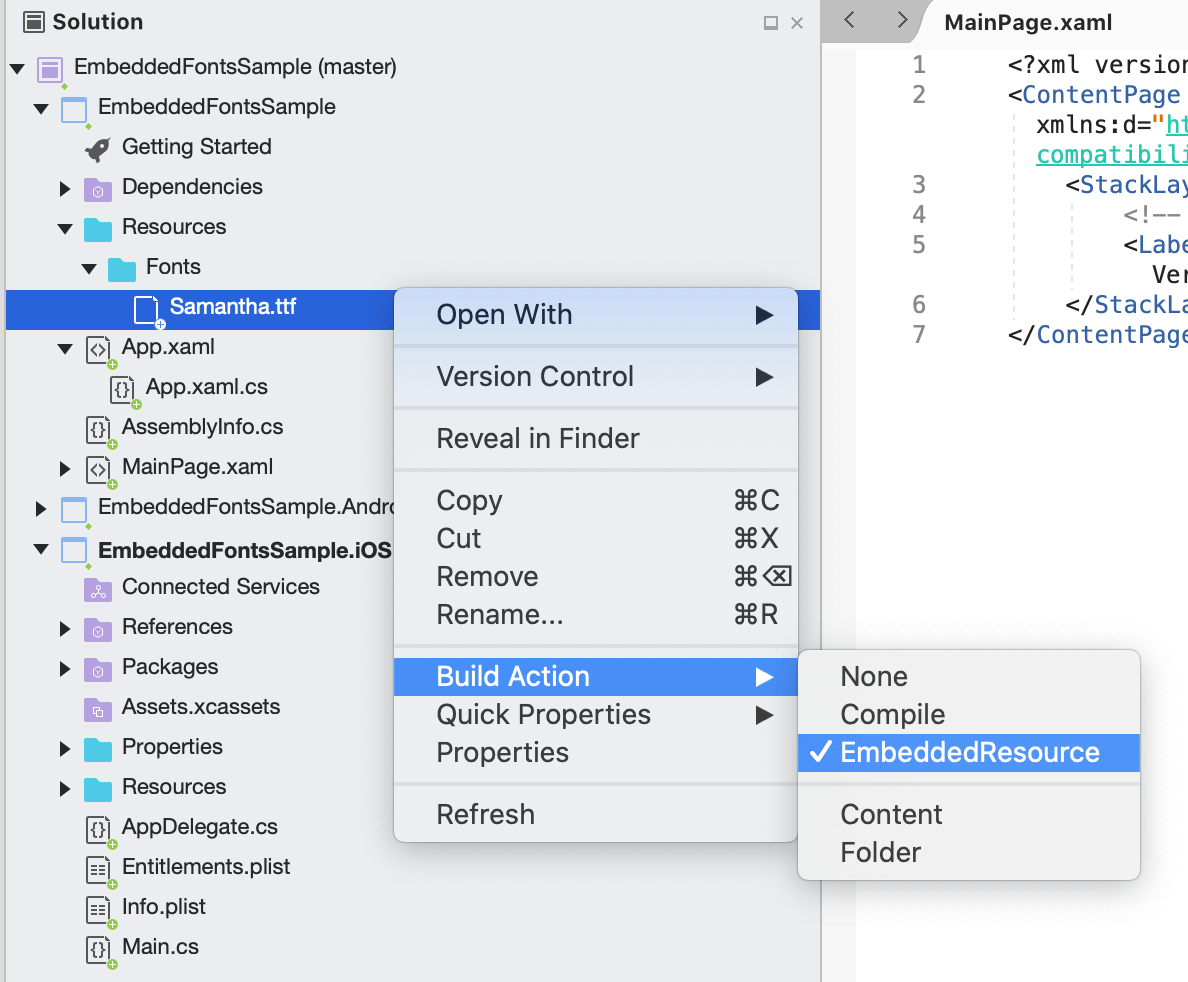
As of Xamarin.Forms 4.5, we will make your life a bit easier yet again. In just three simple steps, we will add a font to use across iOS, Android and UWP.1. Add the font file (otf or ttf) to your shared project and mark it as embedded resource
Simply add the font fileSamantha.ttf to any folder in your project and set the Build Action to EmbeddedResource. In this case, find it here.

2. Add ExportFont attribute in your shared project
The most obvious place would be inside yourApp.xaml.cs or AssemblyInfo.cs. However, since the attribute will register this on assembly level, you can put this anywhere. The placement of the attribute depends on how visible you want to make it to other/future developers.
Anywhere outside a namespace will work. Just add this, you don't need to include the subfolders:
[assembly: ExportFont("Samantha.ttf")]
3. Consume the new font in your controls
That's it! You are now ready to consume the font in your app. Through code or XAML, and directly on a control or through a style. Notice that you don't need to find out the postscript font name anymore. Just use the fonts filename. Which will just work on all platforms! Note that adding an entry in yourinfo.plist was not added for iOS. That is also not needed anymore.
To use a more custom name, alternatively, use the Alias property. There you can specify a name to reference this font by. For example: [assembly: ExportFont("Samantha.ttf", Alias = "MyAwesomeCustomFont")]. Now reference this font by using MyAwesomeCustomFont.
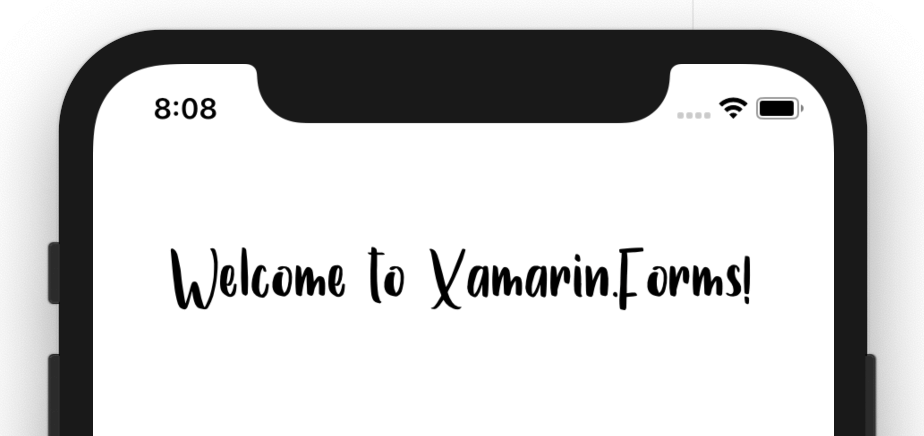
Here is an example of using it with a Label.
<Label Text="Welcome to Xamarin.Forms!" FontFamily="Samantha" FontSize="50" HorizontalOptions="Center" VerticalOptions="CenterAndExpand" />

