This post has been republished via RSS; it originally appeared at: New blog articles in Microsoft Community Hub.
Creating the Custom Connector
A custom connector in Power Apps is a feature that allows users to create a connection between an external API or web service and their Power Apps environment. It allows Power Apps users to extend the capabilities of their applications beyond what is provided by default connectors, by creating custom connections to various web services, REST APIs, and other data sources. Custom connectors enable users to build more robust and personalized apps that meet the unique needs of their organization.
Before we dive into the steps, let's take a moment to introduce the Friend Chat API, which falls under the conversation category of ChatGPT APIs and is the API we will be consuming in this guide. If you're interested, you can check out the other example APIs provided by OpenAI here.
The "Friend Chat" Emulate a text message conversation and has the below API request which we will leverage on building our custom connector.
Let's now walk through the process of creating a custom connector with ChatGPT's API in Power Apps. The following steps will guide you through the process:
Step 1:
First, go to the Power Apps portal, click More -> Discover all -> and under data click on the Custom connectors.
Create a new custom connector by clicking on the "New custom connector" button then click "Create from blank".
Step 2:
Give your custom connector a name, such as "ChatGPT API," (mine is "ChatChat") and fill in the other required fields.
Step 3:
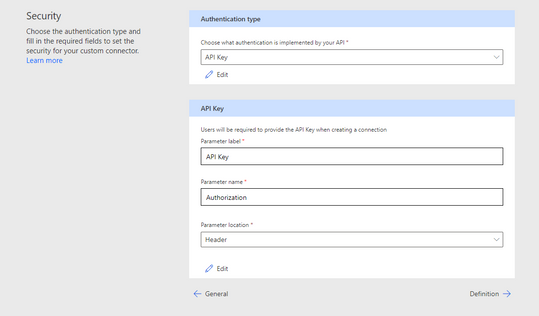
Next, navigate to the "Security" tab and do the following:
- Authentication type section - API Key
- API Key section
Parameter label : API Key
Parameter name: Authentication
It should look like this after fixing.
Step 4:
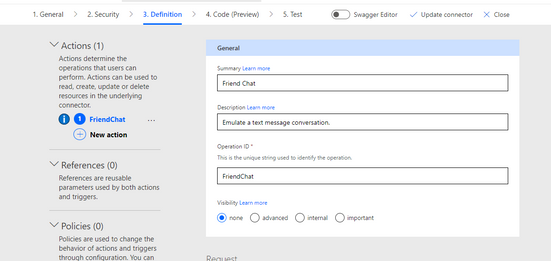
In the "Definition" tab, add the required request parameters for ChatGPT's API, such as the text you want to process, the language of the text, and any other optional parameters.
- Create a new Action under the "Action" drop on the left. In this tutorial I called it "Friend Chat" as below.
- Request
It defines the pre-requirements needed in order to make a request.
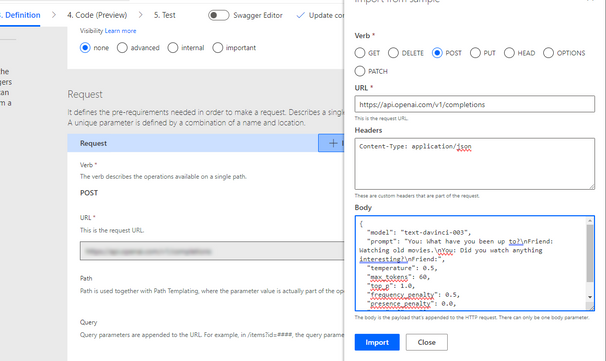
Select "POST" under "verb"
Copy and paste other information from the API Request sample above as shown below and click "Import".
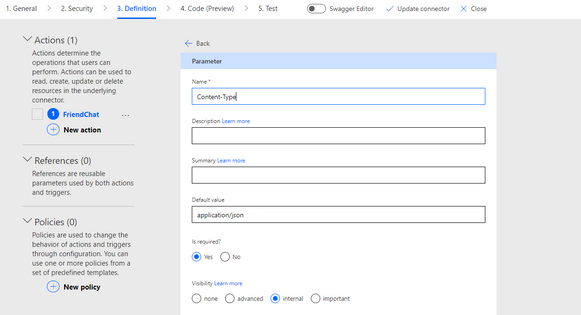
After importing click the "Content-Type" under the Headers and edit it as shown then click back.
Next, select and edit the Body for each parameter based on the API request code provided above. Make sure the body also has a "Yes" required selected. The body is the payload that's appended to the HTTP request.
Select each token and then fix their corresponding values from the API Request code and make sure each is set to required and visibility is set to "Internal" except "Prompt" which has a visibility of "Important"
Click the <- Back button anytime you edit each token. This is how thy should be set to except the "Default value" which comes from the API Request code above.
- Create and Test connector
Once you've defined the parameters, Click the "Create connector" button and test your custom connector by clicking on the "Test" tab on step 5. This will allow you to verify that your connector is working properly and returning the expected response.
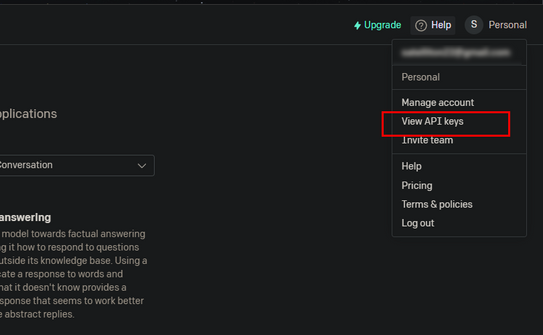
The test operation will ask for new connection. This is where you will have to click on your profile on account on the OpenAI's site and click on "View API keys" as shown. (https://platform.openai.com/account/api-keys)
- API Keys
Inserting the API Keys should be as shown below same as in the API Request code provided above.
Bearer API_KEY
When connected, this will exit the connector edit mode.
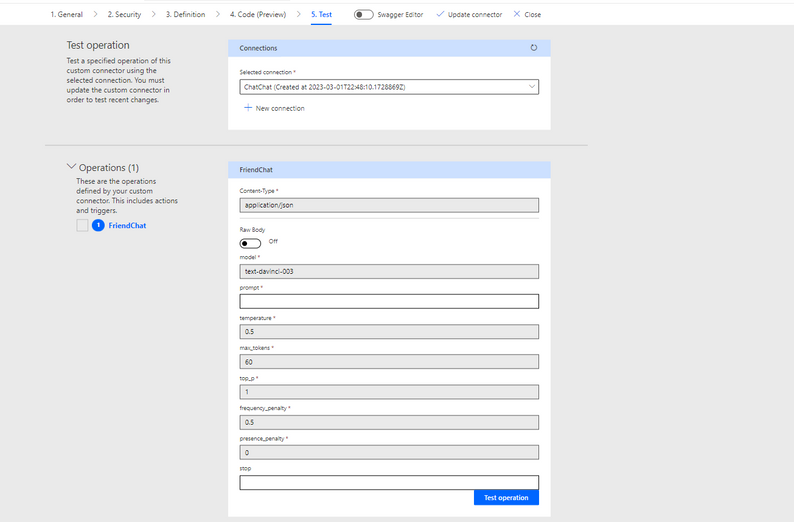
Click the custom connector button and click edit of your connector again then run the test this time around since it is connected now.
You should have something like the below screenshot.
- Testing
Type a sample question inside the "Prompt", click "Test Operation" and wait for it to run.
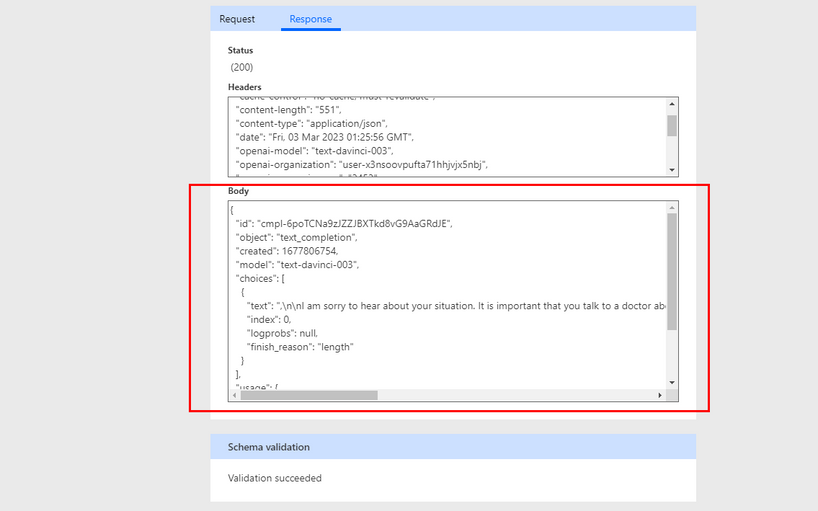
When it runs successfully, you should have something like this. Copy the body code and click the "Definition" tab once more.
- Response update
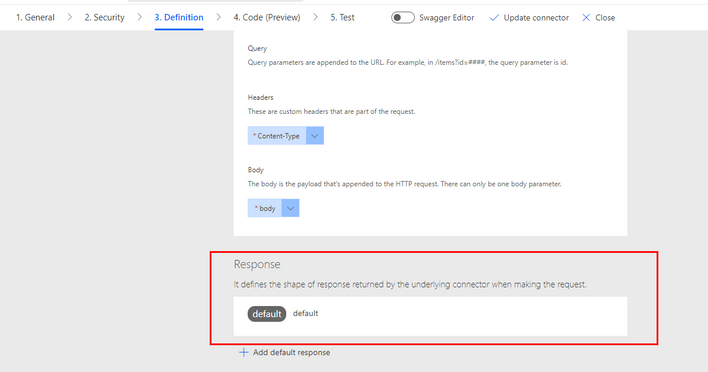
It defines the shape of response returned by the underlying connector when making the request.
Inside the "Definition", click on the response default as shown below.
When its opened, click "Import from sample" and paste the code copied under the test body into the body under the "Import from sample".
Click "import" after you have paste the code.
Finally, click "Update Connector" to update your custom connector and you're ready to use it in your Power Apps! You can now add the connector to your app and start leveraging ChatGPT's powerful natural language processing capabilities. Let's do this is few steps.
ChatGPT in Power Apps
This marks the final stage of the process, where we will connect our custom connector to Power Apps by creating a simple conversation application. Create a Blank canvas app and name it.
Add Connector
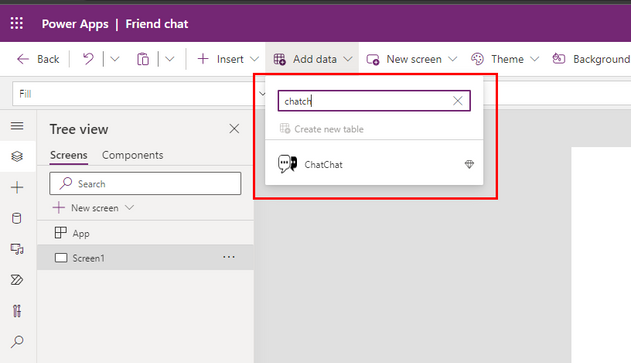
In the Power Apps studio, click the "Add data" tab and search for your connector. When seen click on it to add up to the environment so you can call it in within development.
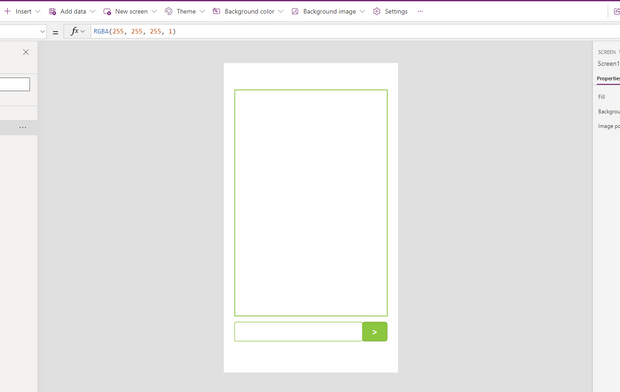
Insert the following elements:
- Text Label: This displays the chat replies.
- Text Input: Where user enters the Prompt text.
- Button: This is used to submit the text in the text input.
After inserting all, design to suite your like. This is mine below:
Select the button, on the OnSelect property, fix the code with the same values for the tokens you set earlier. Assign the Text Input to the prompt and should be something like this:
Code defined
The "varChat" variable is being set to the result of a function call to "ChatChat.FriendChat" with the following arguments:
- "text-davinci-003": This is the name of a language model that will be used for the chat conversation. "text-davinci-003" refers to the OpenAI language model called "GPT-3" which is known as "Davinci".
- TextInput1.Text: This is the text input that will be used as the first message in the chat conversation. The value of the TextInput1 control will be used as the text input.
- 0.5: This is the temperature parameter that controls the randomness of the model's output. A higher temperature value means the model will generate more diverse responses.
-
60: This is the maximum number of tokens (words or punctuation marks) that the model can output in a single response.
-
1: This is the number of responses the model will generate in the conversation.
-
0.5: This is the minimum confidence level for the responses. Only responses with a confidence level greater than or equal to this value will be included in the conversation.
- 0: This is the maximum time (in milliseconds) that the function will wait for a response from the language model. A value of 0 means the function will wait indefinitely for a response.
- ["You:"]: This is an array of strings that will be used as the chat participants' names. In this case, the chat will only have one participant with the name "You:".
- Text Label:
This displays the chat replies.
In the Text property input the following code to reference the variable set earlier in the submit button.First(varChat.choices).text
Code defined
- The "First" function is used to retrieve the first element in the "choices" property. This function takes an array or collection as its argument and returns the first element in that array or collection.
- The ".text" property is then used to access the text content of the first element in the "choices" property. This property contains the text content of the first response generated by the language model in the chat conversation.
Testing Power Apps
Once you've completed all the steps, save and publish your application. Click the play button to launch the app and test it out with a few questions to receive responses from the ChatGPT API
Summary
We created learnt how to create a custom connector with ChatGPT's API and consume it in your Power Apps environment. With ChatGPT's state-of-the-art natural language processing capabilities at your fingertips, you can take your Power Apps to the next level and build truly personalized and engaging experiences for all.
By leveraging the power of AI in Power Apps, you can streamline processes, automate tasks, and make data-driven decisions with ease. We hope this guide has been helpful in unlocking the potential of ChatGPT and empowering you to create custom connectors that meet the unique needs of your organization. So what are you waiting for? Start building your own ChatGPT-powered custom connectors today and take your Power Apps to new heights!
Resources
Fusion development in Power Platform - Power Platform | Microsoft Learn
An Illustrated Guide To Fusion Development (microsoft.com)
Use custom connectors in a Power Apps canvas app - Training | Microsoft Learn
Configure custom connectors with authenticated APIs in Power Automate - Training | Microsoft Learn
Build custom connectors for Power Automate - Training | Microsoft Learn
Introduction to Azure OpenAI Service - Training | Microsoft Learn
Identify guiding principles for responsible AI - Training | Microsoft Learn


