This post has been republished via RSS; it originally appeared at: New blog articles in Microsoft Community Hub.
This blog is a step to step guide on how to create failover cluster and SSO cluster on Azure VMs.
Create the Azure VMs, and configure the domain
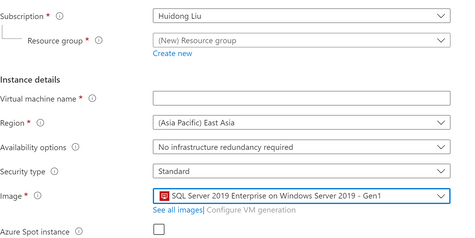
- First we need to create VMs for cluster. In this example I have created one node as the domain controller, two SQL server nodes, and one Biztalk server node on Azure. For DC and BTS node we can just select Windows (Windows Server 2019 Datacenter). For SQL servers we can select the SQL Server 2019 Enterprise on Windows Server 2019 image. These VMs are configured to be in the same domain.
- In this example the domain name is: hl.test
Create the SQL nodes
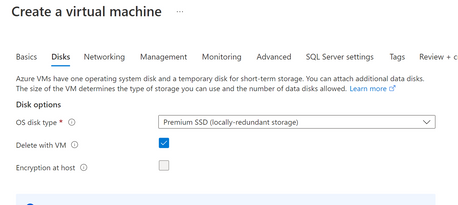
For the disk, select the premium SSD
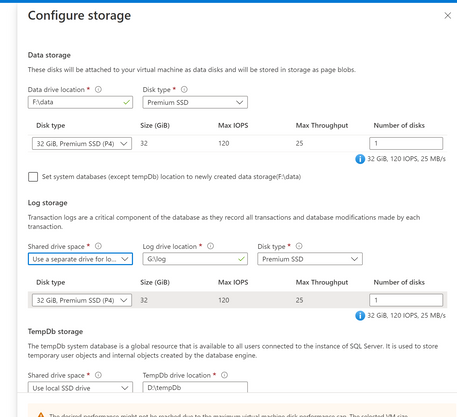
Configure the storage for SQL servers
Create the Failover Cluster on SQL nodes
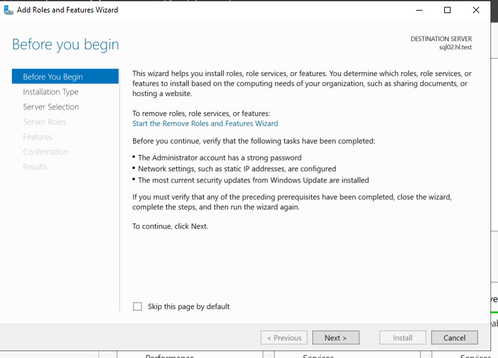
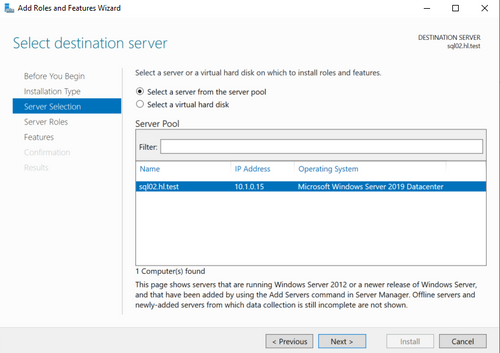
- On each SQL node, open Server Manager, select "Add Roles and Features".
- Select "Role-based or feature-based installation"
- Select the node
- Next
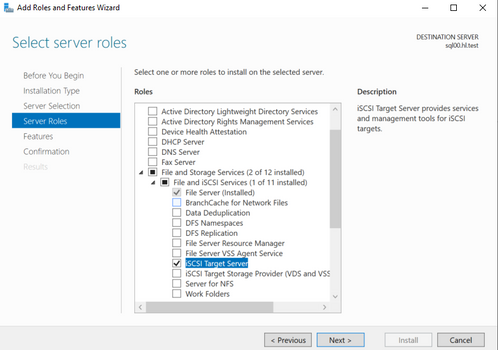
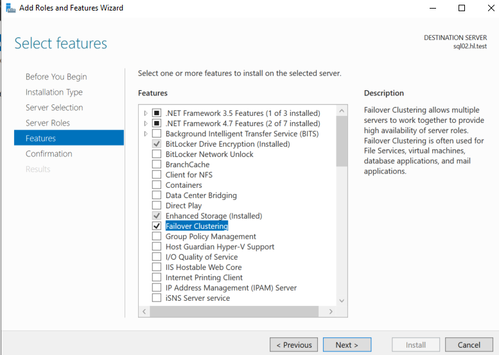
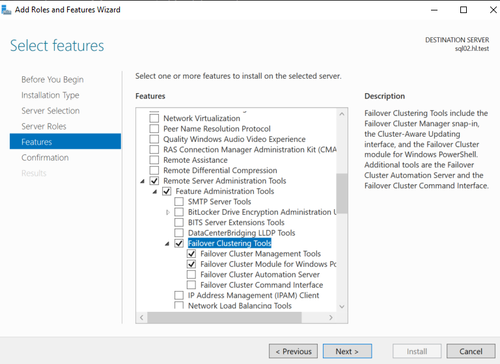
- Select "Failover Clustering" and failover clustering tools
- Select the following features:
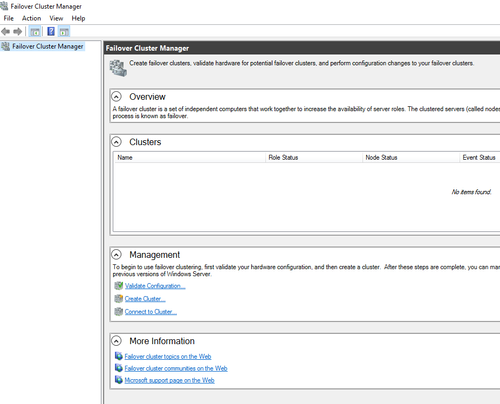
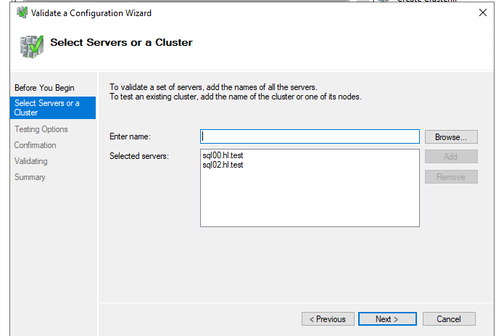
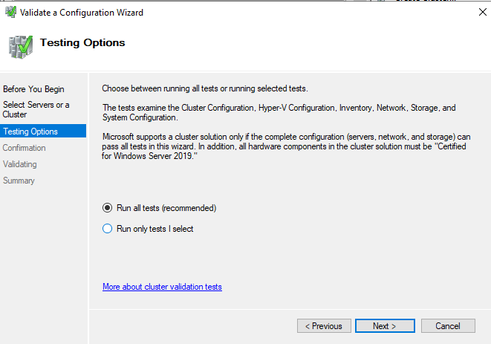
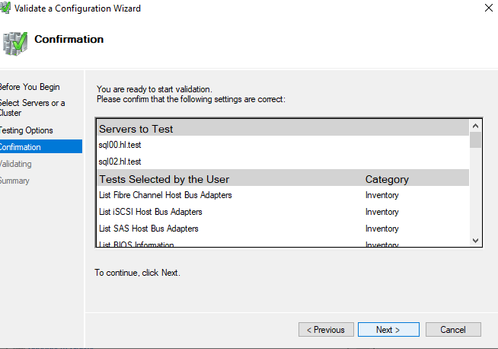
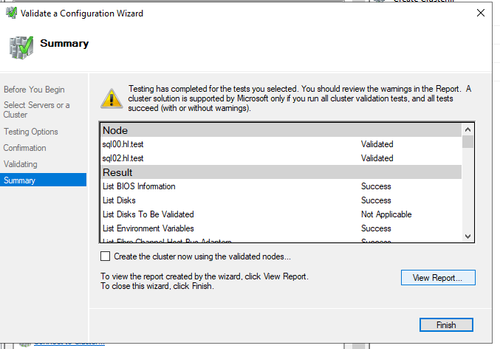
- Once created and restarted, open failover cluster manager, and run validate configuration
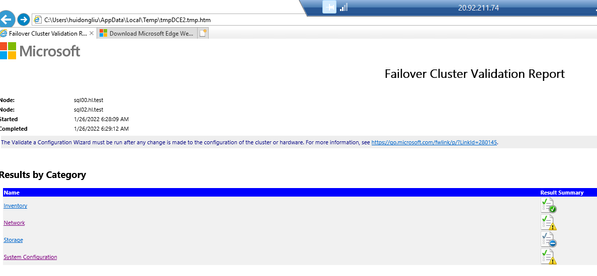
- View Report
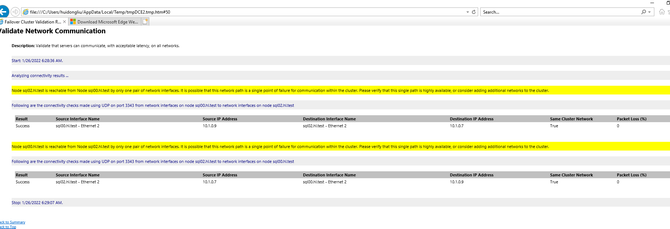
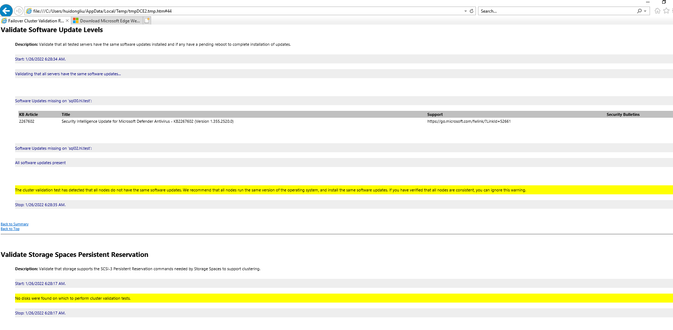
For Azure VMs it is normal to have the following warnings since we have not configured any disks yet.
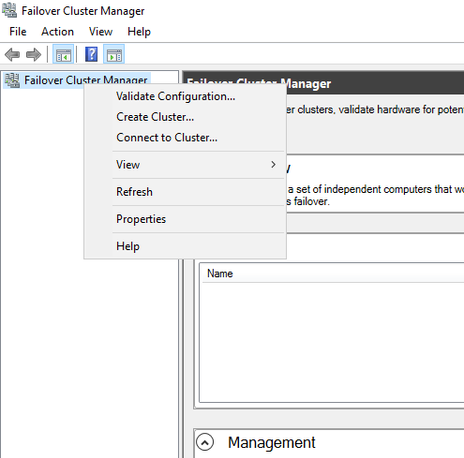
- Go back to failover cluster manager, right-click and select "Create cluster..."
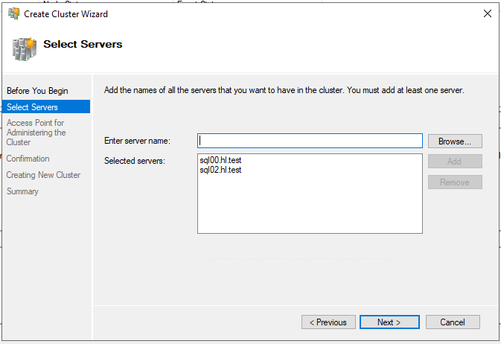
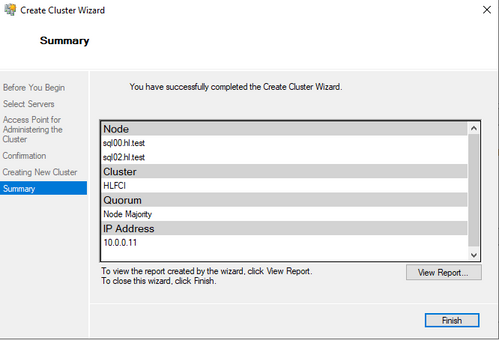
Select the two SQL nodes
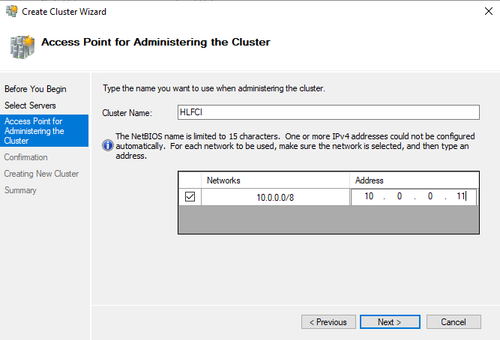
Give the cluster a name, and an IP address that does not overlap with any existing IPs in this domain.
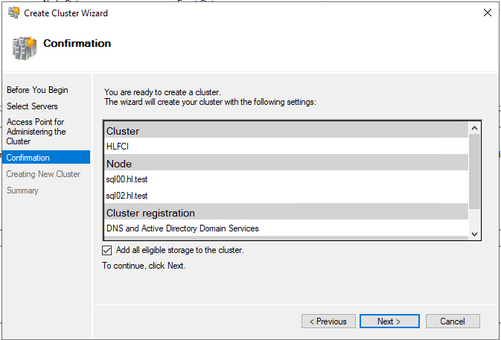
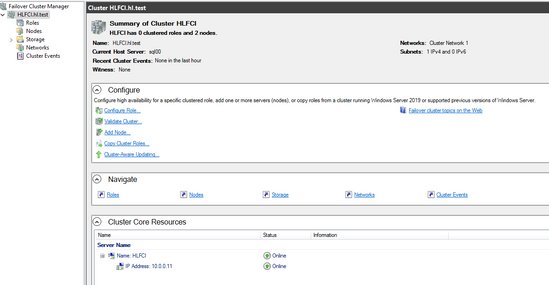
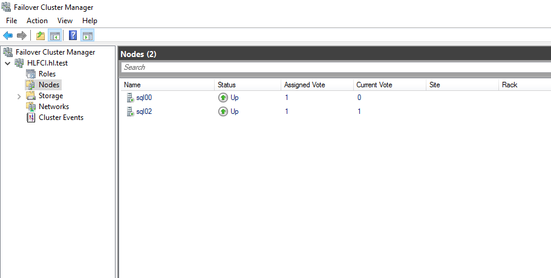
- Once the cluster is created, you are able to see it in the Failover cluster manager
Create storage
There are two ways to create the storage:
- ClusterS2D. ( Create an FCI with Storage Spaces Direct - SQL Server on Azure VMs | Microsoft Docs)
- Azure Shared Disk. This is recommended, as it is both easier and more highly available and the latest recommended. (Create an FCI with Azure shared disks - SQL Server on Azure VMs | Microsoft Learn)
- To create the Azure share disk, first Deploy a managed Premium SSD disk with the shared disk feature enabled, and then attach the disk to VMs.
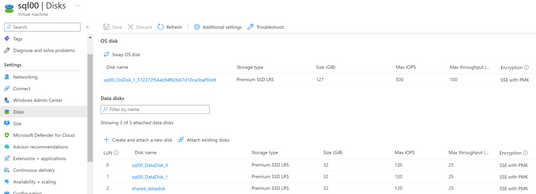
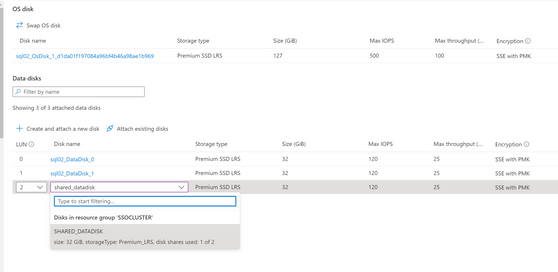
In the VMs, go to Disks, select create and attach a new disk, choose the Premium SSD and the size you need. A new disk will be created. In my example the sql00_DataDisk_0 and sql00_DataDisk_1 are created when I deployed the SQL VM, you can use as shared disk or create a new shared disk and attach it to all the nodes.
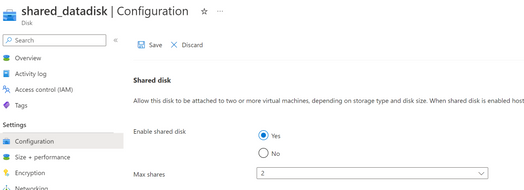
Detach the disk first, and change the configuration of the disk to Enable shared disk, and max shares to the number of the nodes in your cluster.
Attach the disk again to both VMs.
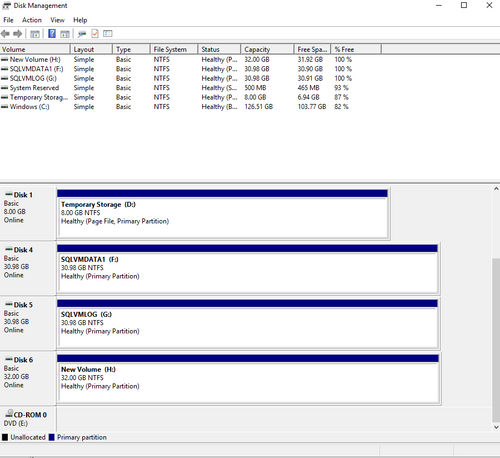
- Initialize shared disk
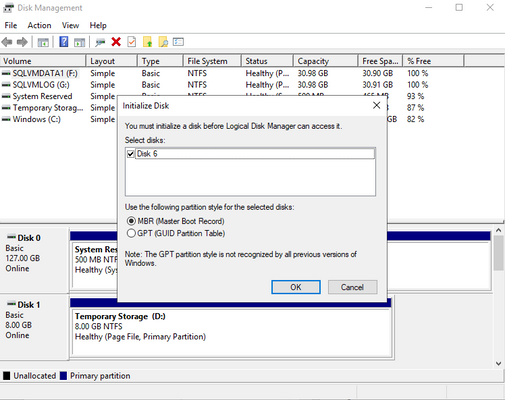
From inside the VM, open the Start menu and type diskmgmt.msc in the search box to open the Disk Management console.
Disk Management recognizes that you have a new, uninitialized disk and the Initialize Disk window appears.
Verify the new disk is selected and then select OK to initialize it.
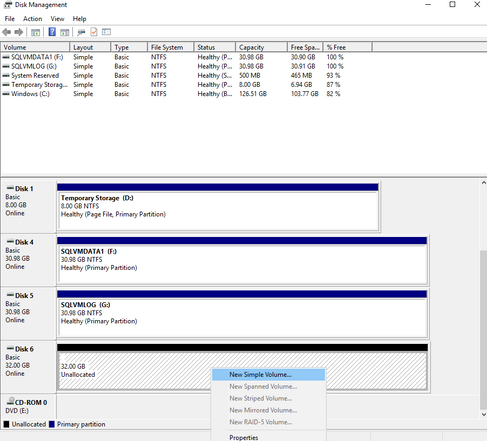
The new disk appears as unallocated. Right-click anywhere on the disk and select New simple volume. The New Simple Volume Wizard window opens.
Proceed through the wizard, keeping all of the defaults, and it will ask you to Format new disk. When the formatting is complete, select OK.
Repeat these steps on each SQL Server VM that will participate in the FCI.
Add shared disks to cluster
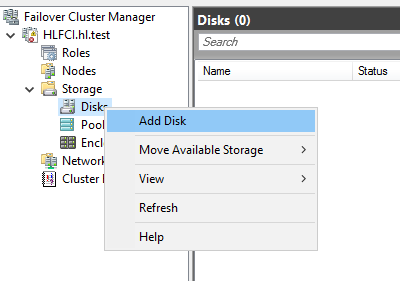
On the failover cluster manager, select storage->Disks, right-click and select Add Disk
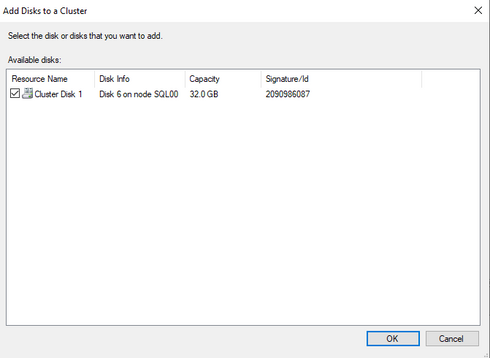
Choose the Azure shared disk showed in the window
Failover cluster installation on SQL server
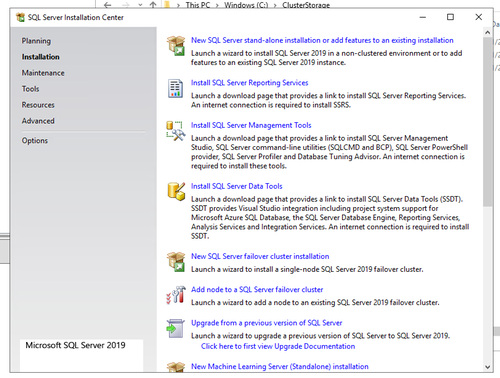
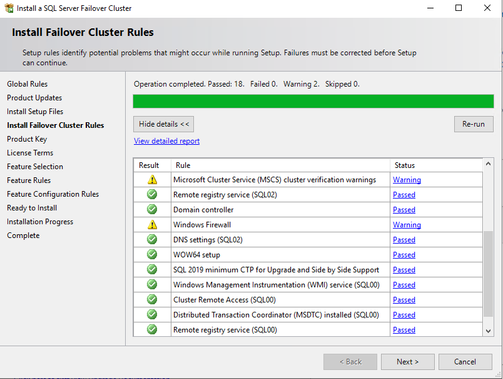
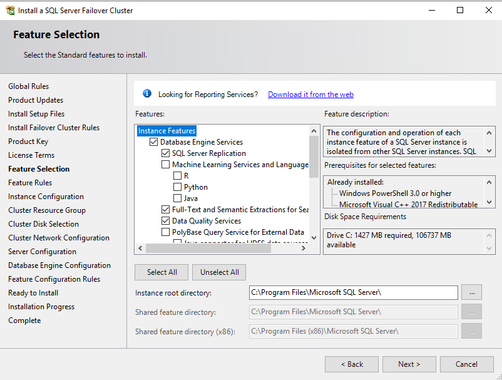
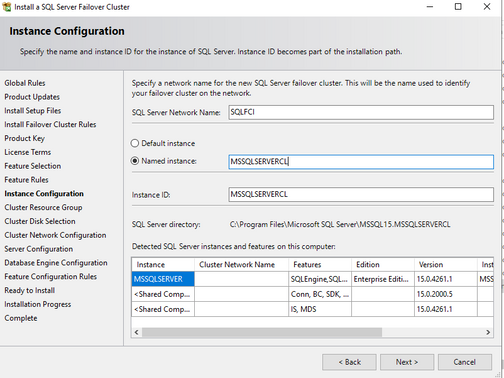
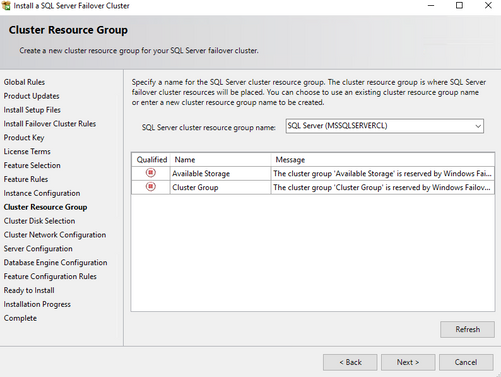
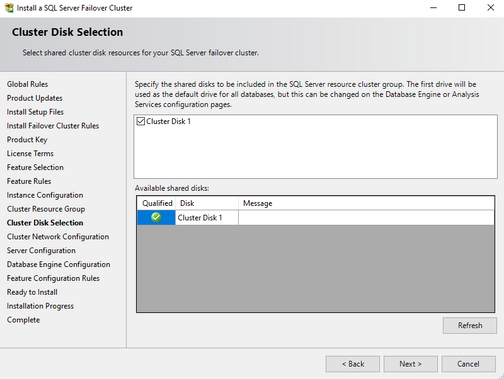
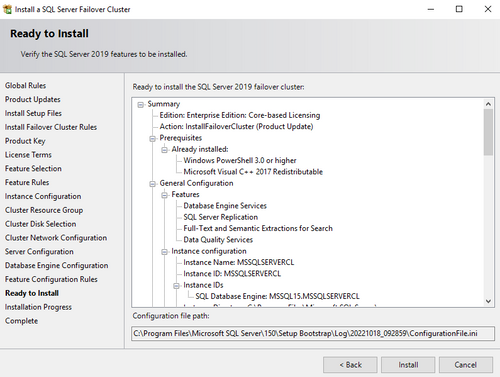
- On the first SQL node, open SQL server installation center, select "New SQL Server failover cluster installation", and follow the steps to install a New SQL server failover cluster.
- Locate the installation media. If the virtual machine uses one of the Azure Marketplace images, the media is located at C:\SQLServer_<version number>_Full.
- Check data and log drive
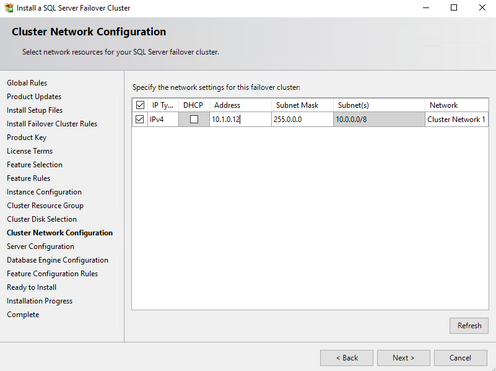
- Create and IP address for the SQL failover cluster, which does not overlap with existing IPs in the same domain. And please also make sure this IP address is within the same subnet and VNET of the Azure VMs.
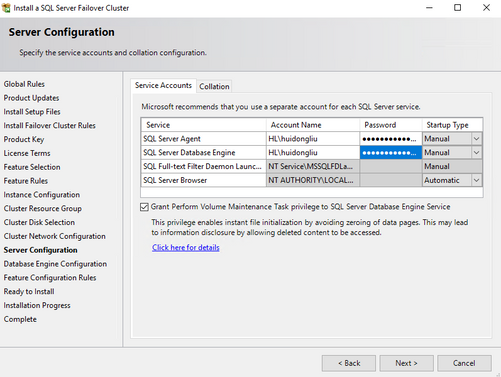
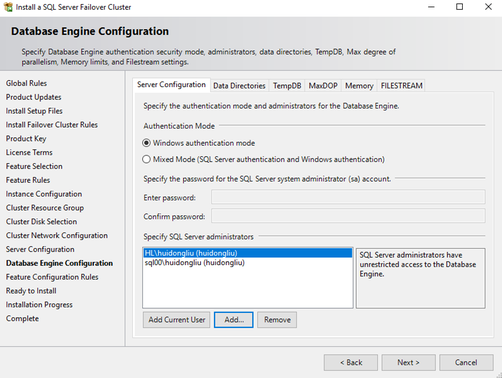
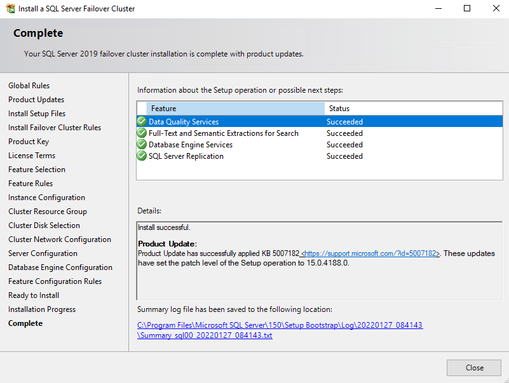
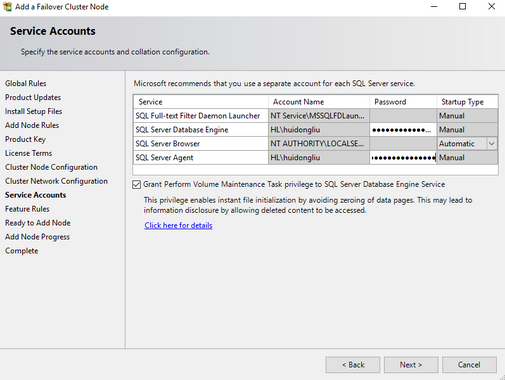
- Complete the installation. Specifics are in the screenshot
On the Database Engine Configuration page, ensure the database directories are on the Azure shared disk(s).
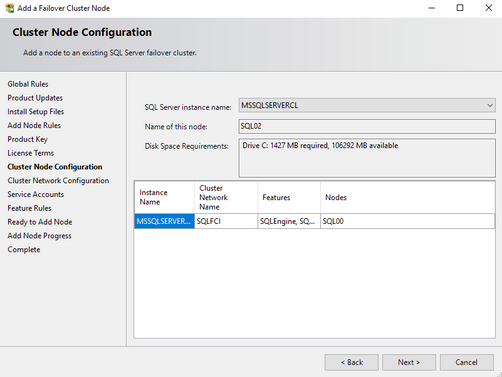
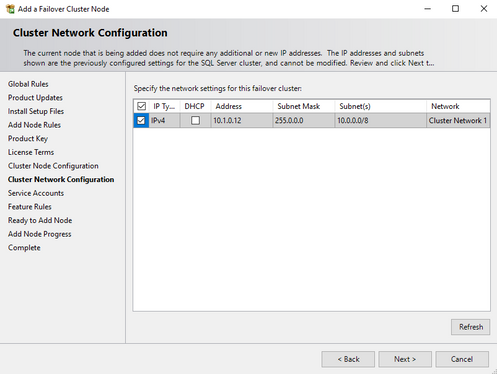
- On the second node, select "Add node to a SQL server failover cluster"
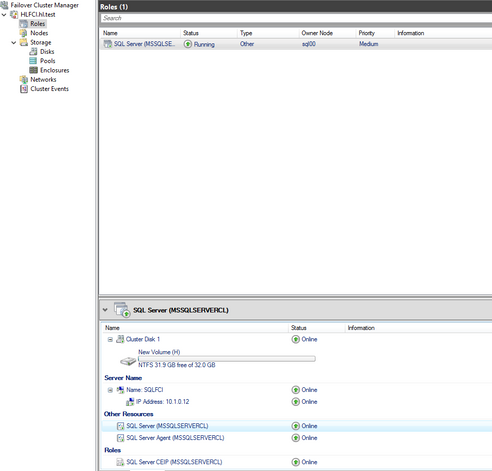
- After installation is done, there is a SQL cluster role created. You can check the resources on Failover Cluster Manager.
Create a load balancer
Usually for on-prem VMs, the cluster is ready for use at this point. However for Azure VMs, in order for the cluster IP to be reached over the network, we need to create a load balancer and set up rules to make the IP address accessible.
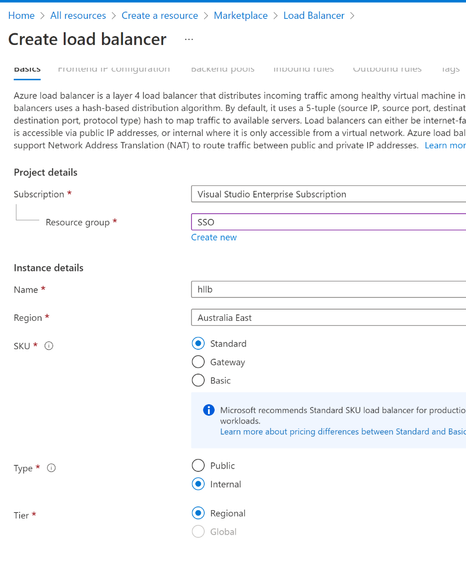
- In the same Azure resource group, create a load balancer, select the standard SKU, same regions as the VNET. For type, select “Internal”
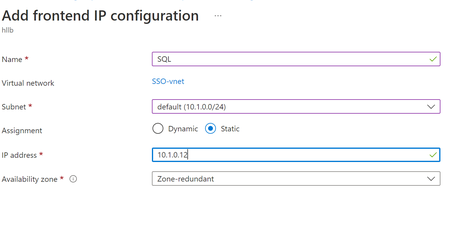
- Add a frontend IP address. The IP is the SQL cluster IP.
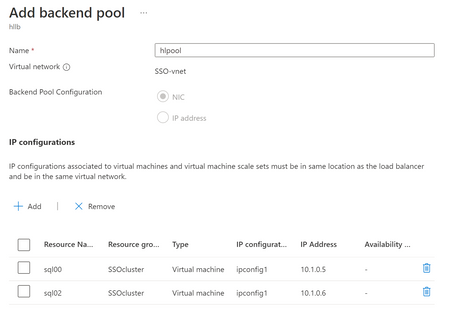
- Create the backend pool, choose the two Azure VMs
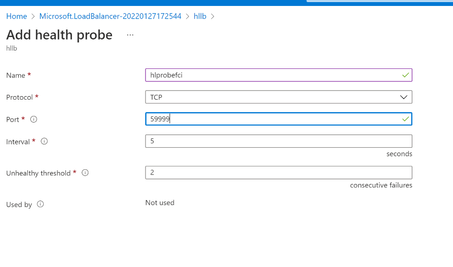
- Create the health probe, with TCP protocol. For port give it a unique port number like 59999. Set interval to be 5 seconds and unhealthy threshold to be 2.
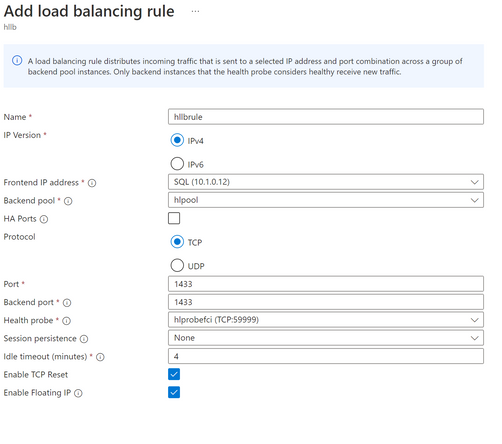
- Add a load balancing rule:
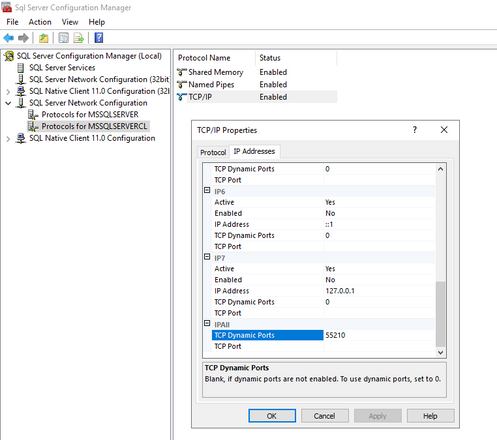
In my test case, I used the Dynamic port and in the load balancing rule I used “HA ports”
Use HA ports if the SQL TCP port is Dynamic
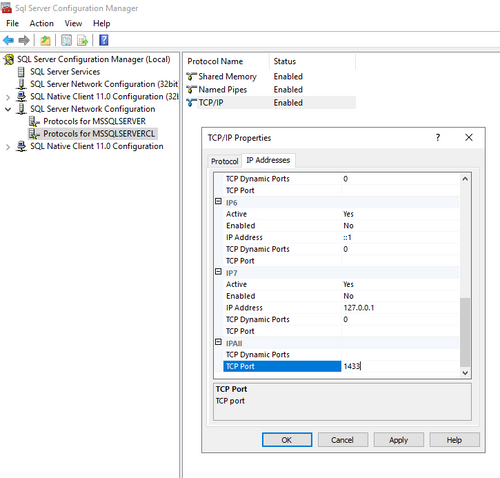
If you use static port, then specify the port number 1433 in the load balancer rule.
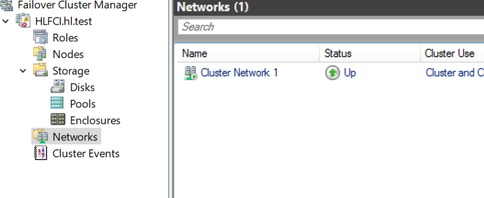
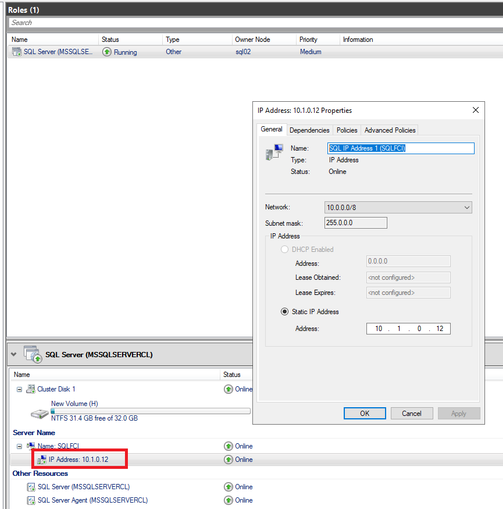
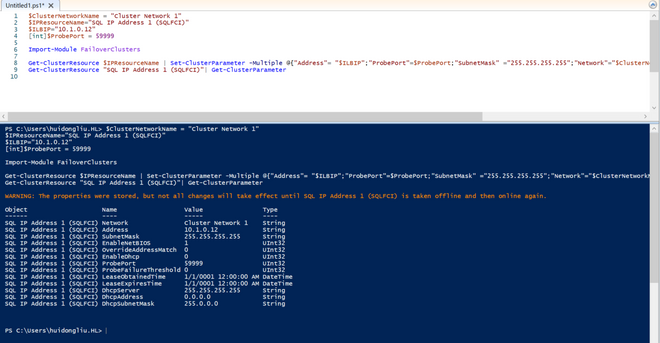
- Go back to VM: Run this script in powershell, the $ClusterNetworkName can be found in the Networks tab in the Failover cluster, and the $IPResourceName can be found by double clicking the IP address of the SQL cluster.
Run the script to configure the port for the cluster.
Then we just need to take the FCI offline and online by fail it over to another node
Also please make sure to add firewall rules to allow inbound for TCP and UDP ports
Click windows->search for run-> type wf.msc
If you use dynamic port then we need to allow inbound ports for
- TCP all ports
- UDP all ports
Install SSO on SQL server
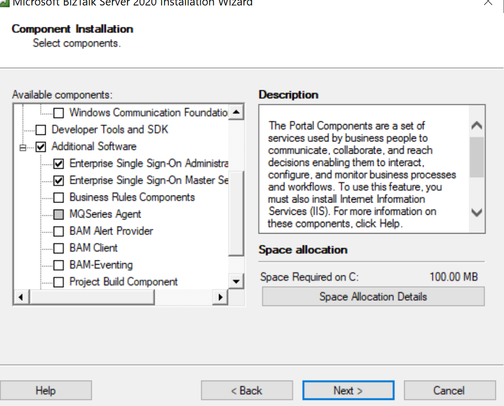
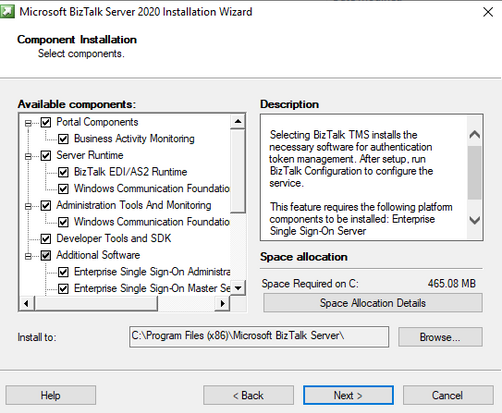
- Install BizTalk SSO component on active sql node
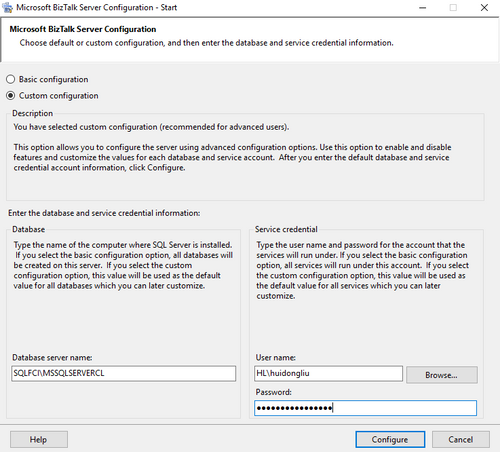
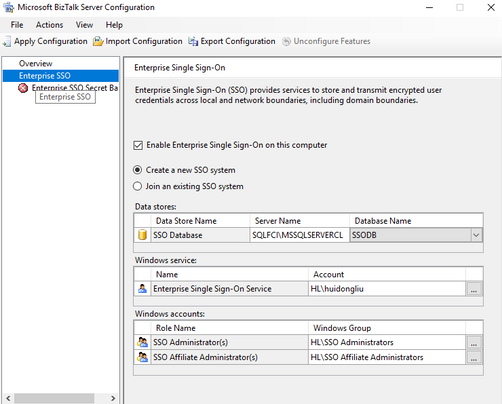
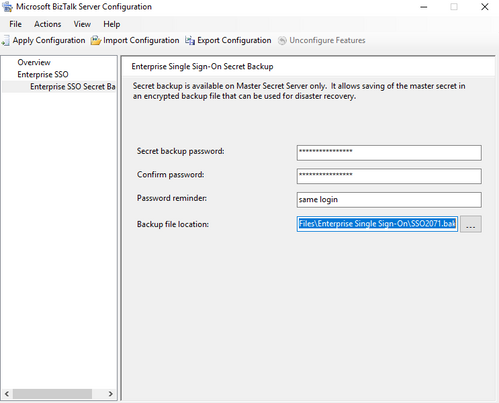
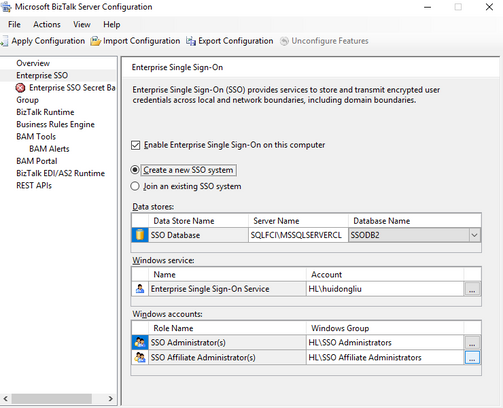
- Configure the SSO on the active node. Create new SSO system.
- Install and configure SSO on second SQL node, join an existing SSO system.
Update the master secret server name in the SSO database
On the active node, type in cmd to stop and start the ENTSSO
Paste the following code in a text editor, then save the file as an .xml file. For example, save the file as SSOCLUSTER.xml.
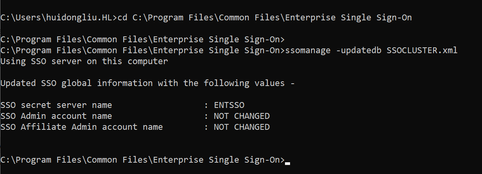
In cmd, cd to C:\Program Files\Common Files\Enterprise Single Sign-On, and then run
The Master Secret Server Name is updated to “ENTSSO”
Create the clustered Enterprise SSO resource
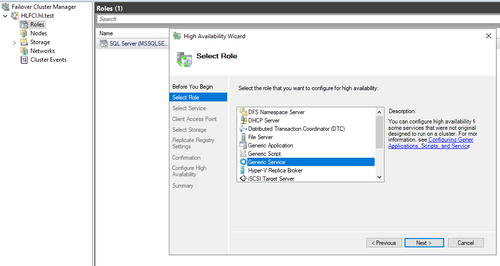
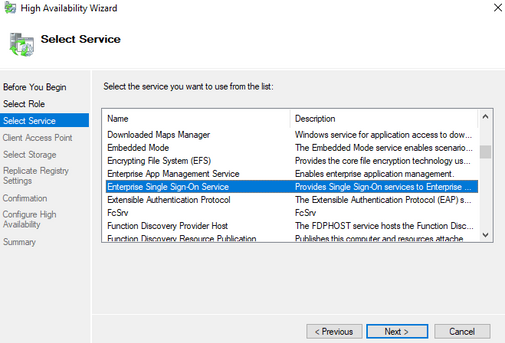
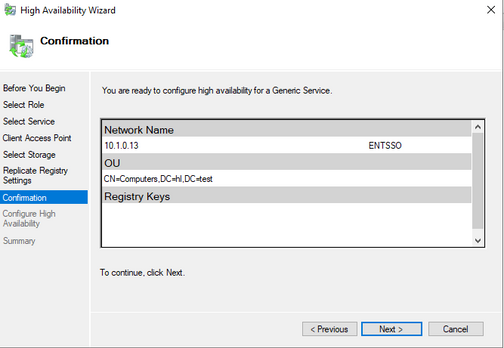
- Go to Failover cluster manager->Configure a role->Generic Service
- Select Enterprise Single Sign-On Service
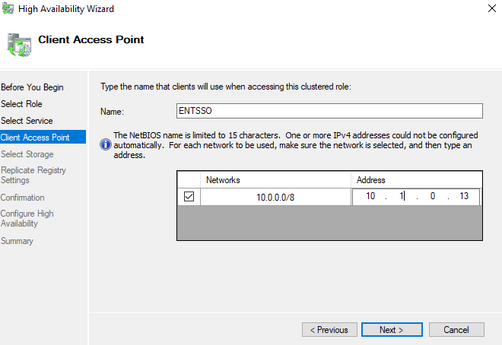
- Give the cluster a name and an IP address that does not overlap with any IP in this network.
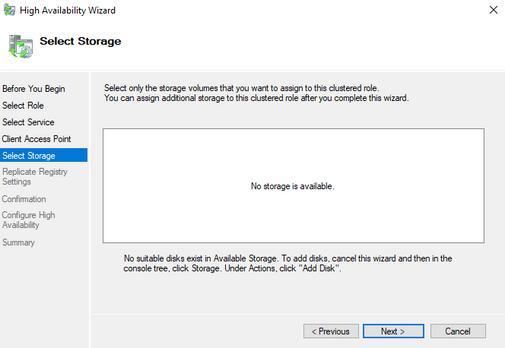
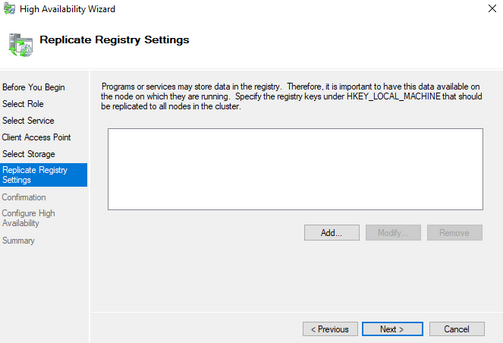
- Click next for the following steps
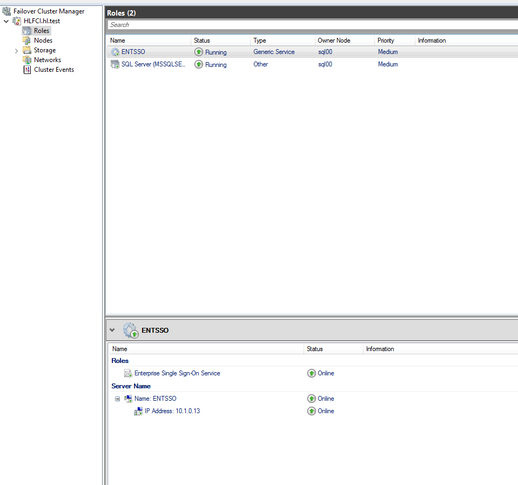
- The SSO cluster role is created
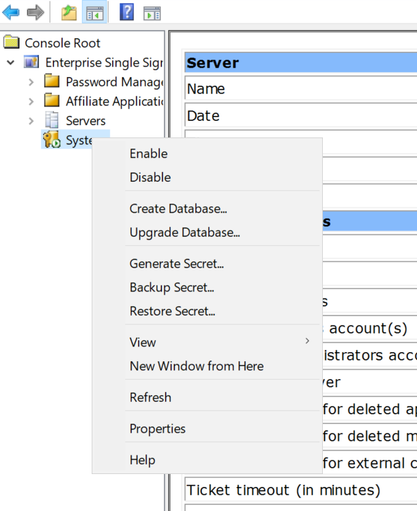
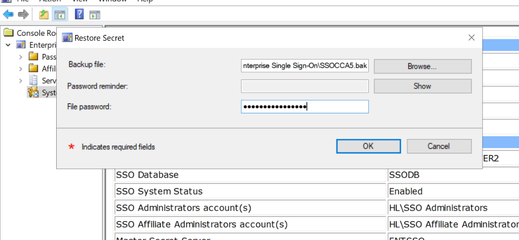
- Now move ENTSSO role to the secode node, copy the bak file for the first node to the second node. Restore the secret on the second node, if the restore/backup menu is gray, disable and enable the system to allow backup and restore.
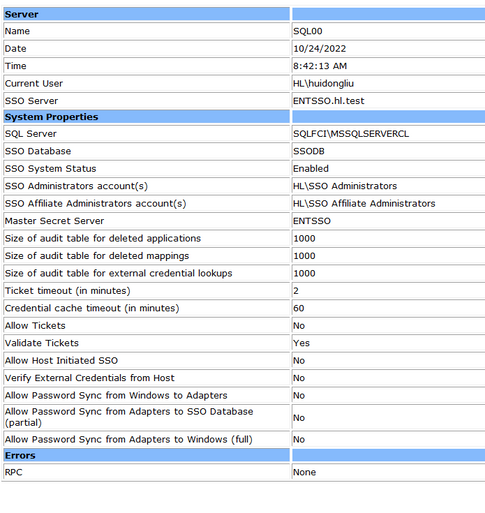
- Check the ENTSSO settings on the active node
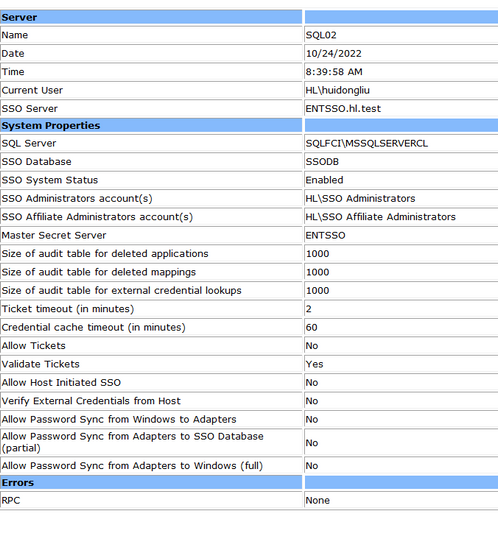
On the second node:
Configure ENTSSO on Azure LB
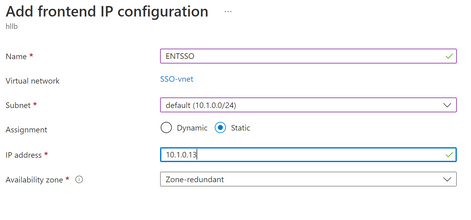
- Add a frontend IP address which is the SSO IP
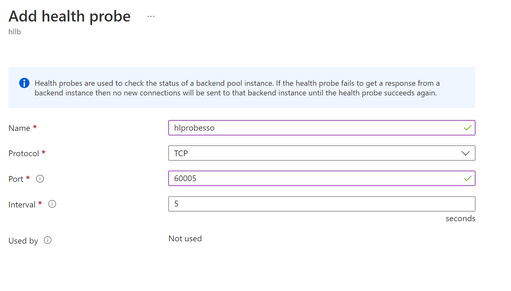
- We do not need to add a backend pool and can use the same backend pool as the failover cluster. Then create a new health probe, and give a port number 60005
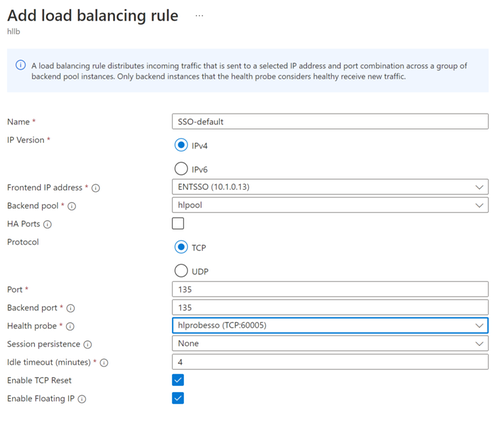
- Add load balancing rule
If you are using the fixed the SSO port, add the rule for the port 135, and each rule for each of the higher fixed port number.
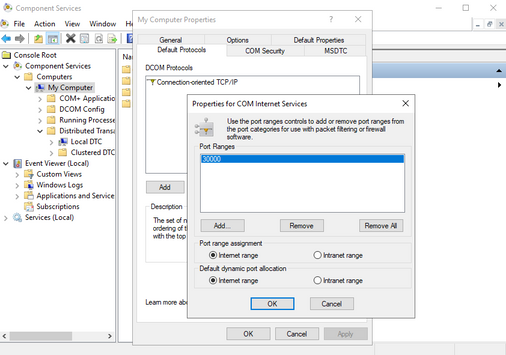
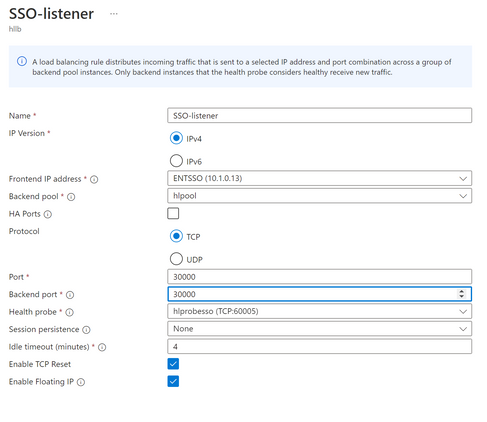
You can use a higher fixed port for SQL and SSO cluster, you can test with 30000 range ports.
- 30000 : EntSSO port
- 30001 : local MSDTC port
- 30002 : clustered MSDTC port #1
- 30003 : clustered MSDTC port #2 (if more clustered SQL instances, usually customers have 2 SQL instances at least)
- 30010 : clustered SQL port #1 (1st SQL instance)
- 30011 : clustered SQL port #2 (2nd SQL instance)
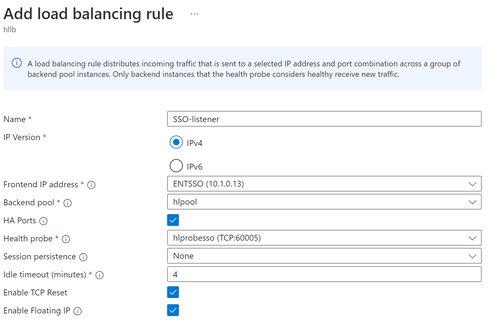
If you are not sure which port ENTSSO is using, choose HA ports. In my case, I used the HA ports, and this is the only LB rule for SSO, and I did not open a range of ports and create extra rules for each of the port. This config is done differently than the reference above.
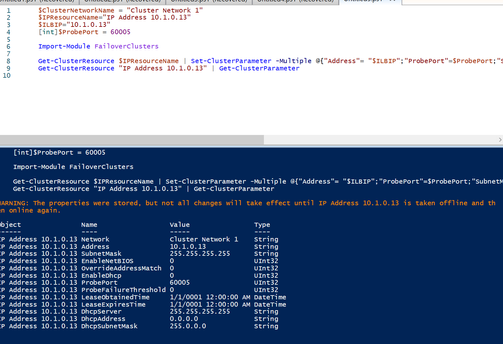
- On the active node of the SSO cluster, make sure to also execute this PowerShell-script, to set several cluster-parameters for this SSO-role, similar as what have been done for the SQL-roles. This time fill in the IP-address and name used for the SSO-cluster.
This command only has to be executed on a single node within the cluster, as this will connect the load balancer’s health probe, as configured in the Azure Portal, to this cluster role.
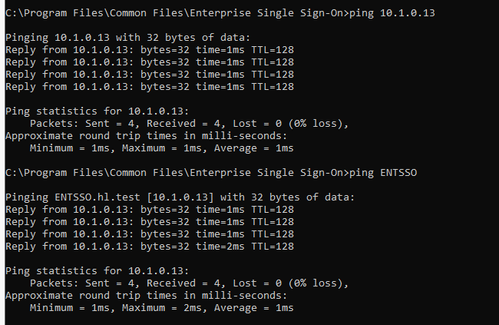
- Now I am able to ping this IP or cluster name from the BTS server
Install BizTalk on the BizTalk node
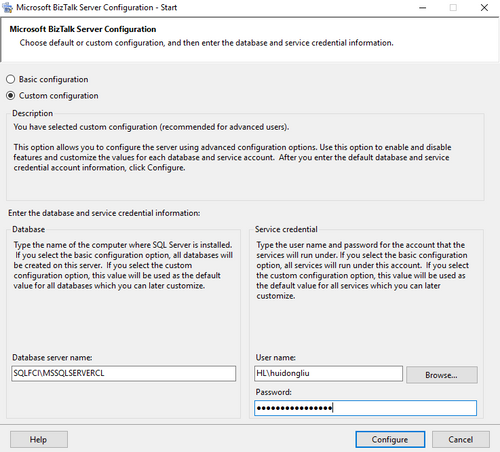
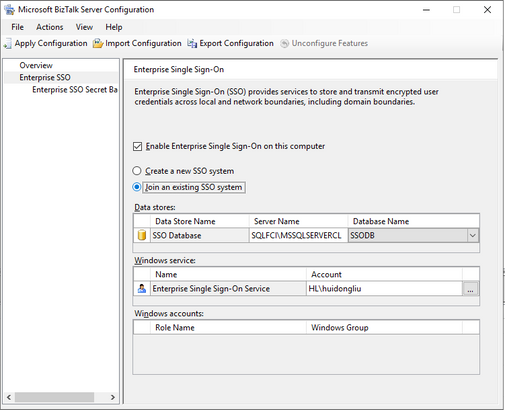
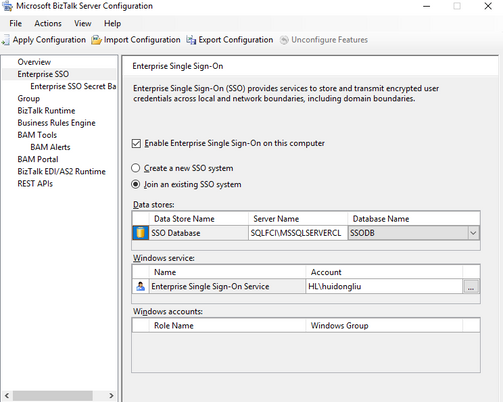
- You can either create a new SSO or join the existing SSO system. I have tested both approach and they all works.
Create new SSO
Or join existing SSO
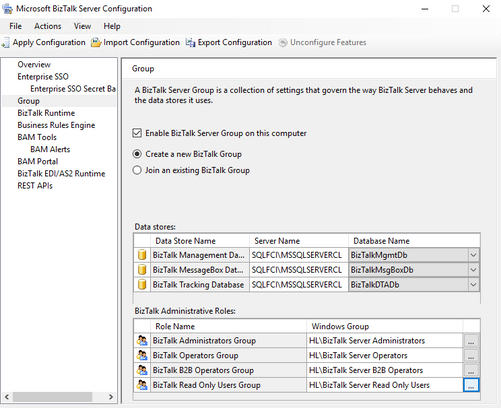
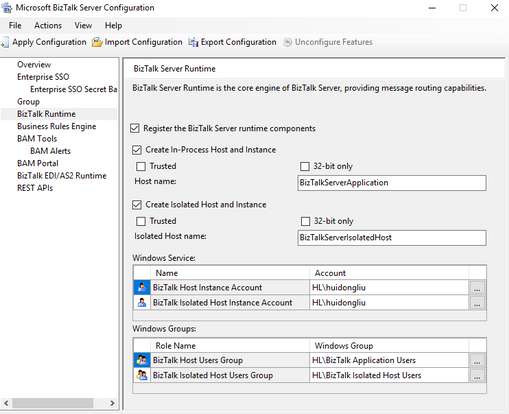
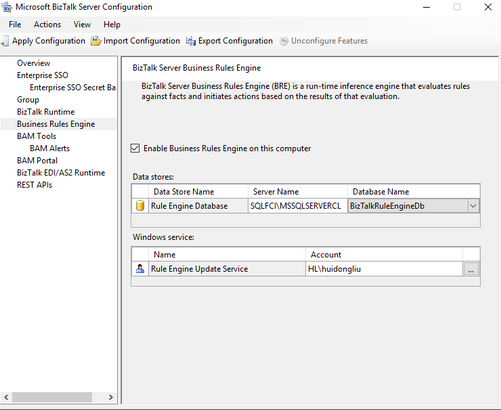
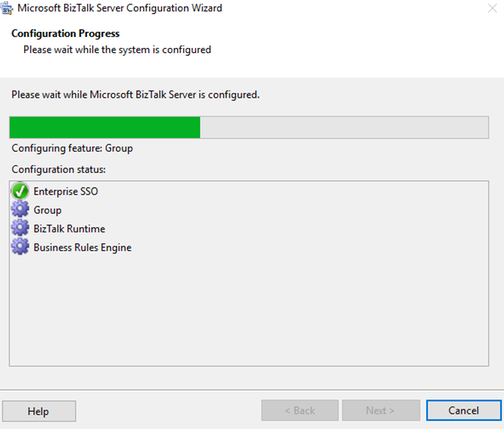
- Then configure the Group and Runtime
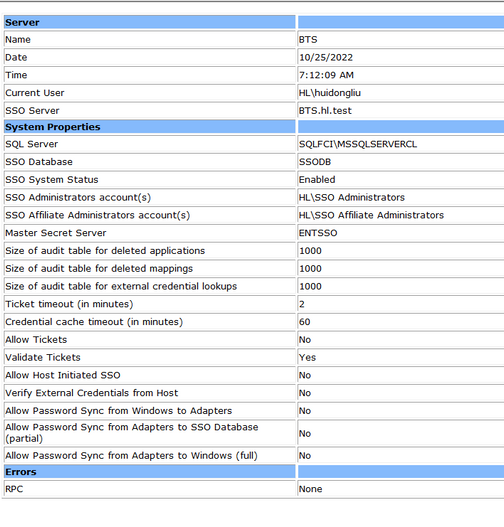
On the BizTalk server, after configuration, SSO is running. If you created a new SSO, it would look like this.
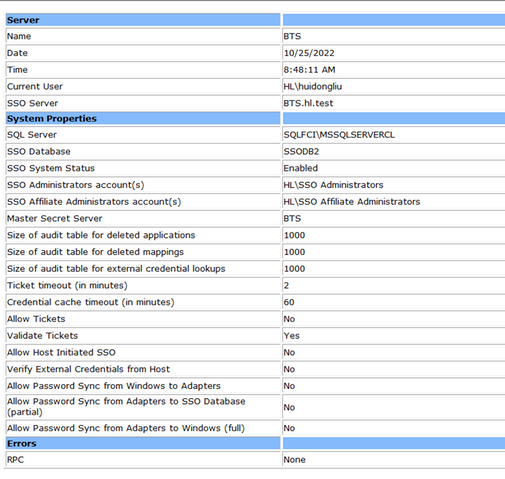
If you joined the existing SSO, which is “ENTSSO” in our case, it will look like this:
Test the BizTalk
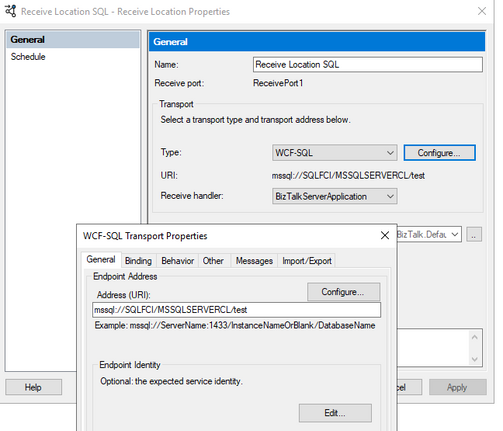
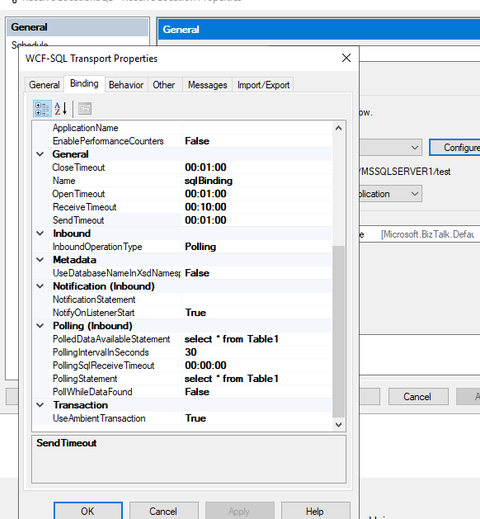
- I configured a receive location and send port, connecting the cluster DB, no errors
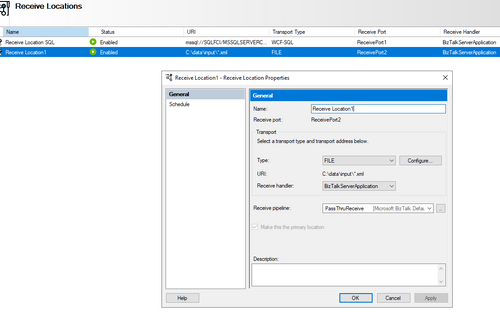
- I also tested a File receive location and send port. It is working properly.
Now we have created a Failover and SSO cluster on Azure VMs and BizTalk is able to run on another VM and able to communicate with the cluster.
References:
- https://learn.microsoft.com/azure/azure-sql/virtual-machines/windows/failover-cluster-instance-azure-shared-disks-manually-configure?view=azuresql
- https://techcommunity.microsoft.com/t5/core-infrastructure-and-security/configure-sql-server-failover-cluster-instance-on-azure-virtual/ba-p/371464
- https://www.codit.eu/blog/how-to-cluster-the-enterprise-single-sign-on-sso-service-on-sql-server-2016-always-on-availability-groups-cluster-in-azure/
- https://docs.microsoft.com/biztalk/install-and-config-guides/set-up-and-install-prerequisites-for-biztalk-server-2020
- https://www.sqlservercentral.com/forums/topic/sql-2019-fci-in-azure-unable-to-connect-on-secondary-node

