This post has been republished via RSS; it originally appeared at: New blog articles in Microsoft Community Hub.
This article is brought to you by the Nonprofit Tech Acceleration (NTA) for Black and African American Communities Program Technical Team. For information on how to take advantage of the granted offerings or free technical consultation, please visit: Supporting Black Community Nonprofits | Microsoft Nonprofits
Greetings to our amazing NTA nonprofits. This article will discuss a feature in Microsoft Outlook that you may or may not be familiar with, but can be very helpful in keeping you organized, better visualize your tasks, and help plan your projects. This feature is Microsoft Outlook’s board view.
Using the board view in Outlook gives you a better visual representation of your tasks and projects and can help you keep track of task progress, goals and priorities all in one place. This can be especially useful for managing projects and tasks that have multiple stages and due dates.
In Calendar in Outlook, you can create as many boards as you’d like and dedicate one to its own project that you are working on. Each board is customizable with a drag-and-drop functionality to suit your specific needs. For example, one calendar can include a project’s task statuses, their priority levels, due dates, emails, files and team member assignments. Another project’s board can include pictures, documents, research links, and goals and team notes. Whatever you need to get that project to the finish line!
Now, it wouldn’t live up to Microsoft’s standards if you could not use it for collaboration. Like majority of Microsoft’s products, you too can share and grant board access to team members for viewing and collaboration purposes. This way, you can all have one shared board for each project. If you choose not to share your board, you can focus only on the tasks assigned to you. To each, their own!
Overall, Microsoft Outlook’s board view is the digital corkboard for project management you didn’t know you needed. Let’s take a look at how you can get started.
How to Access Microsoft Outlook Board View
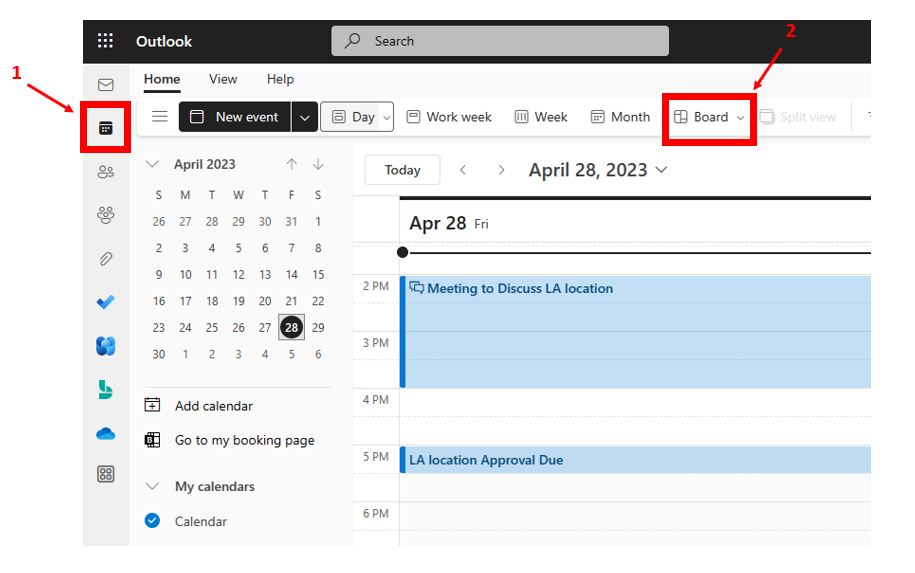
- Start by navigating to the Calendar tab in Microsoft Outlook.
- Select Board from the menu bar.
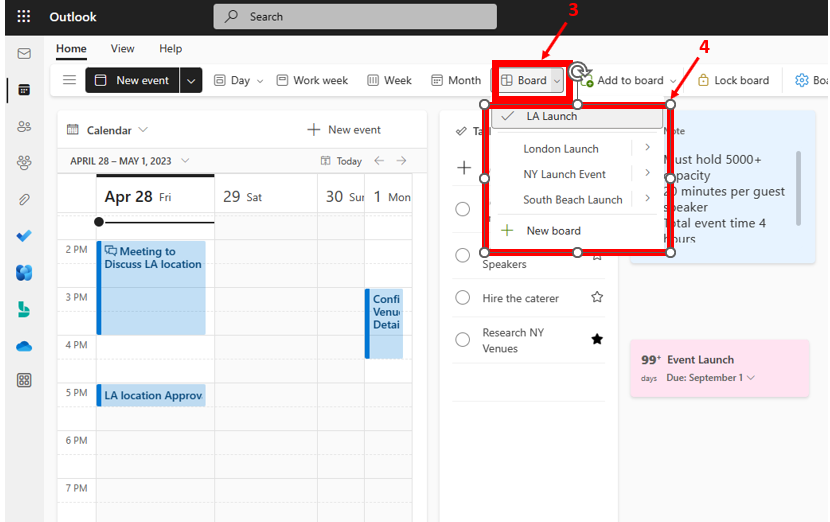
- Select the drop-down next to the Board symbol.
- Choose a board you want to work in or create a new one.
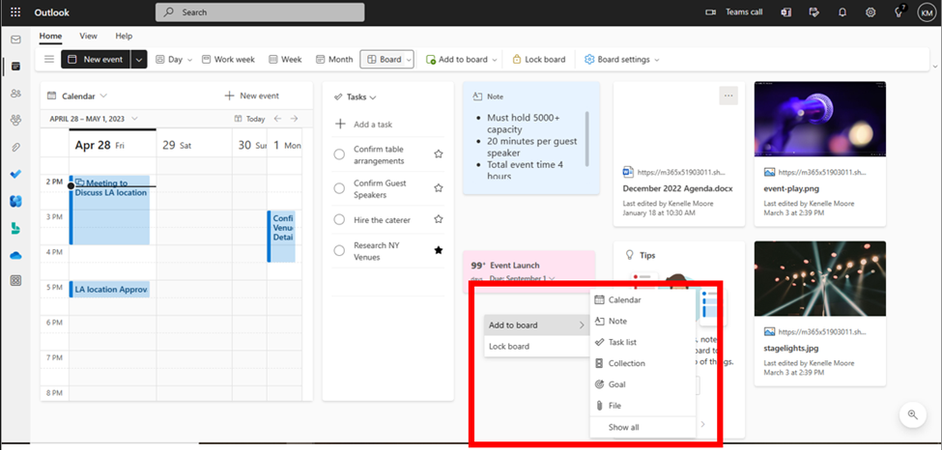
- To add items to your board, right-click on an empty space and select Add to board. Pick from the menu or select Show all to extend for more options. You can also add to the board by right-clicking on an email message, event in your calendar or a task and selecting Add to board.
That's it! Nice and simple. Happy organizing nonprofits and as always, thank you for allowing the NTA team to serve you and help better serve our communities!


