
This post has been republished via RSS; it originally appeared at: Microsoft Stream Archive articles.
Originally published by John Deutscher, Principal PM Manager, on Thursday, August 4, 2016
In part 2 , I covered how to record and capture your screencast. Now that you have your rough content, you may need to cut it down or clean it up. In this post, I cover the editing process.
Editing and revising
If you are one of those masters of recording and got it all in one-take, then you are able to skip to the next step of just uploading your video to Microsoft Stream. But if you are a mere mortal, and took more than one take to get it right like me, you may need to do some editing and revising of your video. In addition, a lot of content may need some additional post-production work to include content like an intro “bumper” at the beginning and end, overlay graphics, lower-third attributions or credits.
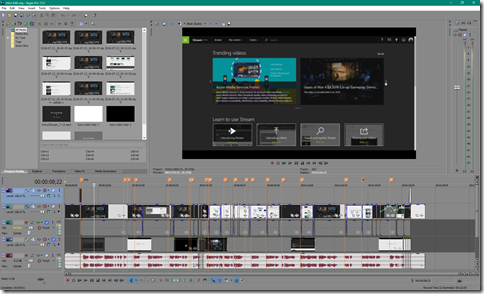
To finalize my own product videos, I rely on Sony Vegas Pro. It’s a tool I have used through many versions, supports the video formats I record in, and allows me to edit fast. Choose whichever editing tool you are most comfortable with.
I initially created a project that matched the resolution of my recorded videos so that the output would not be up or downscaled. In addition I set the frame rate for my project to 30fps.
When editing your training videos, use your creativity to enhance them as much as you like to get your message across. A few basic editing tips to follow:
- Stick to simple crossfade transitions. Don’t experiment with fancy page-turns and 3D wipes. Keep transitions short, around 1-2 seconds at most.
- Cut on actions or words. It’s easier to hide an edit and make it feel smoother if you cut on a word with a hard consonant, or at a specific action point in the video.
- If your timing was off, make sure to slide the audio to match the action.
- Get rid of mistakes. If you stuttered, said “um” a lot, or just held silent too long between phrases… clean up the audio! Try to trim it down first, but if it doesn’t work out, go back and re-record the take.
- Step away from your draft. After a day editing a video, you can lose sight of what your original goal and “purpose” was. Walk away, put it down, and come back to it fresh again.
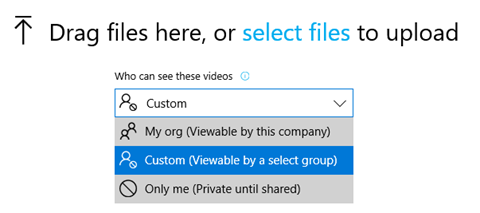
When you are done editing, export a rough edit, upload it to Microsoft Stream and share it with your team before sharing it with your entire org. Stream makes this easy for you by allowing you to secure your content and share it with just the members of your team. You can do this by setting the security to Custom while uploading.
Uploading to Stream
When you are ready to publish your final video, simply drag and drop or select the video in the Upload page. Here’s a quick How-to video that was created using the guidance above and explains uploading content in Microsoft Stream.
I would recommend reviewing our previous blog post on how to make the most of your first upload to Stream by adding the proper metadata, so that your video is more discoverable in Stream.
Adding captions to your edit
One final finishing piece for your video is to provide captions for the hearing impaired. For many companies and government agencies in the United States, this is a requirement for training video.
Microsoft Stream allows you to upload a WebVTT caption file and attach it to your video for playback.
WebVTT is a standardized caption file format , and most of the time if you have a short video you can take your script from above, and easily convert it to WebVTT. You will have to grab the timing from your final video.
For longer videos, unless you have a lot of free time, I would recommend that you look into using specific caption editing software tools ( CaptionMaker and MacCaption ), or to save even more time go through a captioning service provider like SubPly.com .
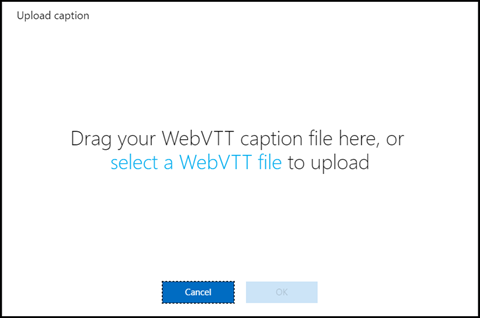
Once you have a valid WebVTT file, it is simple to upload it and attach it to your video in Stream. Just go to the My Content menu and select My Videos to locate the video that you would like to add the captions to. Select Edit from the command menu (“…”) and click the “Upload caption file” link. Browse for the .vtt caption file or simply drag and drop it into the dialog box to upload it. Edit the language as required, and Apply changes.
Your video will now have captions attached and available for viewers during playback.
Publishing your final How-To video
With your content uploaded to Stream and captioned, you can now Publish it for your entire company to view, add it to your own channels, or share it on an internal web site by grabbing the embed code. To share it with your company, just Edit the video again and change the permissions to “My Org (Viewable by this company)”. This makes the video publicly viewable by anyone in your company. Or you can set it to Custom and apply an Active Directory security group to restrict viewing to a smaller set of people in your company.
For details on how to publish a video and use privacy settings, refer to the documentation article “ Understand privacy settings ”.
Your video is now available for anyone in your company to watch and share! To learn more about sharing content in Stream, I recommend checking out the article “ Invite coworkers and share your videos ."