
This post has been republished via RSS; it originally appeared at: Core Infrastructure and Security Blog articles.
First published on MSDN on Oct 02, 2018In the Blueprint we’ve listed all we need, it is time to start setting up our environment!
We’re going to start off requesting an Enterprise Mobility + Security Trial Tenant.
- Open https://www.microsoft.com/en-us/cloud-platform/enterprise-mobility-security-trial and click Sign-up for your free trial
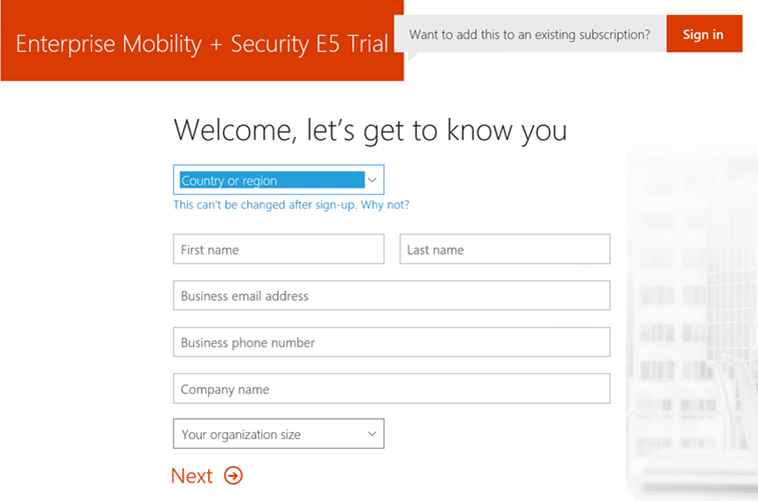
- Click on Create My account after filling out your Details

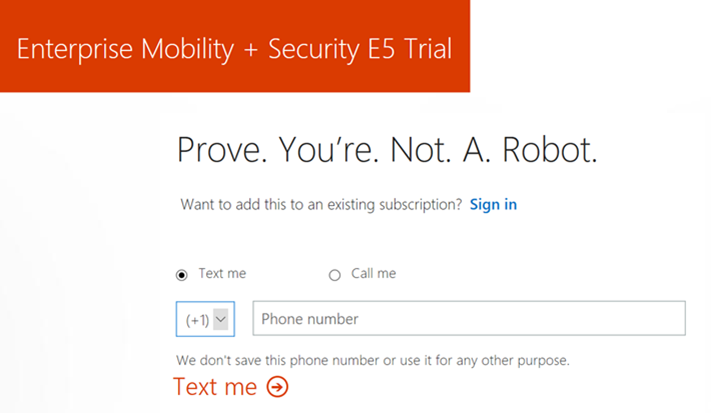
- The next step will be Identity verification by phone. Fill in your details and choose between receiving a text message or a phone call for identification purposes.
- Once this is done, we’re ready to go, so on this screen we will click on “You’re ready to go…”

- This will take us to https://azure.microsoft.com

-
Click the big green “Start free” button
Sign in with the admin account you’ve just created in the previous steps, the .onmicrosoft.com account.

- Next we’ll need verify the details in and submit the form.

- Step 2 takes us through Identity verification. Choose your preferred method, Text me or Call me, and finalize the verification step .
- Step 3 asks for credit card details. Remember you won't be charged unless you upgrade

- Step 4 is the final step, Click the checkbox and click "Sign up"

- Once that’s ready https://portal.azure.com opens on the dashboard page.

And we’re done.
In the next post we’ll go into configuring and preparing our Azure tenant further
Ingmar Oosterhoff, Matthias Herfurth and Johannes Freundorfer