First published on MSDN on Aug 30, 2018
Authored by Steve Read from AzureCAT
A common workload on Azure is a development and test environment because it is so cost-effective and easy to deploy and tear down. In this blog post, I will show how to set up Micro Focus Enterprise Server 4.0 and Micro Focus Enterprise Developer 4.0 on Azure.
With Enterprise Server, Micro Focus has created one of the largest Mainframe rehosting platforms available. This allows customers to run their z/OS workloads on the less expensive x86 platform in Azure. Enterprise Server runs on either Windows or Linux. For this walk-through, we will deploy the Windows version on an image from the Azure Marketplace based on Windows Server 2016 with SQL Server 2017 already installed.
The corresponding development environment for Enterprise Server is Enterprise Developer, which runs on either Microsoft Visual Studio or Eclipse. For this walk-through, we will use a Windows Server 2016 virtual machine that comes with Visual Studio 2017 installed.
Before we get started, check out these prerequisites:
- Get the bits from Micro Focus. If you are an existing Micro Focus customer, contact your Micro Focus representative. Otherwise, you can request a trial .
- For more information, see the documentation for Enterprise Server and Enterprise Developer .
- To run these two environments, you need a valid license (or trial license) from Micro Focus.
- You will obviously need an Azure subscription. If you don’t have one, create a free account before you begin.
- A best practice is to set up a site-to-site virtual private network (VPN) tunnel or a jumpbox so you can control access to the Azure virtual machines.
Now that we have the prerequisites and context squared away, let’s get started.
Install Enterprise Server
- Consider creating a new resource group just for this project—for example, RGMicroFocusEntServer . There are a number of reasons for doing this, all centered around security and manageability. Another tip is to use the first part of the name in Azure to designate the type of resource. It makes it easier to spot in a list.
- Create a virtual machine. From the Azure Portal Marketplace, select the virtual machine and operating system you want. I used the following virtual machine SKUs:
- For Enterprise Server : ES2 v3 (with 2 vCPUs and 16 GB memory) with Windows Server 2016 and SQL Server 2017 installed. This image is available from the Azure Marketplace. Enterprise Server can use Azure SQL Database as well.
- For Enterprise Developer : B2ms (with 2 vCPUs and 8 GB memory) with Windows 10 and Visual Studio installed. As above, this image is available from the Azure Marketplace.
- On the Basics blade, enter your Username and Password. You will also need to select the Subscription and Location/Region you would like to for the VMs. Remember to use RGMicroFocusEntServer for the Resource Group.
- Be sure to put both VMs into the same VNET since they will need to communicate with each other.
- You can accept the defaults for the rest of the settings. Remember the user ID and password you create for the administrator of these virtual machines.
- Once the virtual machines are created, open inbound ports 9003, 86, and 80 for HTTP and 3389 for RDP on the Enterprise Server machine and 3389 on the Developer machine.
- To log on to the Enterprise Server virtual machine, select the virtual machine from the portal. Go to the Overview blade and select Connect to launch an RDP session. Log on using the credentials you created for the virtual machine.
- From the RDP session, load the following two files. Since this is Windows, so you can drag and drop the files into the RDP session:
- es_40.exe , the Enterprise Server installation file.
- mflic , the corresponding license file—Enterprise Server will not load without it.
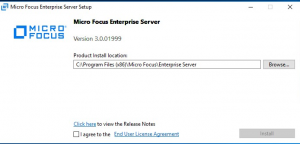
- Double-click the file to start the installation. In the first window, select the installation location and accept the end user license agreement.
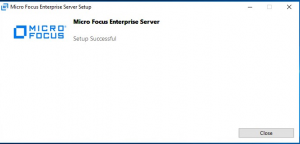
- When Setup is complete, the following message appears:
- After the installation, be sure to check for any additional updates since a number of prerequisites such as the Microsoft C++ Redistributable and .NET Framework are installed along with Enterprise Server.
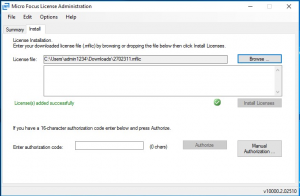
- Next, start the Micro Focus License Administration. Click Start > Micro Focus License Manager > License Administration , and then click the Install tab. There are two types of license formats: a license file or a 16-character license code. In my case, I had a file. For License file , browse to the mflic file uploaded previously to the virtual machine and select Install Licenses . Enterprise Server can now load.
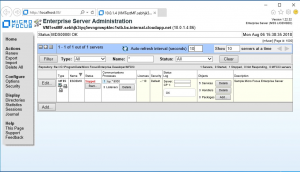
- To verify, try launching the Enterprise Server Administration site from a browser using this URL http://localhost:86/ . You should see the Enterprise Server Administration Page.
Install Enterprise Developer
Now, let’s install Enterprise Developer on our developer machine.
- Select the resource group created earlier (for example, RGMicroFocusEntServer ), then select the developer image.
- To log on to the virtual machine, go to the Overview blade and select Connect . This launches an RDP session. Log on using the credentials you created for the virtual machine.
- From the RDP session, load the following two files (drag and drop if you like):
-
- edvs2017.exe , the Enterprise Server installation file
- mflic , the corresponding license file—Enterprise Developer will not load without it
- Double-click the edvs2017.exe file to start the installation. In the first window, select the installation location and accept the end user license agreement. If you want, choose Install Rumba 9.5 to install this terminal emulator, which you will probably need.
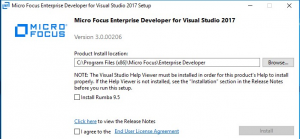
- After setup is complete, the following message appears:
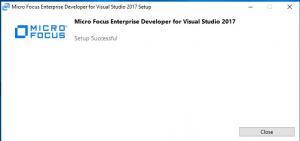
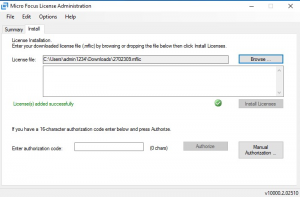
- Start the Micro Focus License Manager just as you did for Enterprise Server. Choose Start > Micro Focus License Manager > License Administration , and click the Install tab. As before, I had a license file rather than a 16-character license code. For License file , browse to the mflic file uploaded previously to the virtual machine and select Install Licenses . Enterprise Developer can now load.
You have now deployed a Micro Focus development and test environment on Azure! In a future blog post we will look at how to setup the Bank Demo application.
AzureCAT Guidance
“Hands-on solutions, with our heads in the Cloud!”
Continue reading Set up Micro Focus Enterprise Server 4.0 and Enterprise Developer 4.0 in Azure→