
First published on MSDN on Jul 18, 2018
This post was contributed by Salahuddin Khatri.
Setting up Application Gateway with WAF with an App Service that uses multiple Custom Domain names
I came across in a scenario in which customer is using WordPress Multisite configuration on Azure App Service with Linux (Multitenant) and publishing Azure App Service using Application Gateway to utilize WAF functionality.
Just so you know the template available in Azure Market Place for WordPress with App Service on Linux is deployed on a Linux container and you cannot enable Multisite feature in it unless you modify the container and then deploy the whole container, I have decided to deploy the App Service on Linux and then installed WordPress in it and then enabled Multi Site feature. For Those who doesn’t know the Multi site feature of WordPress, A multisite network is a collection of sites that all share the same WordPress installation. They can also share plugins and themes. The individual sites in the network are virtual sites in the sense that they do not have their own directories on your server, although they do have separate directories for media uploads within the shared installation, and they do have separate tables in the database for more information please review here
https://codex.wordpress.org/Create_A_Network
.
Just to let you know what are we going to do in this article, we will go through step by step where we are going to use Azure App Service (Multitenant) with multiple custom domain names and we are going to publish Azure App Service using Application Gateway with WAF, where application gateway will accept multiple custom domain names and will forward the request to one back end which is Azure App Service (Multitenant), I will not go through installing App Service and installing WordPress along with Multisite configuration, as this is a unique scenario I thought to write a blog post about it.
Prerequisites
As a prerequisite there is nothing much, but it would be assumed that App Service is deployed and configured, application gateway is deployed but not configured because we are going to do that together and access to External DNS
Before We Start!!
Before we start, since I have two websites which I want to access using Application Gateway, in this blog I am going to use my own custom domain name salah.co whereas kw.salah.co and pk.salah.co will be subdomain names added and verified in Azure App Service using awverify and CNAME record will be pointing to Application gateway IP Address domain name.
Ok enough about scenario and let us get it going further with real work
Adding Custom Domain in Web Apps
We are going to need to prepare the App Service to accept requests on the custom domain that routes through the Application Gateway. For this, we need to first add the custom domain on the App Service. You can follow the regular guide to configure a custom domain by using awverify records to avoid adjusting the domain’s actual records (
https://docs.microsoft.com/en-us/azure/app-service/app-service-custom-domain-name-migrate
), since our purpose is to add custom domain name in Azure and for that we have to use awverify record in external DNS pointing to App Service URL so that App Service will allow us to add those custom domain names. Go to your external DNS and based on your domain names create the txt records pointing to App Service URL, below is what I have done in my External DNS

Let us open App Service and go to Custom Domain option and click on
Add hostname
to add the required domains

On the Add hostname under
hostname
write down the required domain
pk.salah.co
and click
Validate

As the awverify txt record is already created, Azure App Service has verified domain ownership and hostname availability, click on
Add hostname
to add the domain name in Azure App Service, do the same for your other domains

I have added both domains in Azure App Service

Setting up the Application Gateway
Now we have added custom domains in Azure App Service, let us configure application gateway with WAF to accept custom multiple domain names and send it to Azure App Service, I have also done other configuration in Azure App Service with WordPress and Multisite configuration to Map the domains etc.
We are going to use the mixture of PowerShell and GUI for this, as some required settings we need to set are only available in PowerShell for now.
The typical guide for setting up an App Service behind an existing Application Gateway is here:
https://docs.microsoft.com/en-us/azure/application-gateway/application-gateway-web-app-powershell#configure-a-web-app-behind-an-existing-application-gateway
, however this guide will help you to configure the application gateway with default configuration to connect with Azure App Service, where App service is configured with one custom domain name or no custom domain name at all, as well as same guide can create application gateway if does not exist and the connect with Azure App service, where App service is configured with one custom domain name or no custom domain name at all.
Our scenario is different, we have multiple custom domain names and we want Application Gateway to accept and connect to Azure App Service with multiple domain names where I have configured Multi Site with WordPress.
Here is What are we going to do,
1. We will create an application gateway with WAF
2. We will configure default Backend pool to connect to App Service
3. We will create two new http Settings with custom probe one for each domain, if you have more than one domain then you must create Http Settings based on number of custom domains
4. We will create two multi-site listeners one for each domain, if you have more then one domain then you must create listeners based on number of custom domains
5. We will create two Rules one for each Listener
6. We will delete default Application Gateway settings
7. We will run commands from PowerShell to create custom Probe with required settings to make it work for App service
8. We will configure Http settings to accept and work for custom domains
Create Application Gateway
Input the application gateway name, location and RG on the basic information blade, I am naming my application gateway as testappgw

I am going to select a VNET with dedicated subnet for application gateway, select the Public IP under IP Address type and then select create new Public IP Address, define the name for the DNS name of the Public IP Address, this is necessary because we are going to use this name for CNAME creation with your own DNS, configure Listener with port 80 since in this example I am going to have HTTP website, select other required options and click OK review the settings and then click ok

Since the application gateway is created, we will now start creating HTTP Settings, Multisite Listener etc as mentioned before
Editing existing / default Backend pool to connect App Service
On the Application Gateway with WAF Enabled, click on
Backend Pools
then open the default
appGatewayBackendPool

under name type the name of Azure Web App in our scenario it is
sitewordpressss.azurewebsites.net
then save

Add new HTTP Settings
Create two HTTP Settings, one for each custom domain name, if you have more custom domain name then you can create HTTP settings based on the number of domains
On the Application Gateway with WAF Enabled, click on
HTTP Settings
then click on
Add
, we will delete the default one once all dependencies are deleted.

On the Add HTTP Settings, fill the fields, as per my scenario I do not need other settings to be enabled, changed Request timeout to
30
as per requirements.

Do the same for other custom domain name, since I have two I have created two HTTP settings

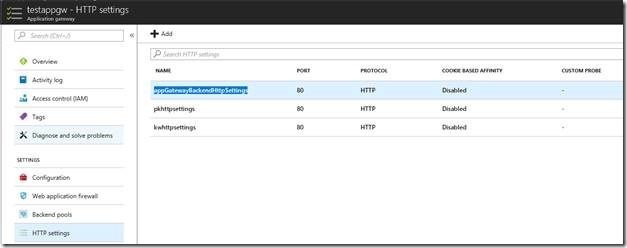
As you can see I have now total 3 HTTP settings, two I have created just now and the third default one which we will delete soon, notice there is no custom probe as of now, we are going to add one using PowerShell

Add Multi Site Listener for customer domain
Create two Multi Site Listeners, one for each custom domain name, if you have more custom domain name then you can create Multi Site Listeners based on the number of domains
On the Application Gateway with WAF Enabled, click on
Listeners
then click on
Multi-Site
, we will delete the default one once all dependencies are deleted.

On the Add, name the listener, under
Host name
make sure to add the domain name, do the same for other custom domain names, since we did not add or change anything on Frontend IP Configuration or Frontend port we will not select anything else.


You will see three listeners, two we have created just now and third is the default one. We will delete default one soon.

Create Rule
Create two Rules, one for each custom domain name, if you have more custom domain name then you can create Rules based on the number of domains
On the Application Gateway with WAF Enabled, click on
Rules
then click on
Basic
, we will delete the default one once all dependencies are deleted.

On the
Add
Basic
Rule
, name the rule and select the required listener and HTTP Settings, we have created two listeners and two http settings for each custom domain, associate the rule with its own custom domain
Listener
and
HTTP Setting
.

Create another one for pk.salah.com listener and HTTP Setting

Notice we have three rules including default one

Delete Default Listener, HTTP Setting and Rule
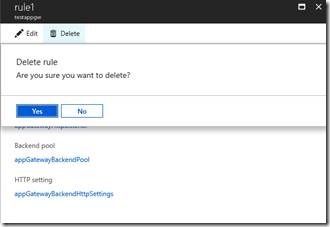
First let us delete the default rule, click on
Rules,
select the default rule named
rule1
and then click on
Delete
and click
Yes

Next, we will Delete Default Listener, click on Listeners, then click on default Listener named appGatewayHttpListener

Click on
Delete
then
yes

You will be asked for the confirmation to update the resources click ok

Next, we will delete default http settings, click on HTTP Settings, then click on default HTTP Settings named
appGatewayBackendHttpSettings
Click on
Delete
and then
Yes

Run the PowerShell Commands for application gateway
By running the PowerShell commands, we are configuring application gateway with custom Probes, there will be two probes for each HTTP Settings, configuring HTTP settings to accept the custom domain names, configuring custom probe to be compatible and work with App Service by using
“-PickHostNameFromBackendHttpSettings”
which is required by probe to make work with App Service. In the typical guide for setting up an App Service behind an existing Application Gateway
https://docs.microsoft.com/en-us/azure/application-gateway/application-gateway-web-app-powershell#configure-a-web-app-behind-an-existing-application-gateway
which uses
“-PickHostNameFromBackendAddress”
with HTTP Settings, which would use the *.azurewebsites.net hostname when connecting to the backend App Service. When that configuration is in place, authentication goes towards the *.azurewebsites.net hostname instead of the custom domain, Since we have multiple custom domain names instead of using
“-PickHostNameFromBackendAddress”
we will use
“-HostName”
in each HTTP Settings, in our example we will use
-HostName “kw.salah.co”
with kw http settings, and
-HostName “pk.salah.co”
with pk http settings, that is the reason we have created multiple http settings, rules, listeners and Custom Probes.
In the following script change the Resource Group name, application gateway name, custom domain name, probe name etc.
# Retrieve existing resource group
$rg = Get-AzureRmResourceGroup -Name “testappgwrg”
# Retrieve an existing application gateway
$gw = Get-AzureRmApplicationGateway -Name testappgw -ResourceGroupName $rg.ResourceGroupName
# Define the status codes to match for the probe
$match=New-AzureRmApplicationGatewayProbeHealthResponseMatch -StatusCode 200-399
# Add a new probe to the application gateway
Add-AzureRmApplicationGatewayProbeConfig -name webappprobe2 -ApplicationGateway $gw -Protocol Http -Path / -Interval 30 -Timeout 120 -UnhealthyThreshold 3 -PickHostNameFromBackendHttpSettings -Match $match
# Add a new probe to the application gateway
Add-AzureRmApplicationGatewayProbeConfig -name webappprobe3 -ApplicationGateway $gw -Protocol Http -Path / -Interval 30 -Timeout 120 -UnhealthyThreshold 3 -PickHostNameFromBackendHttpSettings -Match $match
# Retrieve the newly added probe
$probe = Get-AzureRmApplicationGatewayProbeConfig -name webappprobe2 -ApplicationGateway $gw
# Retrieve the newly added probe
$probe1 = Get-AzureRmApplicationGatewayProbeConfig -name webappprobe3 -ApplicationGateway $gw
# Configure an existing backend http setting
Set-AzureRmApplicationGatewayBackendHttpSettings -Name kwhttpsettings -ApplicationGateway $gw -HostName “kw.salah.co” -Port 80 -Protocol http -CookieBasedAffinity Disabled -RequestTimeout 30 -Probe $probe
# Configure an existing backend http setting
Set-AzureRmApplicationGatewayBackendHttpSettings -Name pkhttpsettings -ApplicationGateway $gw -HostName “pk.salah.co” -Port 80 -Protocol http -CookieBasedAffinity Disabled -RequestTimeout 30 -Probe $probe1
# Update the application gateway
Set-AzureRmApplicationGateway -ApplicationGateway $gw
Once the Script is done, it would update the application gateway and update the settings, I am just going to share the screen shot of the settings to notice the changes in HTTP Settings and Probes which were not there while creating those.


In case you want to verify Health Probe Settings, notive Host is empty this is because we have used
“-PickHostNameFromBackendHttpSettings”

Since we have created and configured Application gateway, it is time now to create CNAME record for each custom domain from External DNS.
Create CNAME record for each domain
During creation of application gateway, we have provided DNS name for the public IP address of application gateway, we are going to create two CNAME record in external DNS pointing to the DNS name of application gateway Public IP Address.


It would take time to update the DNS you can verify DNS updated or not by doing nslookup from your own device, mine is updated after 5 minutes. As soon as DNS is updated when I browse kw.salah.co it is connecting me to the site contents related to kw and when I browse pk.salah.co it is connecting me to different contents related pk.