
This post has been republished via RSS; it originally appeared at: Windows Dev AppConsult articles.
First published on MSDN on Nov 15, 2018
Artificial Intelligence is everywhere and powered by the Cloud. We can now go even further and bring AI to HoloLens gracefully thanks to Windows Machine Learning and Windows 10!
Let's go and make it real with a full working and reusable sample. Yes! Reusable because, you can train your own Custom Vision model and run it using this sample ♻ without any code modification.
Note: My colleagues Etienne Margraff and Matteo Pagani already gave lot of details and useful explanations about Windows ML. Feel free to refer to their good blog posts in the References section at the end of this article.
The idea is the following:
- We use a Custom Vision model that we train in Azure to recognize objects/situations/machines/persons/etc. (In fact, almost what you want ?).
- We export this model as a ONNX 1.2 file.
- We develop a HoloLens app which gets video frames in continue.
⏩✔ The app uses the model locally for evaluation and predicts what is in front of the user wearing the HoloLens!
--
Step 1. Train ? a Machine Learning Model in Azure
? Create the Custom Vision model
Connect to https://www.customvision.ai/ and click on the NEW PROJECT button to create a new Custom Vision project. 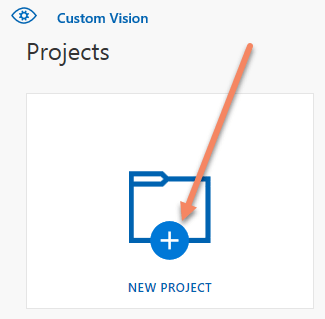
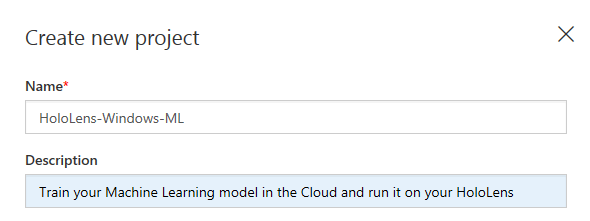
Fill in the details:
- A name and a description .
- Choose if you want to use the Limited Trial mode or use/create an Azure resource group for hosting the Custom Vision service in Azure.

Note: Choosing the resource group option makes sense if you want to use your Custom Vision model everywhere. I mean: it uses Azure to provide a REST endpoint API that can be used in mobile apps or on computers running Windows, MacOS, Linux or even in Web sites. And all this, without to worry about the technology used.
For evaluating the model locally on the HoloLens, you can go for the Limited Trial as we will not use the Azure Custom Vision endpoint. Please note that, later, if you want to instantiate an Azure resource for this Custom Vision model's evaluation on other platforms, you can do it by clicking on the gear on the top right of the page:
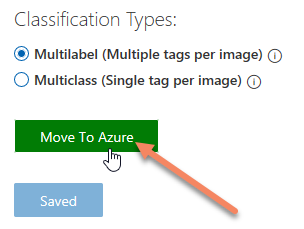
Then, at the bottom of the details' page for your model, you create the Azure resource by clicking on the Move To Azure button:
So, let's go back to our model creation:
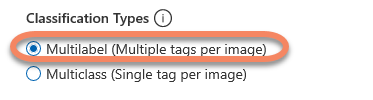
- Choose Classification for the project type. That means that we would like to tag the whole image.
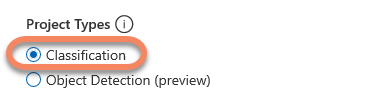
Note: For your information, Object Detection finds also the location of the object within an image.
- Go for Multilabel (Multiple tags per image) as we would like to not be blocked to use only one tag. As an example: The image can contain a machine factory B214 type 2 and another machine whom id is A78 Alpha2. Tags applied to the image will be "B214 type 2" and "A78 Alpha2".
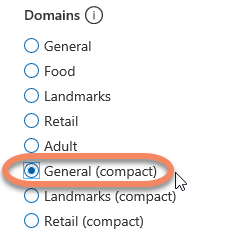
- Lastly, but may be the most important, ⚠ take General (compact) ⚠. Choosing a compact model is mandatory to be able to use it with Windows ML on HoloLens or in a Windows 10 UWP app.
? We are all set for the creation!
⚗ Train the model
To do so, the steps are straight forward:
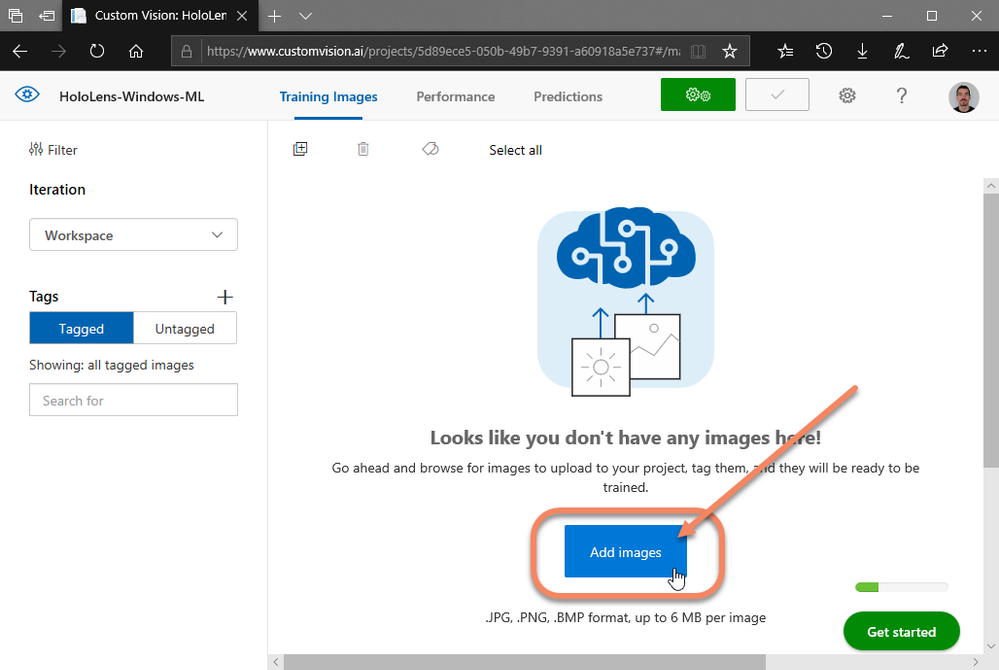
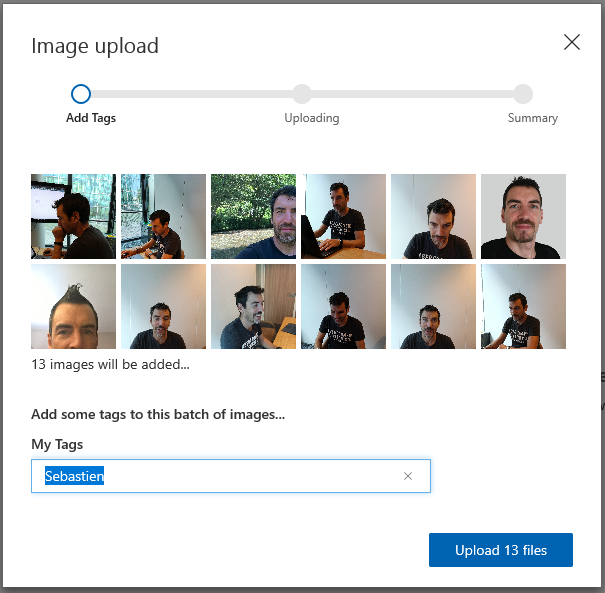
- Just upload photos using the Add images button.
- Give one or more tags to the images to upload.
At any time, you can review, add or change the tags to the images. 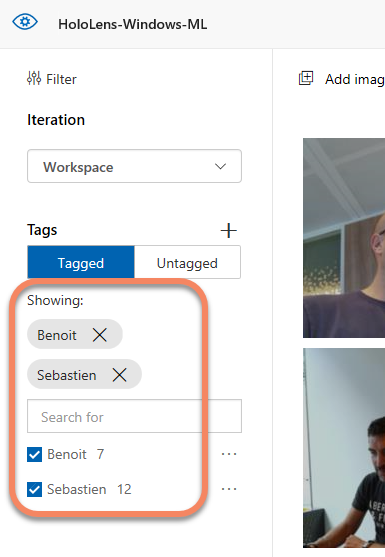
When you are done, click on the Train button. 
For more details, feel free to read Test and retrain a model with Custom Vision Service .
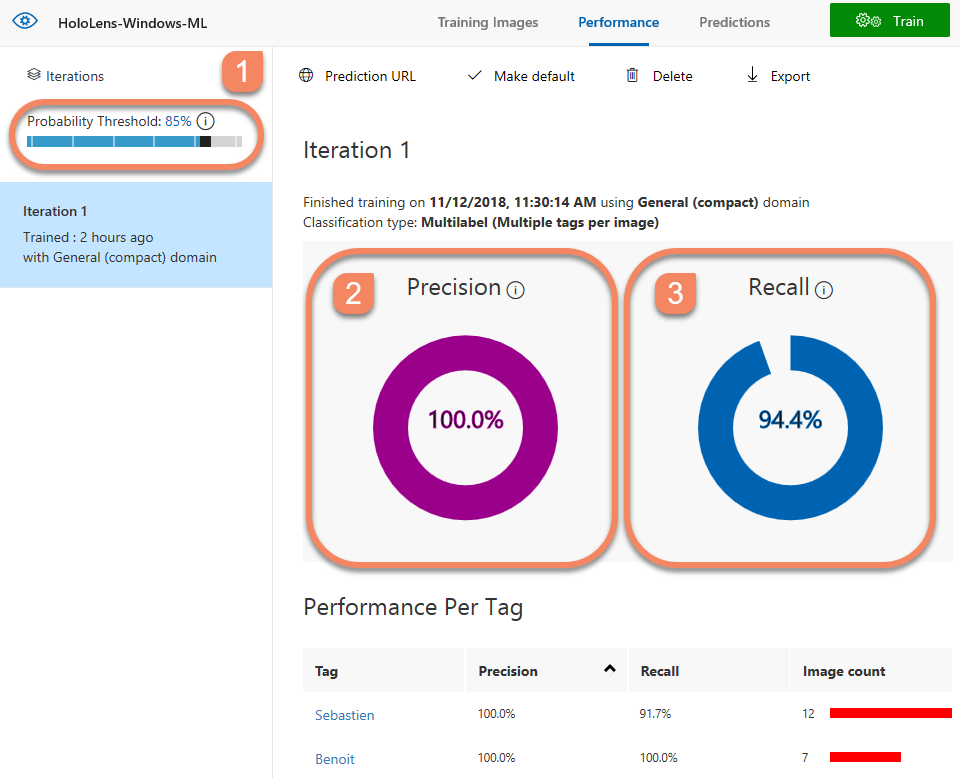
Here are some explanations about the results we get:
- You can change the Probability Threshold for a prediction to be valid. For example: 85% means that any predictions whom score < 85% will not be considered as a valid prediction.
- Precision = Gives you the % of correct predictions. For example: For Benoit , we have 7 tagged pictures and the model's evaluation predicted this tag for all 7 pictures (so 100%).
- Recall = Gives you the % of found tags. For example: For Sebastien , we have 12 tagged pictures and the model was able to predict this tag for 91,7% of the pictures (11 pictures).
Step 2. Export ? the model as ONNX 1.2
Again, this steps is easy and well documented by the article written by Matteo : Just click on the Export button. 
⚠ Be sure to choose the ONNX 1.2 format ⚠ 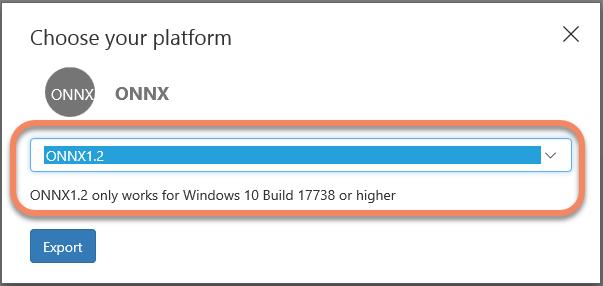
You see there that your app will run on Windows starting at the Build 17738 which means Windows version 1809 or above.
Note: As I write this article, the Windows version 1809 can be installed on HoloLens by participating to the Windows Insider Preview Slow ring.
Step 3. Create a Unity App ? for HoloLens that captures the camera ? frames
Project setup ?
I worked with the following versions:
- Windows version 1809 for the PC and HoloLens
- Visual Studio 2017 version 15.9.0
- Windows SDK version 10.0.17763.0
- Unity 2017.4.13f1
Note: You can skip this part if you are familiar with Unity and Mixed Reality.
If not, please refer to Create a Windows Mixed Reality App from 0 – The Unity project .
The Unity project has to be configured for Windows Mixed Reality:
- File menu / Build Settings ➡ Universal Windows Platform selected as the Build platform
- Edit menu / Project Settings / Player ➡ Virtual Reality Supported checked
- Edit menu / Project Settings / Player ➡ Other Settings / .NET as Scripting Backend. Please also use the Experimental (.NET 4.6 Equivalent) for the Scripting Runtime Version.
Technical piping ? for being able to give update to the user
The purpose is to be able to display a text message in front of the user from any code within the app. We first add a startup script to the scene:
From the GameObject menu Create an empty object and name it "ScriptManager". 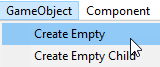
Select the ScriptManager object in the Hierarchy and click on Add Componennt / new script and name it "UnityScanScene". 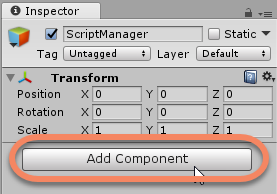
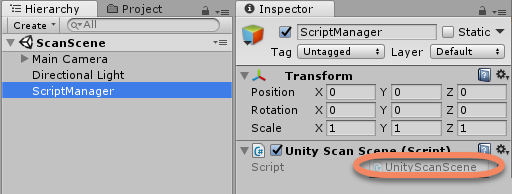
Double click on the UnityScanScene script to modify it in Visual Studio; Replace the existing code by the one below. Let me give you some details:
- We use an interface IUnityScanScene with one unique public method ModifyOutputText .
- The startup script we are modifying (UnityScanScene) implements this interface. The method ModifyOutputText just modifies a string.
- The Update method of the script (UnityScanScene) is executed for each frame. We just modify the text of a 3D Text object based on the modified string.
All this "piping" is really useful for giving feedback to the user (text or other) from any code from any class within the project. You will see it in action later in this article.
using System.Collections;
using System.Collections.Generic;
using UnityEngine;
/// <summary>
/// The Interface gives one method to implement. This method modifies the text to display in Unity
/// Any code can then call this method outside the Unity MonoBehavior object
/// </summary>
public interface IUnityScanScene
{
void ModifyOutputText(string newText);
}
public class UnityScanScene : MonoBehaviour, IUnityScanScene
{
// Unity 3D Text object that contains
// the displayed TextMesh in the FOV
public GameObject OutputText;
// TextMesh object provided by the OutputText game object
private TextMesh OutputTextMesh;
// string to be affected to the TextMesh object
private string OutputTextString = string.Empty;
// Indicate if we have to Update the text displayed
private bool OutputTextChanged = false;
// Use this for initialization
async void Start ()
{
OutputTextMesh = OutputText.GetComponent<TextMesh>();
OutputTextMesh.text = string.Empty;
#if UNITY_WSA && !UNITY_EDITOR // **RUNNING ON WINDOWS**
// We will create our Camera scan engine here
#else // **RUNNING IN UNITY**
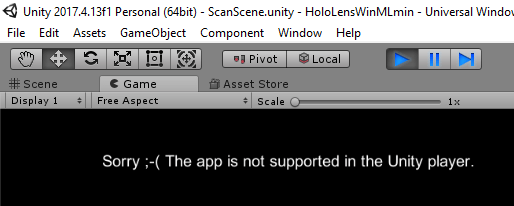
ModifyOutputText("Sorry ;-( The app is not supported in the Unity player.");
#endif
}
/// <summary>
/// Modify the text to be displayed in the FOV
/// or/and in the debug traces
/// + Indicate that we have to update the text to display
/// </summary>
/// <param name="newText">new string value to display</param>
public void ModifyOutputText(string newText)
{
OutputTextString = newText;
OutputTextChanged = true;
}
// Update is called once per frame
void Update ()
{
if (OutputTextChanged)
{
OutputTextMesh.text = OutputTextString;
OutputTextChanged = false;
}
}
}
Display ? some text in the field of view
Add a 3D Text object as a child of the camera; Name it "OutputText"; Change its properties as shown below. The purpose is to see some text at a nice distance and in the center of the field of view. 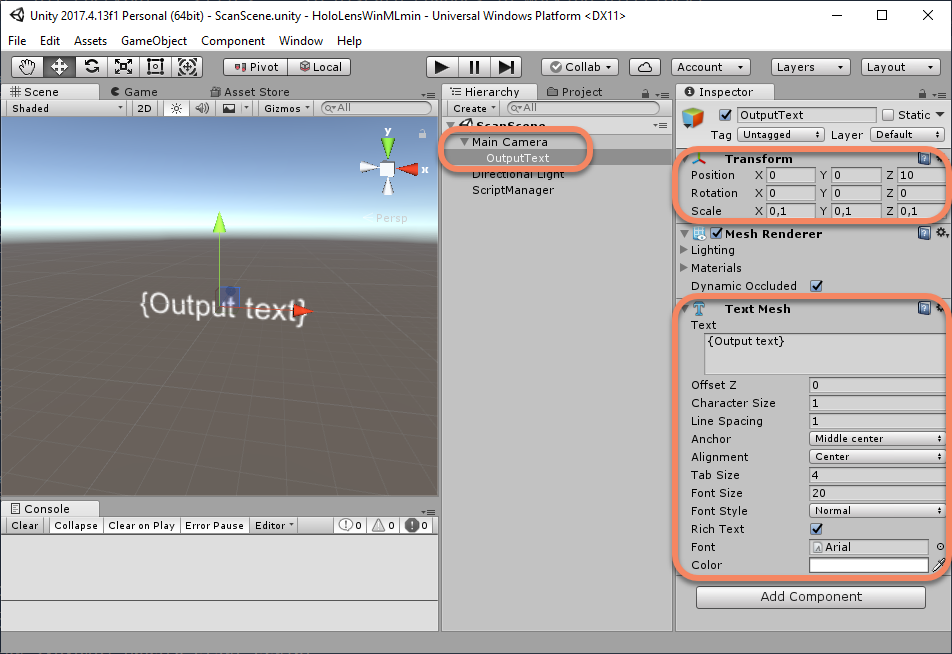
To be able to update this 3D Text object, drag & drop the OutputText object from the hierarchy to the Output text property of the ScriptManager object. This action gives to the UnityScanScene class the reference to the 3D Text to modify. 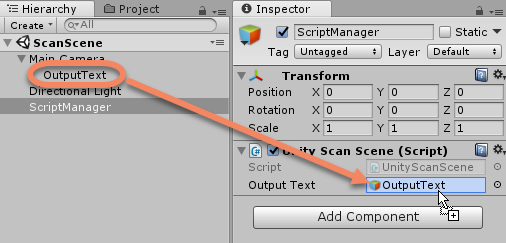
To do a small verification, you can press the Unity PLAY button.
Camera scan engine ⚙ ?
Ok, it is now time to take care of the camera:
Add a new folder in the Assets named "UWP" in order to place within it only C# code that runs on Windows.
Add a script named "ScanEngine". Here is the Assets folder look: 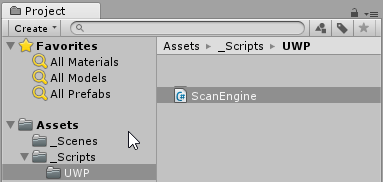
Replace the content of the ScanEngine.cs file with the code below.
#if UNITY_WSA && !UNITY_EDITOR
using System;
using System.Linq;
using System.Threading.Tasks;
using Windows.Media.Capture;
using Windows.Media.Capture.Frames;
using Windows.Media.MediaProperties;

public class ScanEngine
{
    public TimeSpan PredictionFrequency = TimeSpan.FromMilliseconds(400);

    private MediaCapture CameraCapture;
    private MediaFrameReader CameraFrameReader;

    private Int64 FramesCaptured;

    IUnityScanScene UnityApp;


    public ScanEngine()
    {
    }

    public async Task Inititalize(IUnityScanScene unityApp)
    {
        UnityApp = unityApp;

        await InitializeCameraCapture();
        await InitializeCameraFrameReader();
    }

    private async Task InitializeCameraCapture()
    {
        CameraCapture = new MediaCapture();
        MediaCaptureInitializationSettings settings = new MediaCaptureInitializationSettings();
        settings.StreamingCaptureMode = StreamingCaptureMode.Video;
        await CameraCapture.InitializeAsync(settings);
    }

    private async Task InitializeCameraFrameReader()
    {
        var frameSourceGroups = await MediaFrameSourceGroup.FindAllAsync();
        MediaFrameSourceGroup selectedGroup = null;
        MediaFrameSourceInfo colorSourceInfo = null;

        foreach (var sourceGroup in frameSourceGroups)
        {
            foreach (var sourceInfo in sourceGroup.SourceInfos)
            {
                if (sourceInfo.MediaStreamType == MediaStreamType.VideoPreview
                    && sourceInfo.SourceKind == MediaFrameSourceKind.Color)
                {
                    colorSourceInfo = sourceInfo;
                    break;
                }
            }
            if (colorSourceInfo != null)
            {
                selectedGroup = sourceGroup;
                break;
            }
        }

        var colorFrameSource = CameraCapture.FrameSources[colorSourceInfo.Id];
        var preferredFormat = colorFrameSource.SupportedFormats.Where(format =>
        {
            return format.Subtype == MediaEncodingSubtypes.Argb32;

        }).FirstOrDefault();

        CameraFrameReader = await CameraCapture.CreateFrameReaderAsync(colorFrameSource);
        await CameraFrameReader.StartAsync();
    }

    public void StartPullCameraFrames()
    {
        Task.Run(async () =>
        {
            for (; ; ) // Forever = While the app runs
            {
                FramesCaptured++;
                await Task.Delay(PredictionFrequency);
                using (var frameReference = CameraFrameReader.TryAcquireLatestFrame())
                using (var videoFrame = frameReference?.VideoMediaFrame?.GetVideoFrame())
                {

                    if (videoFrame == null)
                    {
                        continue; //ignoring frame
                    }

                    if (videoFrame.Direct3DSurface == null)
                    {
                        videoFrame.Dispose();
                        continue; //ignoring frame
                    }

                    try
                    {
                        // HERE, We will evaluate the model
                    }
                    catch (Exception ex)
                    {
                        System.Diagnostics.Debug.WriteLine(ex.Message);
                    }
                    finally
                    {
                    }
                }

            }

        });
    }

}
#endif
The UnityScanScene.cs script will use this class this way:
	async void Start ()
	{
        OutputTextMesh = OutputText.GetComponent<TextMesh>();
        OutputTextMesh.text = string.Empty;

#if UNITY_WSA && !UNITY_EDITOR // RUNNING ON WINDOWS**
        CameraScanEngine = new ScanEngine();       // <-- 1
        await CameraScanEngine.Inititalize(this);  // <-- 2
        CameraScanEngine.StartPullCameraFrames();  // <-- 3
#else                          // RUNNING IN UNITY**
        ModifyOutputText("Sorry ;-( The app is not supported in the Unity player.");
#endif
	}
❗ It is now time to modify the UnityScanScene.cs accordingly in order to have the code above for the Start method.
I have to give you some explanations ?.
- We create our Camera helper CameraScanEngine from the ScanEngine class.
- Calling
CameraScanEngine.Inititalize(this)in the UnityScanScene.cs startup script gives the ability to call the public ModifyOutputText method of the IUnityScanScene interface from the CameraScanEngine object. Here is the proof:

Also, it really initializes the HoloLens camera for being able to capture the video frames. Under the hood, we use the
MediaCapture
class.
- The HoloLens camera is initialized and we can get the frames. The
StartPullCameraFrames()call initiates an infinite loop for pulling for frames. We will replace the line// HERE, We will evaluate the modelby the code for evaluating the model on the frame later.
For this camera helper code, I thank Etienne Margraff with his article ( Preview API - Experimenting with Windows Machine Learning and Mixed Reality - Feel free to read it for further details about this code).
Step 4. Integrate ⤵ the model in the app
Adding the file in the package ?
Back to step 2, we saved the model as a ONNX 1.2 file on the disk. It is now time to add it to the Unity App:
Just name the model "ONNXModel.onnx" and drag & drop it to a new folder named StreamingAssets in the Assets folder. 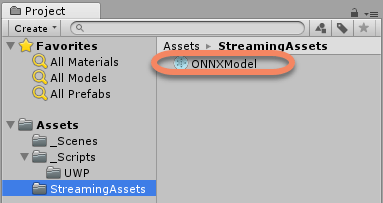
This StreamingAssets folder is special for Unity: it will be copied to the Data folder inside the UWP application that will be deployed on the HoloLens. This way, we will be able to load the file by code from the package installation folder.
Note: It is also possible to add the ONNX file directly to the resulting C# UWP application. The Unity way of adding it is not mandatory.
Add a wrapper class ? for the model
This was the tricky part of the job and the one that changed from the Preview APIs and the ones released. The long story is well detailed by Matteo Pagani in the two referenced articles ( Preview API - Add a bit of machine learning to your Windows application thanks to WinML and Upgrade your WinML application to the latest bits ).
For today, long story short: we do not use the generated class by Visual Studio for our model wrapper but the following one below. This class is 'generic' and works for your own custom vision trained model.
Here are the steps:
In Unity, add a new script named 'ONNXModel' in the Assets/UWP folder. This is our 'generic' model wrapper class. 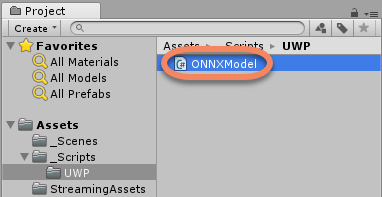
Double click on ONNXModel.cs and replace the content of the script by the following code:
#if UNITY_WSA && !UNITY_EDITOR
using System;
using System.Collections.Generic;
using System.Diagnostics;
using System.Threading.Tasks;
using Windows.AI.MachineLearning;
using Windows.Media;
using Windows.Storage;

public sealed class ONNXModelInput
{
    public VideoFrame Data { get; set; }
}

public sealed class ONNXModelOutput
{
    public TensorString ClassLabel = TensorString.Create(new long[] { 1, 1 });
    public IList<IDictionary<string, float>> Loss = new List<IDictionary<string, float>>();
}

/// <summary>
/// These classes ONNXModel, ONNXModelInput, ONNXModelOutput never change
/// We just load a different custom model
///
/// In order to evalutate a model:
/// 1. Call the static method ONNXModel.CreateOnnxModel(<<MyModelStorageFile>>)
/// 2. Call EvaluateAsync method on the created Model before
/// </summary>
public sealed class ONNXModel
{
    private LearningModel _learningModel = null;
    private LearningModelSession _session;

    public static async Task<ONNXModel> CreateOnnxModel(StorageFile file)
    {
        LearningModel learningModel = null;

        try
        {
            learningModel = await LearningModel.LoadFromStorageFileAsync(file);
        }
        catch (Exception e)
        {
            var exceptionStr = e.ToString();
            Debug.WriteLine(exceptionStr);
            throw e;
        }
        return new ONNXModel()
        {
            _learningModel = learningModel,
            _session = new LearningModelSession(learningModel)
        };
    }

    public async Task<ONNXModelOutput> EvaluateAsync(ONNXModelInput input)
    {
        var output = new ONNXModelOutput();
        var binding = new LearningModelBinding(_session);
        binding.Bind("data", input.Data);
        binding.Bind("classLabel", output.ClassLabel);
        binding.Bind("loss", output.Loss);
        LearningModelEvaluationResult evalResult = await _session.EvaluateAsync(binding, "0");

        return output;
    }
}
#endif
Note: All code dedicated to UWP is surrounded by
#if UNITY_WSA && !UNITY_EDITOR
. It allows us to be sure to run this code only on Windows.
The
CreateOnnxModel()
static method is in charge of loading the file. The
EvaluateAsync()
performs the model' evaluation.
Again, this code will not change if you create your own custom vision model (Classification / Multilabel / General Compact).
Let's add now a 'high level' model helper in order to put the glue between the captured frame and the model evaluation.
Load ? and evaluate ⚙ the model for each frame
In Unity, add a new script named 'ONNXModelHelper' in the Assets/UWP folder. 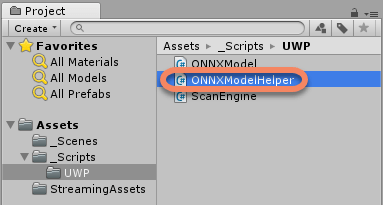
Use this code:
#if UNITY_WSA && !UNITY_EDITOR
using System;
using System.Diagnostics;
using System.Threading.Tasks;
using Windows.Media;
using Windows.Storage;

public class ONNXModelHelper
{
    private ONNXModel Model = null;
    private string ModelFilename = "ONNXModel.onnx";
    private Stopwatch TimeRecorder = new Stopwatch();
    private IUnityScanScene UnityApp;

    public ONNXModelHelper()
    {
        UnityApp = null;
    }

    public ONNXModelHelper(IUnityScanScene unityApp)
    {
        UnityApp = unityApp;
    }

    public async Task LoadModelAsync() // <-- 1
    {
        ModifyText($"Loading {ModelFilename}... Patience");

        try
        {
            TimeRecorder = Stopwatch.StartNew();

            var modelFile = await StorageFile.GetFileFromApplicationUriAsync(
                new Uri($"ms-appx:///Data/StreamingAssets/{ModelFilename}"));
            Model = await ONNXModel.CreateOnnxModel(modelFile);

            TimeRecorder.Stop();
            ModifyText($"Loaded {ModelFilename}: Elapsed time: {TimeRecorder.ElapsedMilliseconds} ms");
        }
        catch (Exception ex)
        {
            ModifyText($"error: {ex.Message}");
            Model = null;
        }
    }

    public async Task EvaluateVideoFrameAsync(VideoFrame frame) // <-- 2
    {
        if (frame != null)
        {
            try
            {
                TimeRecorder.Restart();
                ONNXModelInput inputData = new ONNXModelInput();
                inputData.Data = frame;
                var output = await Model.EvaluateAsync(inputData).ConfigureAwait(false); // <-- 3

                var product = output.ClassLabel.GetAsVectorView()[0]; // <-- 4
                var loss = output.Loss[0][product]; // <-- 5
                TimeRecorder.Stop();

                var lossStr = string.Join(product, " " + (loss * 100.0f).ToString("#0.00") + "%");
                string message = $"({DateTime.Now.Hour}:{DateTime.Now.Minute}:{DateTime.Now.Second})" +
                    $" Evaluation took {TimeRecorder.ElapsedMilliseconds}ms\n";

                string prediction = $"Prediction: {product} {lossStr}";
                if (loss > 0.5f)
                {
                    message += prediction;
                }

                message = message.Replace("\\n", "\n");

                ModifyText(message); // <-- 6
            }
            catch (Exception ex)
            {
                var err_message = $"error: {ex.Message}";
                ModifyText(err_message);
            }
        }
    }

    private void ModifyText(string text)
    {
        System.Diagnostics.Debug.WriteLine(text);
        if (UnityApp != null)
        {
            UnityApp.ModifyOutputText(text);
        }
    }
}
#endif
Explanations ?:
- The helper method effectively loads the ONNX Model using
StorageFile.GetFileFromApplicationUriAsync().
EvaluateVideoFrameAsync()is called by the ScanEngine for every frame.
So, there is an action for you ?: Please replace
// HERE, We will evaluate the model
by
await ModelHelper.EvaluateVideoFrameAsync(videoFrame).ConfigureAwait(false);
.
Model.EvaluateAsync()calls the wrapper method for the model's evaluation. We get the result in the output object.
var product = output.ClassLabel.GetAsVectorView()[0]is the name of the most scored prediction.
output.Loss[0][product]is the score of this prediction.
- We call the private method
ModifyTextto modify the text to display in HoloLens thanks toUnityApp.ModifyOutputText(). The display is about giving the predication and the score.
We should have all set ???! You just have to build the Unity app; It generates the C# UWP Solution that you can compile in MASTER x86 and deploy to you HoloLens.
Here is what you can get ?
Good prediction for Benoit ! 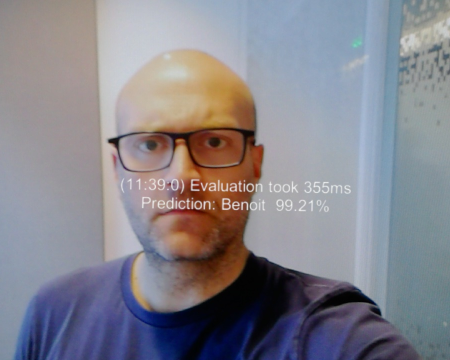
A 'low' prediction for Florent (who is not me ? and who was not part of the Model's training)
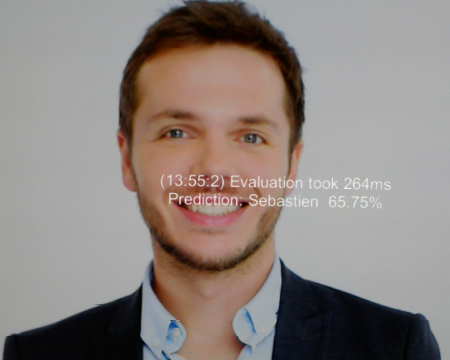
Disclaimer ⚖: Again, this model was only trained with less than 20 pictures which is a way too low to pretend having a correct model for prediction. But you have the idea!
All updated and optimized source code is on GitHub - https://github.com/Microsoft/Windows-AppConsult-Samples-MixedReality/tree/master/HoloLensWinML .
Conclusion
Talking about performance: The app deployed on HoloLens loads the ~3Mb ONNX model in about 300ms. The model's evaluation is done in average in 250 to 400ms. So right now, we have a minimum of 2 frames analyzed by second; Based on the fact that only the HoloLens processor does the job, it is pretty good: We can imagine scenarios in factories for safety or monitoring, in maintenance or diagnostics operations or even in medical assistance.
The future? Who knows? Alex Kipman and his team for sure ?
What I can say is that work is in progress a new Holographic Processing Unit (HPU) for HoloLens :
...the second version of the HPU, currently under development, will incorporate an AI coprocessor to natively and flexibly implement DNNs.
DNN stands for Deep Neural Networks which is what we are using ?. We can expect that this future AI chip would be dedicated for this kind of work and performance would be decoupled ?!
Last word of this article is from the link above:
Mixed reality and artificial intelligence represent the future of computing, and we’re excited to be advancing this frontier.
Bye,
@sbovo for the ? ? Windows AppConsult team.
--
Credits
I would like to thank
- Etienne Margraff for the first article on this topic on HoloLens/
- Matteo Pagani for his articles and reviewing this one.
- Benoit my co-presenter on Mixed Reality events
- Florent for his support
References
- All source code HOLOLENS V2- https://github.com/sbovo/HoloLens-Windows-MachineLearning/tree/master/HoloLensV2WinML
- All source code HOLOLENS V1- https://github.com/Microsoft/Windows-AppConsult-Samples-MixedReality/tree/master/HoloLensWinML
- Custom Vision - https://www.customvision.ai/
- Windows Machine Learning - https://docs.microsoft.com/fr-fr/windows/ai/
- Second version of HoloLens HPU will incorporate AI coprocessor for implementing DNNs - https://www.microsoft.com/en-us/research/blog/second-version-hololens-hpu-will-incorporate-ai-coprocessor-implementing-dnns/
- Open Neural Network Exchange Github - https://github.com/onnx/onnx
- ONNX Format initiative - https://onnx.ai/
- (Preview API) Experimenting with Windows Machine Learning and Mixed Reality - https://meulta.com/en/2018/05/18/experimenting-with-windows-machine-learning-and-mixed-reality/
- (Preview API) Add a bit of machine learning to your Windows application thanks to WinML - https://blogs.msdn.microsoft.com/appconsult/2018/05/23/add-a-bit-of-machine-learning-to-your-windows-application-thanks-to-winml/
- Upgrade your WinML application to the latest bits - https://blogs.msdn.microsoft.com/appconsult/2018/11/06/upgrade-your-winml-application-to-the-latest-bits/
- Integrate a model into your app with Windows ML - https://docs.microsoft.com/fr-fr/windows/ai/integrate-model