This post has been republished via RSS; it originally appeared at: Premier Field Engineering articles.
Introduced with SQL Server 2016, the PolyBase feature enabled access to non-relational data stores, namely Hadoop and Azure Blob Storage all while using the familiar and popular Transact-SQL language.
SQL Server 2019 builds upon that foundation by unlocking the ability to access many new relational and non-relational data stores such as Oracle, Teradata, MongoDB, SQL Server and any ODBC-compatible data source. These expanded capabilities enable SQL Server 2019 to act as a hub or conduit to many disparate data sources.
This article will focus specifically on leveraging PolyBase in SQL Server 2019 to virtualize a Sybase IQ data source. Let’s get started.
Demo environment topology
- Sybase IQ environment
- Windows Server 2019
- Sybase IQ 16.1.030.1031 sp03
- Database: iqdemo
- Port: 2638
- SQL Server environment
- Windows Server 2019
- SQL Server 2019 Developer 15.0.2000.5
- Database: FourthCoffee
- Port: 1433
Step One – Enable the PolyBase feature
This step assumes that the PolyBase feature (PolyBase Query Service for External Data) is installed but not yet enabled. If you are unsure whether the PolyBase feature is installed on the server, use the query below to validate.
To enable PolyBase, use the sp_configure stored procedure as shown below.
Use SQL Server Configuration Manager to ensure the “SQL Server PolyBase Engine (<Instance Name>)” service is in a Running state.
Step Two – Create a Database Master Key
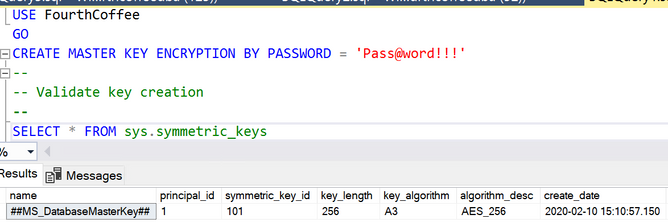
If one does not already exist, we’ll need to create a Database Master Key (DBMK). The DBMK is used to protect any secrets associated with the credential we’ll be creating in the next step. Follow the example below to create a DBMK (but use a stronger password!).
Step Three – Create a Database Scoped Credential
Now that we have a DBMK, we can create a database credential. A database credential is used by the database to access an external location. In the case of this article the external location is a Sybase database. Note that a database credential is not mapped to a server login or database user and should not be considered an orphaned login.
The example below is creating a database credential called “SybaseIQreadOnly” with an identity (think of this like a username) of “SybaseReadOnly”.
The database master key created in the previous step will be used to encrypt and protect the secret associated with the database credential.
Step Four – Create the External Data Source
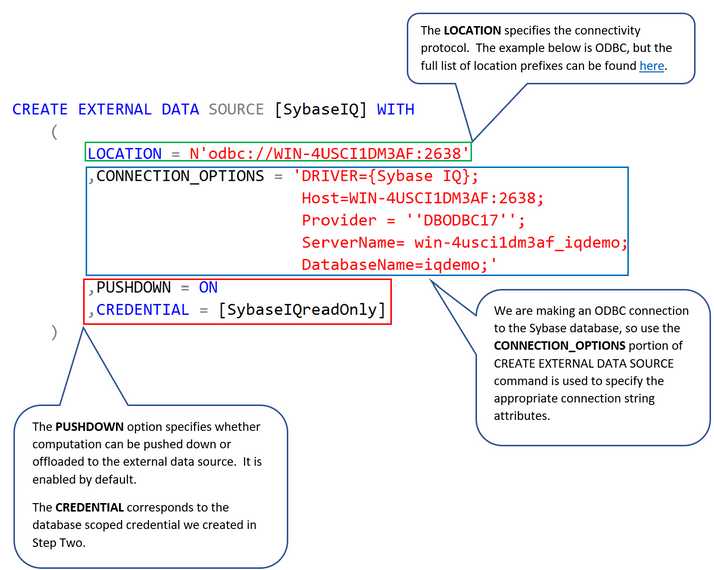
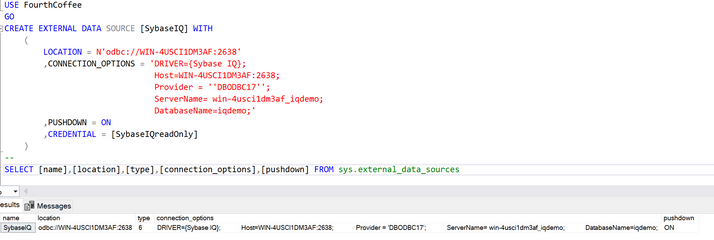
The last step is to create the external data source which represents the actual connection string and associated properties. In the example below, we’re connecting to Sybase using an ODBC connection and are providing the various connection options required for successful connection. Note that the required connection options will vary based on the external data source and the full list and description of valid options can be found here.
Let’s decode our Sybase external data source a bit.
Not bad at all. Four easy steps to create and connect to an external data source. Now let’s investigate what that provides.
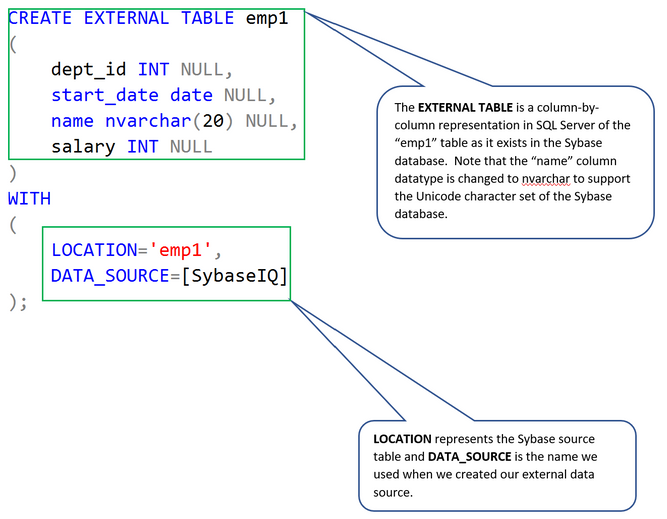
The first thing that we need to do is create an external table for the external data source. An external table is essentially a virtual representation within SQL Server of a table in the external data source.
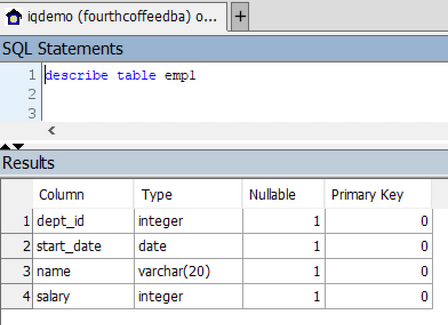
Let’s connect to the “emp1” table in the “iqdemo” database on our Sybase IQ instance.
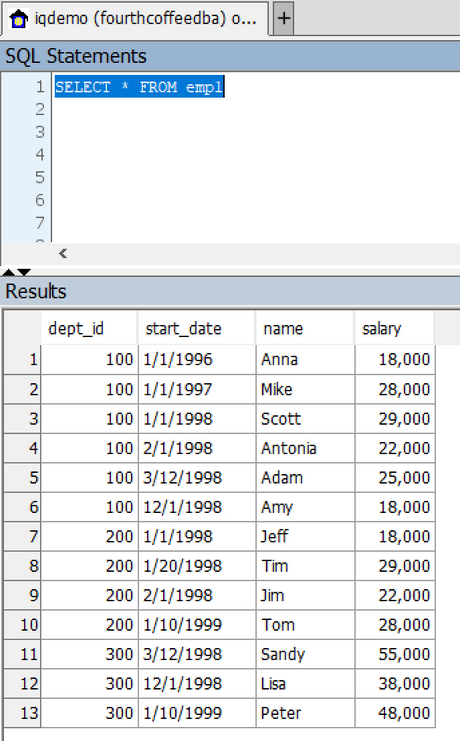
This is what the “emp1” table looks like in Sybase.
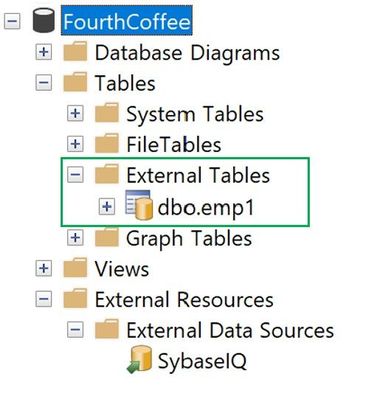
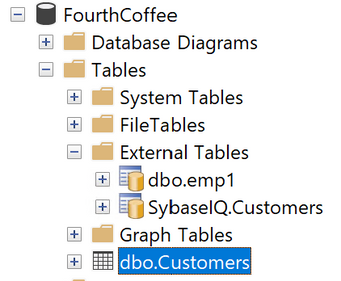
Here we can see the external data source and external table in our FourthCoffee database.
Example One
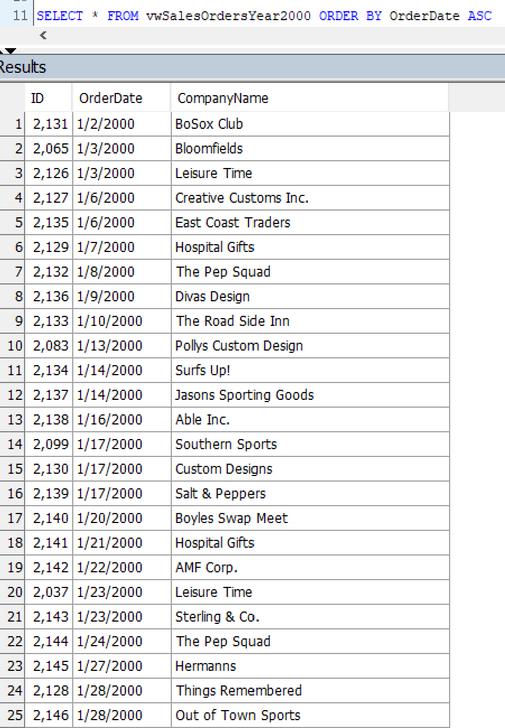
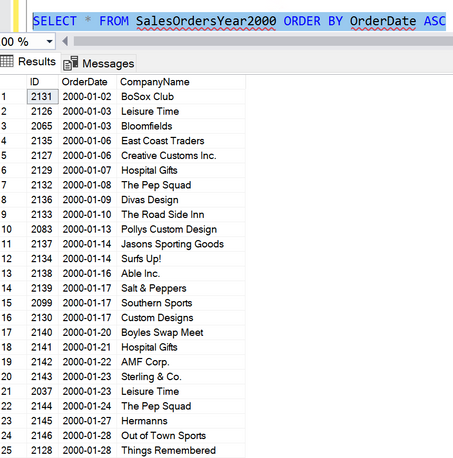
A simple query in SQL Server Management Studio returns the same data that we see when using the Interactive SQL graphical query utility for Sybase.
Example Two
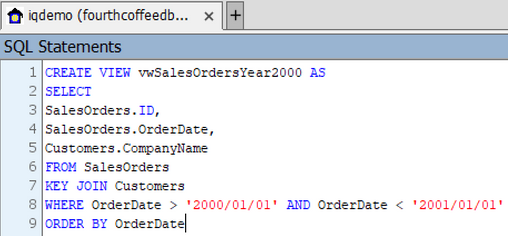
Another quick example is creating an external table based on the results of a view on the source system. In this case I’ve created a view within the Sybase source system and an external table in SQL Server.
View in Sybase “iqdemo” database
Create an external table in SQL Server to reference the Sybase view.
Example Three
The final example is where the power and possibilities of PolyBase in SQL Server 2019 begin to really come into focus. In this scenario, we’ll join an external table in the Sybase IQ database to a table in the FourthCoffee database hosted on the SQL Server 2019 instance.
Just like the previous examples, first we create an external table in the FourthCoffee database that references the “Customers” table in the Sybase IQ database. Note that for this example I’ve created a separate schema, “SybaseIQ”, for the “Customers” external table.
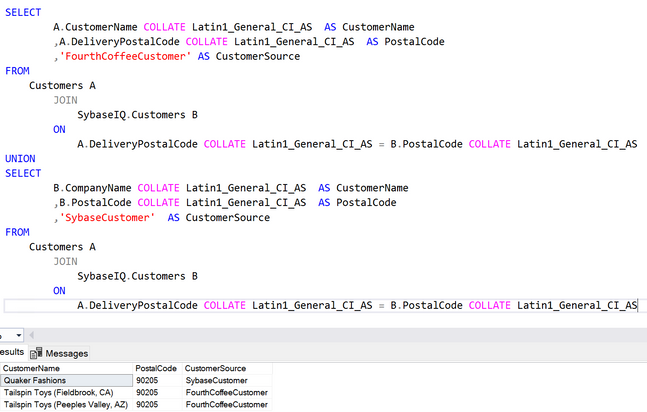
Now that we have our external table, let’s display customer results between the FourthCoffee.dbo.Customers table and the SybaseIQ.Customers external table where customers are in the same PostalCode. Note the query below is written for illustrative purposes only.
What we’ve accomplished in this final example is to join to disparate datasets in two disparate database systems without performing any extraction, transformation or loading (ETL) of data between systems. And we accomplished this using only a familiar and simple Transact-SQL query.
Taking this a step further, we could perform the same join of disparate datasets between Hadoop, for instance, and a Sybase IQ database using a Transact-SQL query with PolyBase on SQL Server 2019 serving as the central coordinator. Again, with no ETL involved.
Key points
- When using simple SELECT statements as those shown above, query results are not persisted. Data is stored in temp tables which are immediately dropped upon query completion.
To persist data into a SQL Server table from an external data source, use the SELECT INTO FROM EXTERNAL TABLE or INSERT INTO SELECT FROM Transact-SQL query syntax.
- For servers hosting multiple instances of SQL Server, PolyBase can only be installed on one of those instances.
PolyBase Resources
- What is PolyBase?
- Install PolyBase on Windows
- Install PolyBase on Linux
- Database Scoped Credentials
- External Data Source
- External Table


