This post has been republished via RSS; it originally appeared at: Microsoft Tech Community - Latest Blogs - .
This article is brought to you by the Nonprofit Tech Acceleration (NTA) for Black and African American Communities Program Technical Team. For information on how to take advantage of the granted offerings or free technical consultation, please visit: Supporting Black Community Nonprofits | Microsoft Nonprofits
Hello to our amazing NTA non-profit organizations. A few organizations recently inquired about how they can use Microsoft Excel to serve some of their organizational data needs and I figured it would be perfect to discuss in my next blog. In this article I will talk about how Microsoft Excel is a versatile tool that can be used by non-profit organizations in a multitude of ways.
What is Microsoft Excel?
One of the primary benefits of using Excel is its ability to store, organize, and analyze data. Non-profits often have large amounts of data to manage, such as donor information, volunteer hours, and program outcomes. By using Excel to store and track this data, organizations can gain valuable insights into their operations and make data-driven decisions.
Excel is great when you need to do complex calculations, create visual representations of data, and organize large amounts of information. It can be used to create budgets, financial reports, track payroll expenses and for managing mailing lists. You can use or create formulas, and perform mathematical functions to manipulate and analyze information, which is great because sometimes trying to do all these calculations on your own is a very daunting task. Using these tools can cut your time in half when working with numbers opposed to doing them on your own.
What is a Workbook?
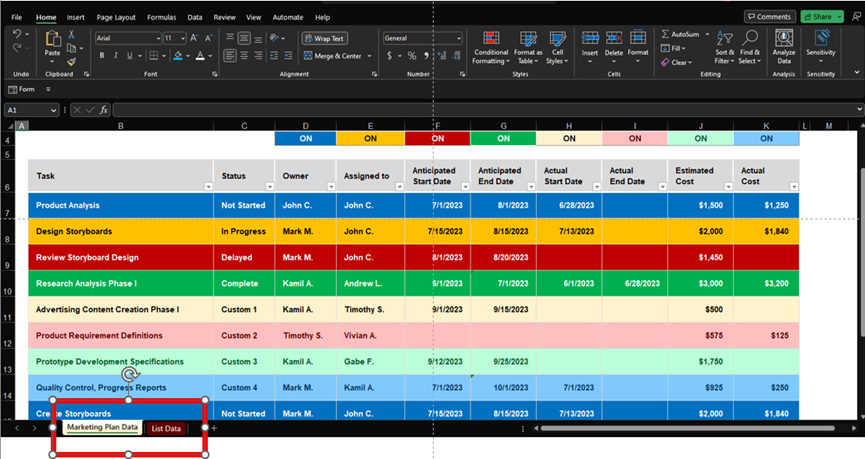
An Excel workbook is the main file type used by Microsoft Excel. Each workbook can contain one or multiple worksheets or "sheets," each of which is a separate tab within the workbook found at the bottom. When you create a new workbook, it is the equivalent of creating a new “document” inside of Microsoft Word and creating a new sheet is the equivalent of writing on a new page in said document.
Below is an example of a workbook that has two worksheet tabs. The worksheet tabs are located at the bottom of the screen and allow you to switch between different worksheets within the same workbook. In the bottom left corner, you can see a sheet titled “Marketing Plan Data” and another that says, “List Data”. Your workbooks can contain as many worksheets as you’d like!
Getting Familiar with Excel
At first glance, Excel can seem intimidating to someone who is not familiar with using it. Let’s take a look around at the different components of an Excel worksheet.
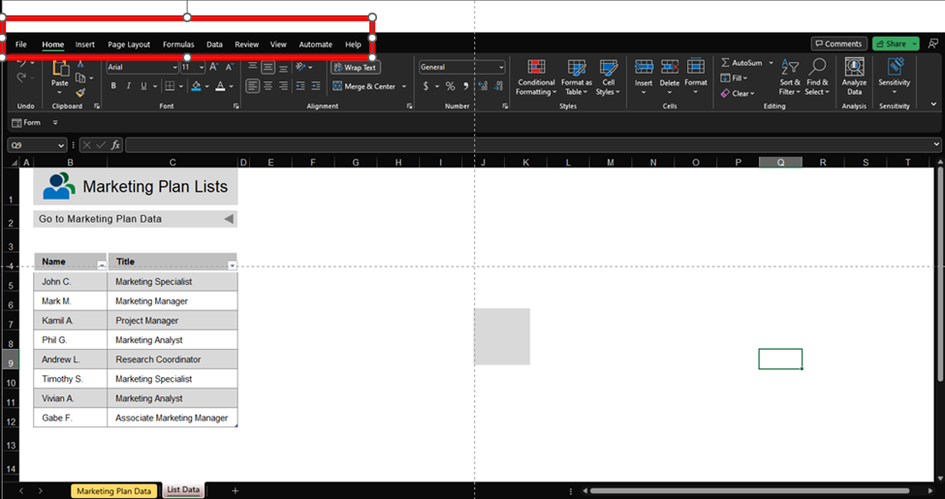
1. Menu Bar: The menu bar contains a list of tabs that you can use to perform various tasks and commands inside of Home, Insert, Page Layout, and Formulas. These tabs and commands are displayed in the ribbon bar.
2. Ribbon: The ribbon is the bar of icons and commands found at the top or the worksheet. Inside of the ribbon you will find access to a multitude of commands that will allow you to add and edit information onto your worksheet. For example, inside of the home tab in the menu bar, the ribbon will display commands that will allow you to edit the font by changing its color or size, align your data and use accounting or currency symbols such as the dollar sign. Inside of the insert tab, the associated ribbon will display commands that allow you to insert pictures, shapes, charts, pivot tables etc. Each tab in the menu bar will display its own commands in the ribbon.
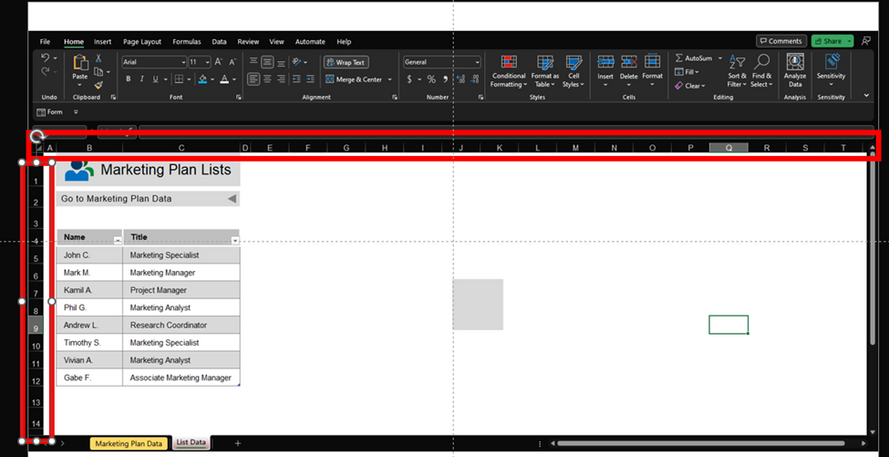
3. Columns and Rows: The columns and rows are the main structure of the worksheet and are used to organize data. Each column is identified by a letter, and each row is identified by a number. Columns and rows are especially important when utilizing mathematical formulas.
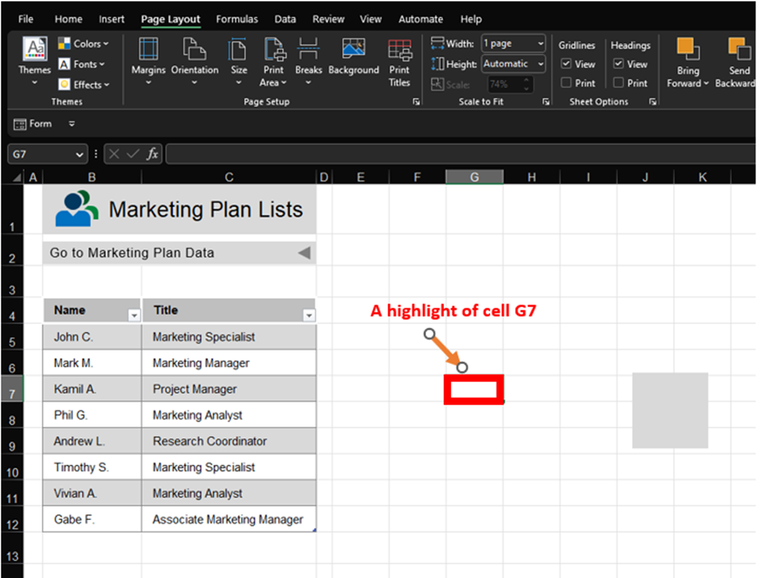
4. Cell Grid: The cell grid is the main area of the worksheet where you enter and edit your data. Each cell is identified by a unique cell reference, which is a combination of the column letter and row number.
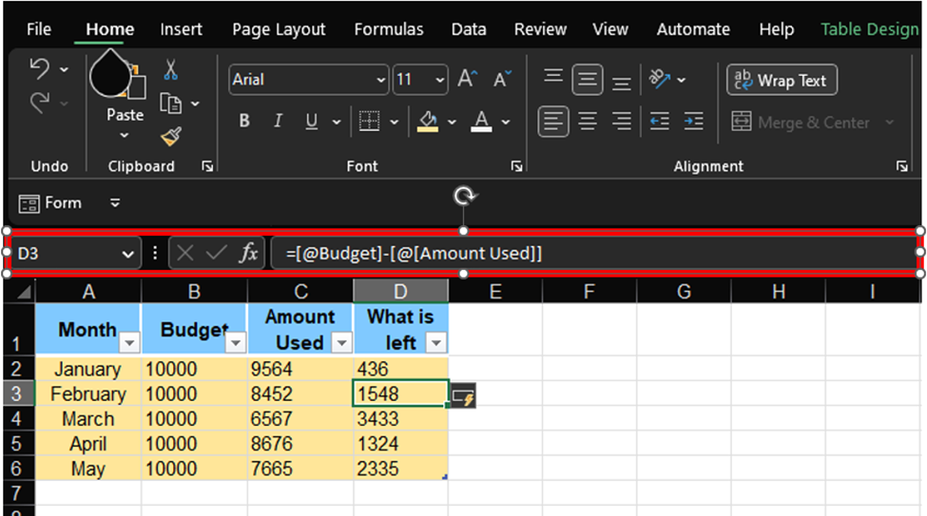
5. Formula Bar: The formula bar is located above the cell grid and displays the contents of the active cell, including any formulas or functions. In the example below, the formula bar is displaying a formula that calculates the difference between the month’s budget and what was actually used for that month.
Overall, the Excel interface may seem intimidating at first, but it truly is designed to be user-friendly and easy to navigate. Now that we’ve gone over the basics of the interface, I challenge you to dig into and become familiar some of Excel’s many features and tools that help you manage and analyze your organization’s data effectively. Stay tuned for future articles on topics such as how to create your first table! Happy Exceling non-profits, and as always, thank you for allowing the NTA team to serve you and in turn help better serve our communities!

